NEC MH4500 User Manual
Page 81
Upgrading Your System 4-11
1.
Power off the system, disconnect any attached peripherals, and unplug the
system’s power cords from the power sources.
2.
Remove the access cover as previously described.
3.
Carefully remove the foam cover from over the electronics bay.
4.
Remove a new processor cartridge from its antistatic package and place it on
a grounded static-free surface or conductive foam pad.
Note:
All systems ship with a processor cartridge
preinstalled in the bottom most slot (PROC1) on the system
board. Some systems may have more, depending on how it
was configured. When adding a processor cartridge, install it
in the next empty slot up from the bottom slot.
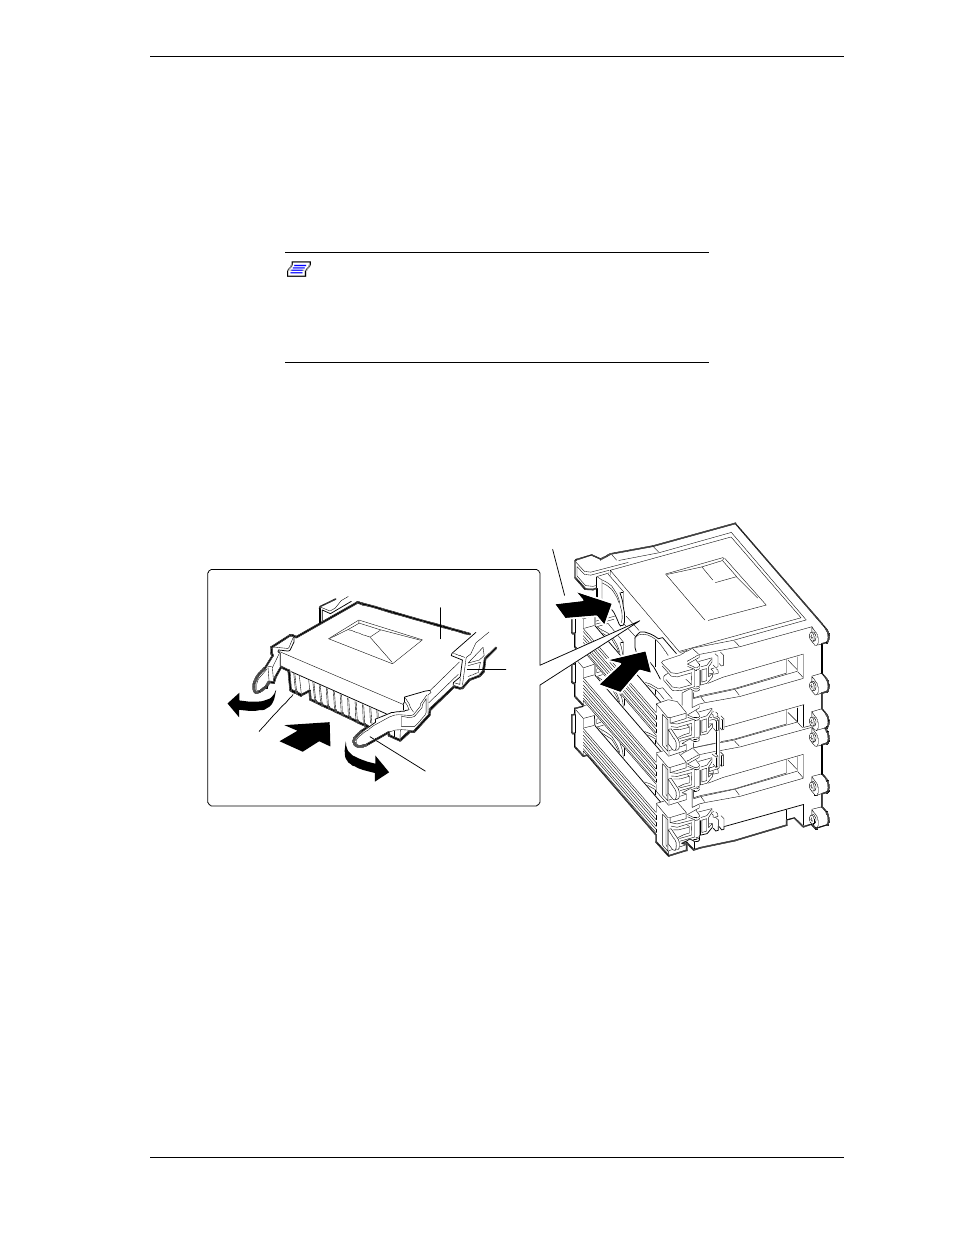
5.
Align the cartridge so that the heat sink (D in the following figure) faces
away from the system board.
If installing a termination board, align the board so that the white barcode
label faces away from the system board.
B
D
C
A
E
A.
S.E.C. cartridge
B.
Retention module guide rails
C.
Cartridge tabs
D.
Processor heat sink (face away from baseboard center)
E.
Push tabs inward on S.E.C. cartridge to seat processor
Installing a Processor S.E.C. Cartridge
6.
Ensure that the tabs at the top of the cartridge are completely open; i.e.,
pulled outward, away from the center of the cartridge (C in the preceding
figure).