Gateway ALR 7200 User Manual
Page 63
Installing Components 51
6.
Remove the screws that attach the hard drive to the mounting bracket
and remove the hard drive (see Figure 30).
7.
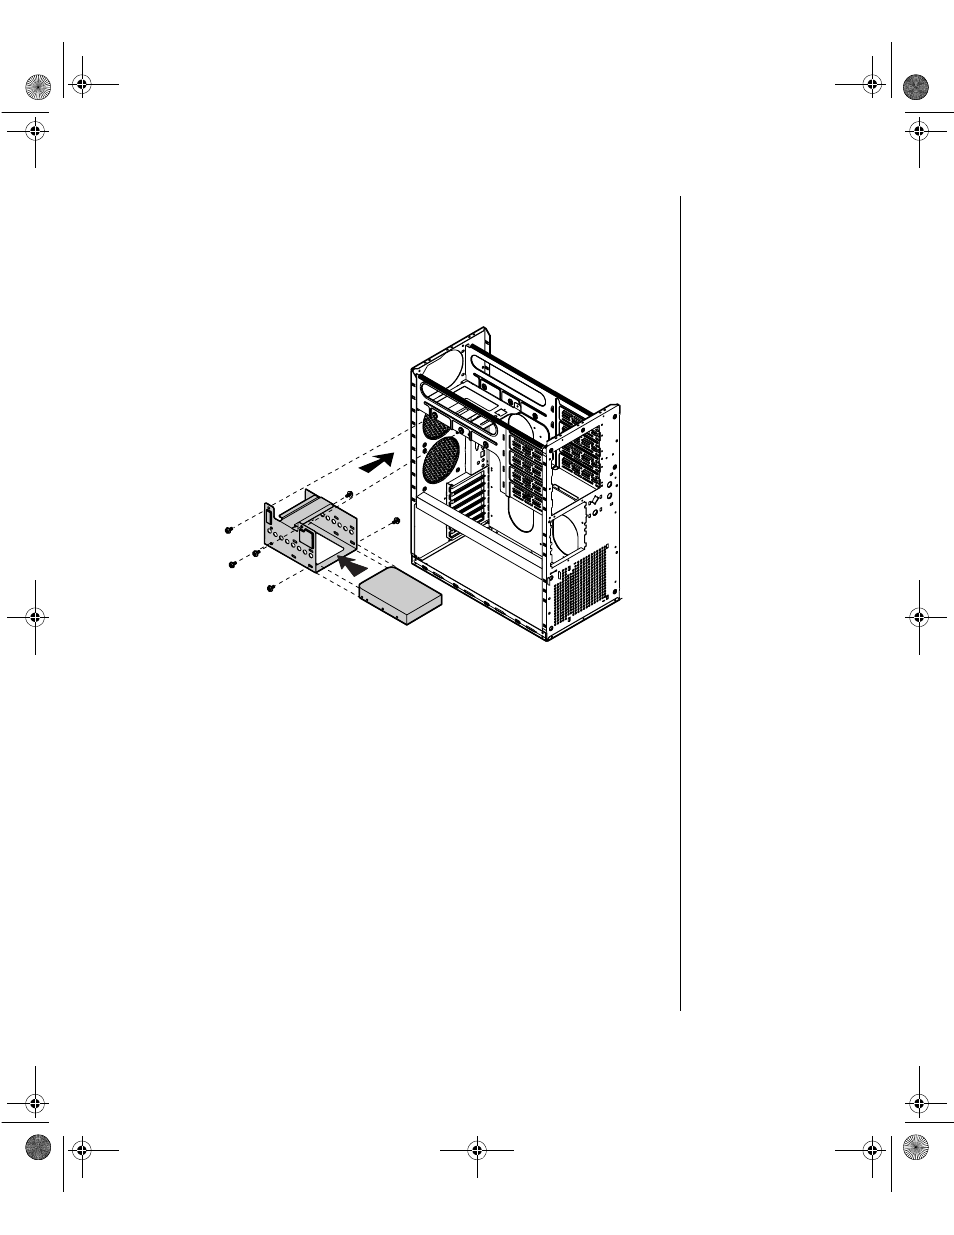
Secure the new hard drive to the mounting bracket using the screws
you removed in Step 6 (see Figure 31).
Figure 31: Installing a Hard Drive in the Rear Drive Bay
8.
Place the hard disk assembly into the chassis and secure it to the
chassis using the screws you removed in Step 5 (see Figure 31).
9.
Connect the data and power cables to the hard drive, making sure the
cables match their original position. (See the drive documentation for
proper drive jumper settings and cable orientation.)
10.
Close the case, as described in “Closing the system” on page 8.
11.
Reconnect the power cord and turn on the system.
12.
The system should automatically recognize the new drive. If it does
not, you may need to set jumpers on the drive or change settings in the
BIOS Setup utility.
4077.boo Page 51 Thursday, January 21, 1999 9:48 AM