Replacing a hard disk in the rear drive bay – Gateway ALR 7200 User Manual
Page 62
50 Maintaining and Troubleshooting the Gateway ALR 7200 Server
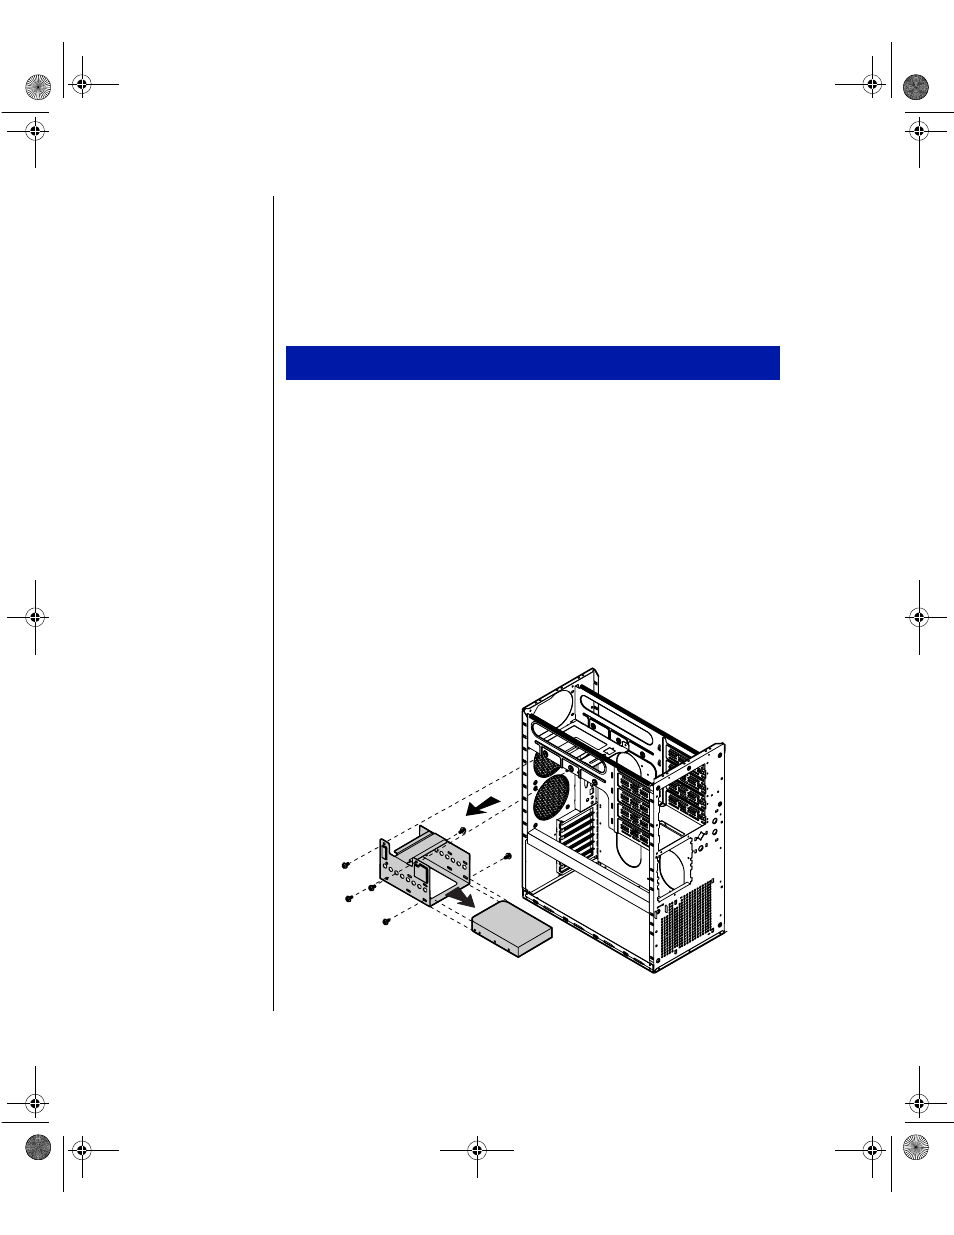
Replacing a hard disk in the rear drive bay
The hard disk is secured to a metal mounting bracket, which enables the
drive to be easily installed and removed from the system chassis. This
procedure refers to the internal 3.5-inch drive bay, not to the 3.5-inch bay at
the front of the chassis.
1.
Turn off the system and disconnect the power cord.
2.
Open the case (“Opening the system” on page 3), observing the static
electricity precautions in “Static electricity precautions” on page 2.
3.
Locate the hard disk assembly beneath the power supply at the rear of
the chassis.
4.
Disconnect the data and power cables from the hard disk drive, noting
their location and orientation. (You will reconnect these cables when
you install the new hard drive.)
5.
Remove the screws that attach the hard disk mounting bracket to the
chassis, and remove the bracket from the chassis (see Figure 30).
Figure 30: Removing the Hard Disk Bracket and Drive
To replace a hard drive in the rear drive bay
4077.boo Page 50 Thursday, January 21, 1999 9:48 AM