Create a profile, Step 5: create a profile – Eicon Networks 1530 User Manual
Page 19
Setup
19
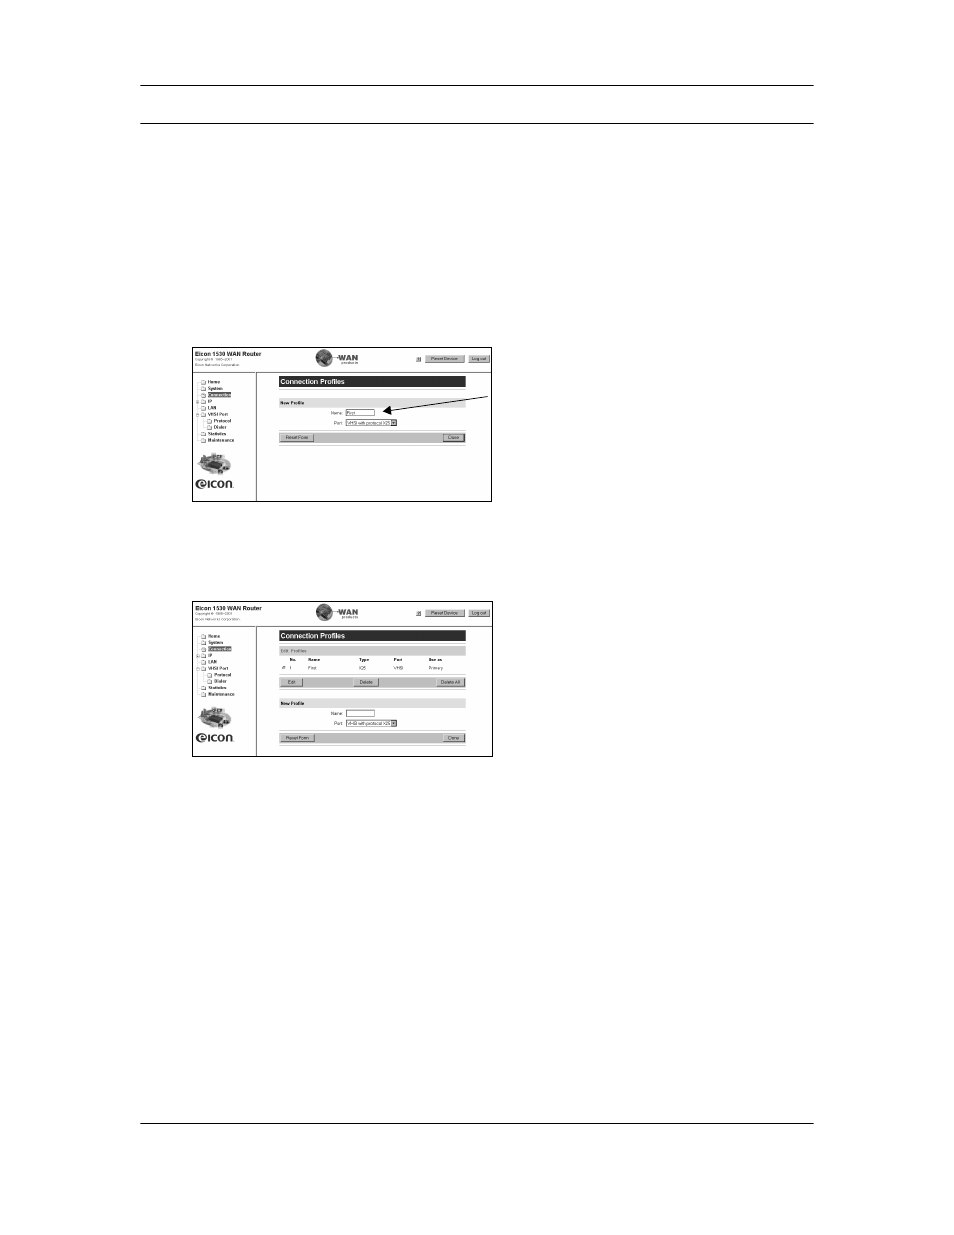
Step 5: Create a Profile
Settings for particular connections are contained in profiles on the Eicon 1530.
Note: When you change protocols for the VHSI interface, all profile information is lost. To avoid having to
re-enter configuration information, choose the protocol first, as described at the beginning in
Creating a Profile
1.
From the Link List, click the ‘Connection’ link. The ‘Connection Profiles’ page appears.
2.
To add a profile, enter the name in the ‘Name’ field, then click the ‘Done’ button.
Note: With X.25 or Frame Relay, you can create up to eight profiles. For PPP, you can create only one
profile.
3.
The web page for your new profile will be displayed.
4.
To edit the profile, make sure it is selected and click ‘Edit”.
5.
Make the required changes to the profile. Be sure to scroll down and inspect all parameters.
In particular:
• If you are using X.25, make sure to enter the remote DTE address and remote IP address.
• If you are using Frame Relay, make sure the local DLCI number is the same as the remote
DLCI.
• If you are using PPP, make sure to enter the IP information at the bottom of the page.
6.
Click the ‘Save’ button (located at the bottom right of the page) when finished.
‘Name’
field