Installing an sp, Installing an sp -27 – Grass Valley PRS 250 RAID Storage System User Manual
Page 73
Replacing an SP
RAID Instructions
3-27
Installing an SP
You can install an SP while the storage chassis is powered up. However, you must
complete Steps 4 through 6 within two minutes to avoid automatic thermal shutdown
of the storage chassis. Before you begin to install an SP, make sure that you
understand all the steps in the following procedure.
NOTE: Do not install an SP from a PRS200/A in a PRS250/M. Optimum
PRS250/M performance requires an Ultra-SCSI SP (labeled 118-028754).
To install an SP:
1. Install the memory modules that shipped with the SP, and position the SP within
easy reach of the storage chassis.
2. If you are installing an add-on SP, power down the storage chassis and the Profile.
3. Locate the slot where you want to install the SP.
4. Open the fan module.
CAUTION: To maintain proper cooling, never operate the storage chassis with an
empty SP slot. Save the filler board to fill the slot in case you need to operate the
storage chassis with an SP removed temporarily.
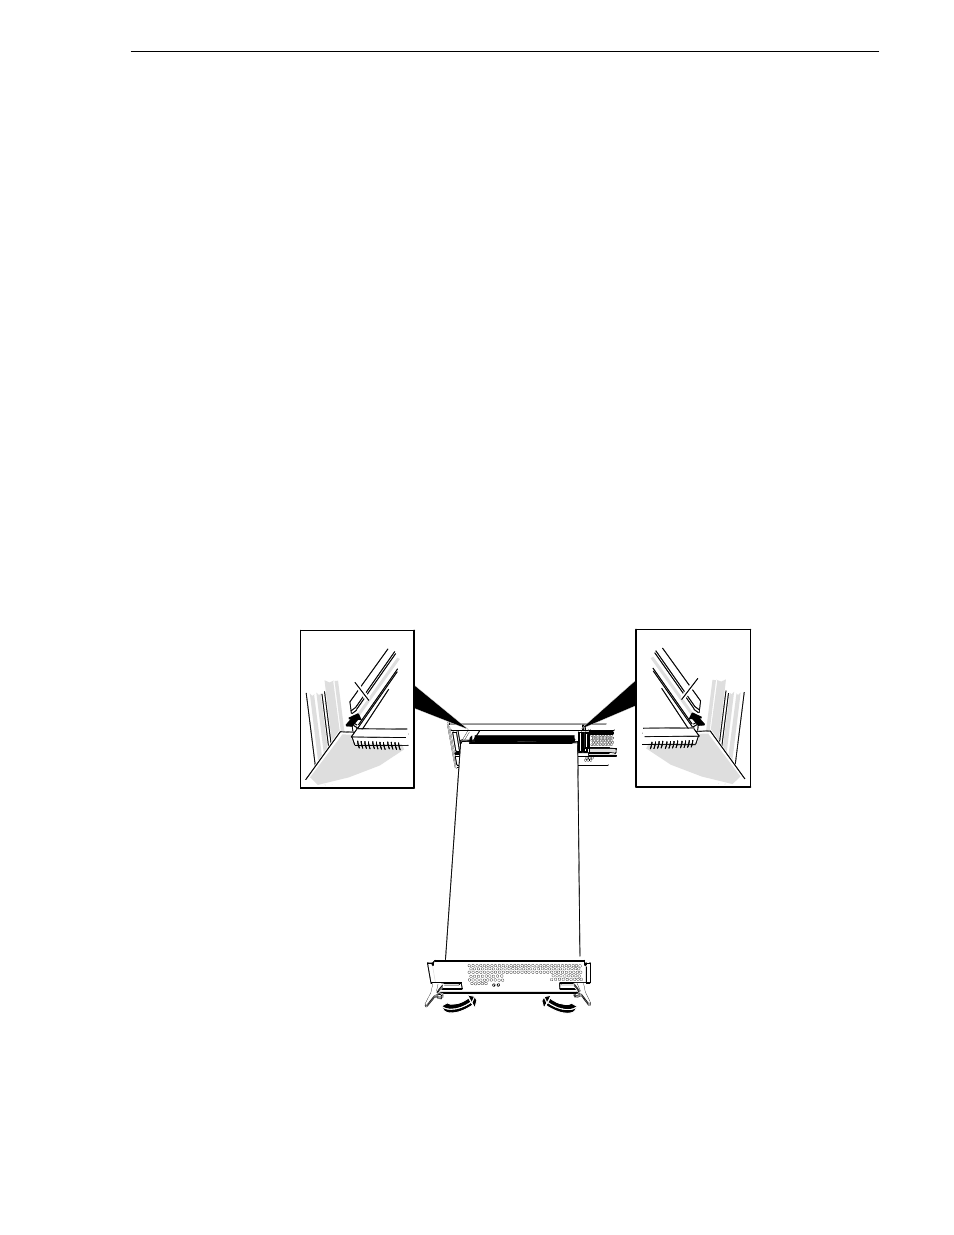
5. Install the SP as shown below.
Installing an SP
6. Immediately close and lock the fan module.
Board
guide
Board
guide
A. Engage the edges of the SP
in board guides, and slide the
SP into the chassis until the
ejectors engage with the
chassis edge.
B. Press both ejectors at the same
time until they lock and the SP
moves further into the chassis.