Installing a disk module, Installing a disk module -20 – Grass Valley PRS 250 RAID Storage System User Manual
Page 66
Chapter 3 Servicing the System
3-20
RAID Instructions
Installing a Disk Module
You can install a replacement disk module or an add a RAID group (five disk
modules) without powering down the storage chassis.
CAUTION: Before installing a replacement module, wait at least 15seconds after
removing the failed module to allow the SP time to recognize that the module has
been removed. If you insert the replacement module too soon, the SP may report the
replacement module as defective.
NOTE: Do not install a disk module from a PRS200/A in a PRS250/M. Optimum
PRS250 performance requires Ultra-SCSI drives.
To install a disk module:
1. Read Avoiding Electrostatic Discharge (ESD)Damage.
2. Place the disk module in its antistatic packaging within reach of the storage chassis.
3. Attach the clip of the ESD wrist band (strap) to the grounded chassis, and put the
wrist band around your wrist with the metal button against your skin.
4. If you are adding a RAID group, individually remove each disk filler module from
the slot and immediately perform Step 5.
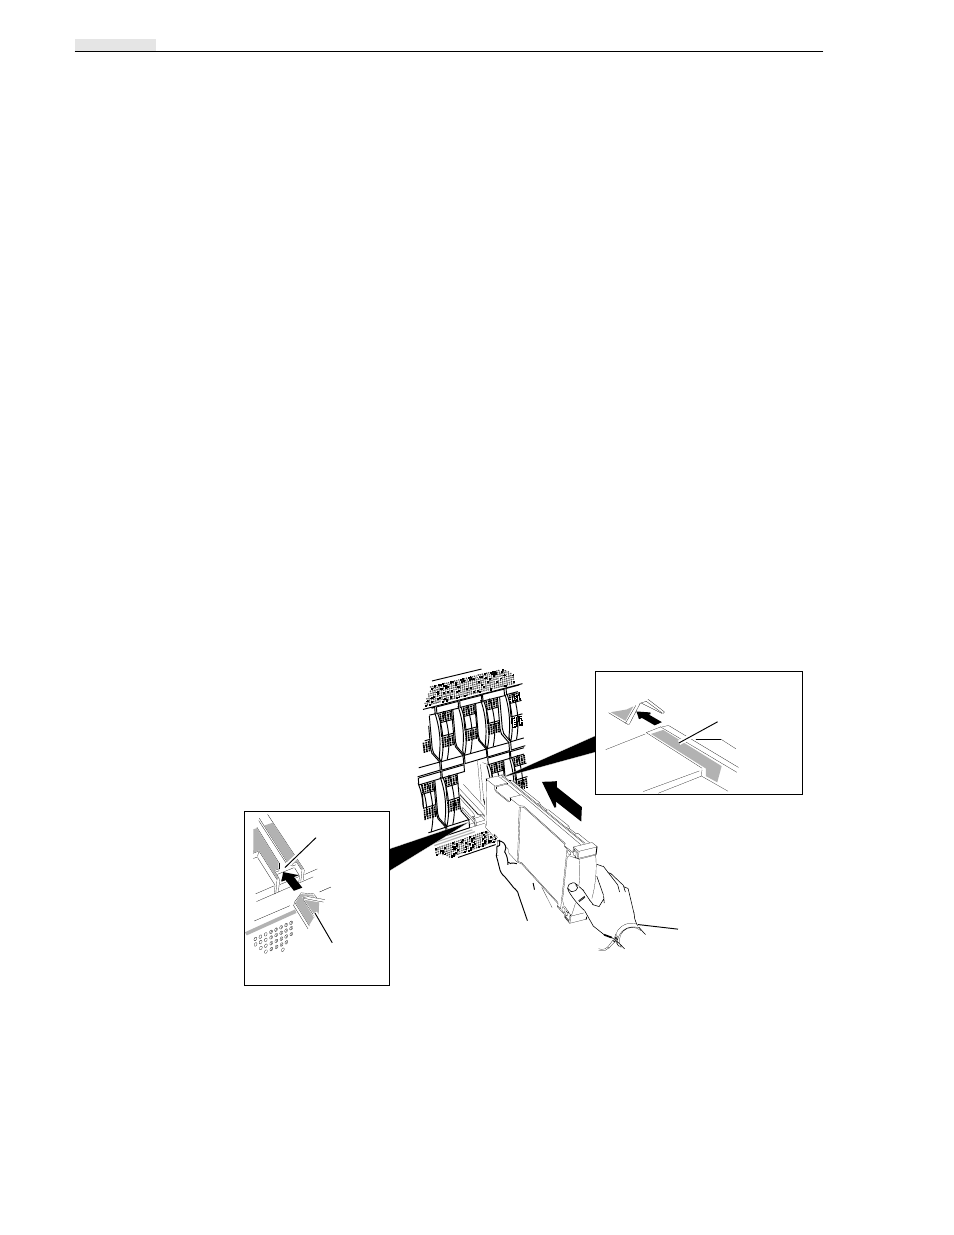
5. Locate the slot where you will install the disk module, and install the module as
shown below.
Installing a disk module
CAUTION: When removed from the chassis, a disk module is extremely sensitive
to shock and vibration. Even a slight jar can severely damage it.
NOTE: Make sure the disk module is firmly seated.
Disk module’s
guide
Guide slot
Disk module’s
rail
Rail slot
A.Engage disk module’s
rail in chassis rail slot.
C.Firmly push disk module
into slot until it locks in
place.
B.Engage disk module’s guide
in chassis guide slot.
ESD wrist
band