How to make a rear serial connection, 19 uniconfig, User’s guide – Grass Valley UniConfi NVISION Series v.2.1 User Manual
Page 31
19
UniConfig
User’s Guide
How to Make a Rear Serial Connection
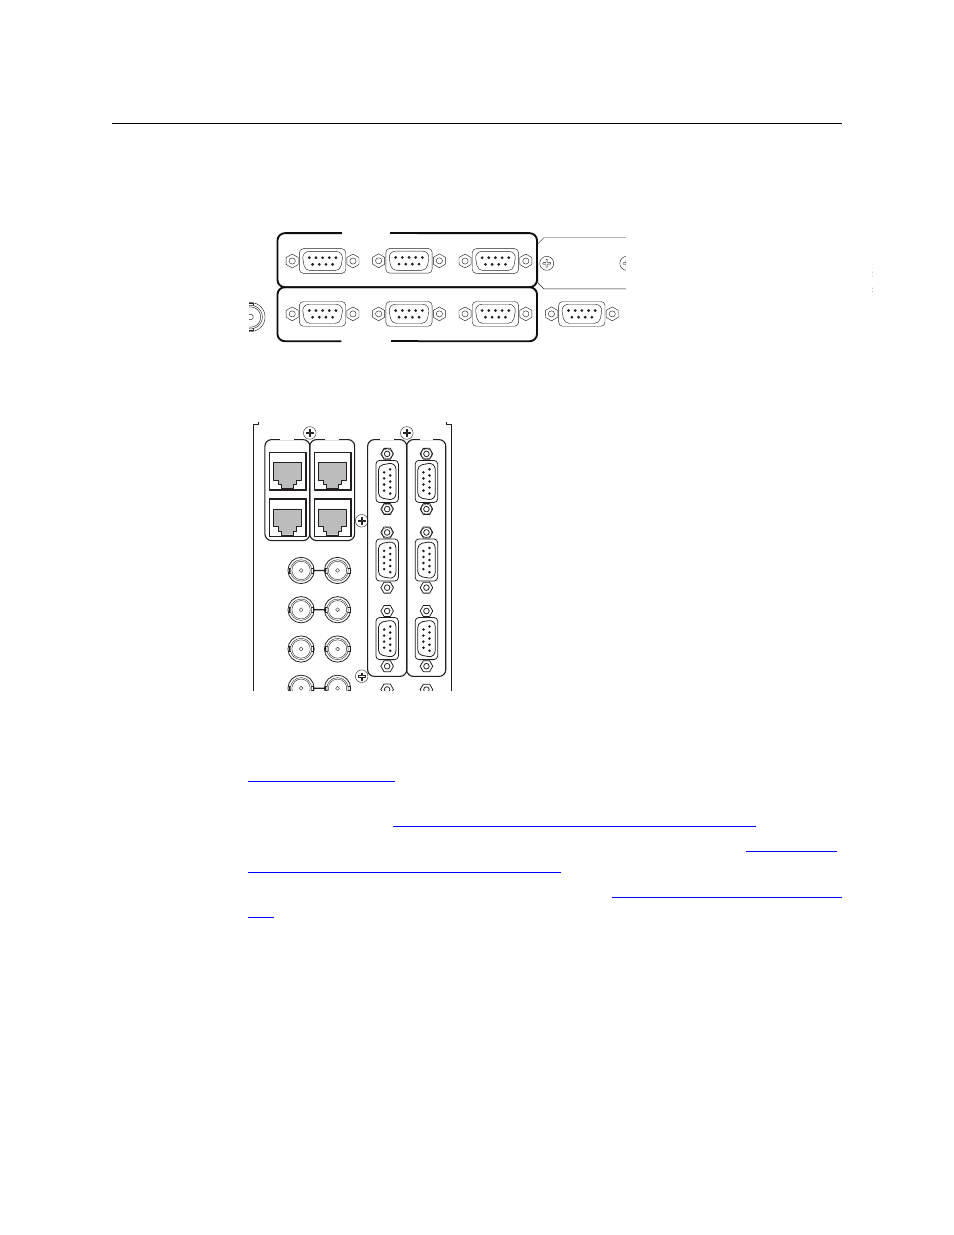
1 Locate the permanent serial ports on the rear of the router, as shown in Figure 5-2. On the
NV8288 and NV8288-Plus, the ports are labeled ‘DIAG (38400 Baud)’:
Fig. 5-1: Serial Ports (Rear View, NV8288, NV8288-Plus)
On the NV8500 family routers, the ports are also labeled ‘DIAG (38400 Baud)’, but in a differ-
ent orientation: This shows the NV8144:
Fig. 5-2: Serial Ports (Rear View, NV8144)
2 Run a straight-through serial cable from your PC’s serial port to the diagnostic connector.
If your PC does not have a serial port, you’ll need a USB-to-serial adapter for the cable. See
3 Set up serial communication in UniConfig. That is, choose serial mode and set the RS-232
settings to 38400. See
Changing UniConfig’s Serial Communication Parameters
4 Ensure that the control card’s DIAG port is set to RS-232 and 38400 Baud. See
Control Card’s Serial Communication Parameters
5 Read the control card configuration from the router. See
Reading a Control Card’s Configura-
on page 25. If the read is successful, your serial connection is good.
(If the read is not successful, you will need to diagnose and correct the problem. The prob-
lem could be a faulty cable or that you have used a crossover cable by mistake. The problem
might lie in UniConfig: its Baud rate not set properly, the wrong COM port or the wrong con-
nector chosen.)
DEO
F 1
OP
VIDEO
REF 2
LOOP
AUX 1
AUX 2
CTRL 1
CTRL 1
CTRL 2
CTRL 2
ALARMS
POWER SUPPLY
MONITORS
POW
TIME
CODE
PRI CTRL
SEC CTRL
DIAG (38.4 Kbaud)
DIAG (38.4 Kbaud)
DIA
G
(38.
4 K
baud)
CONTROL
RTR EXP IN
AES REF 1
AES REF 2
VIDEO REF 2
VIDEO REF 1
RTR EXP
10/100 BT
RTR EXP
10/100 BT
CTRL
1
CTRL
2
CTRL
1
CTRL
2
DIA
G
(38.
4 K
baud)
PRI
SEC
SEC
PRI