Figure 18. camera cable restraint, Cable restraint – Grass Valley 3-CCD CameraMan User Manual
Page 21
CameraMan Installation and Operation Manual
21
Cable Restraint and System Power
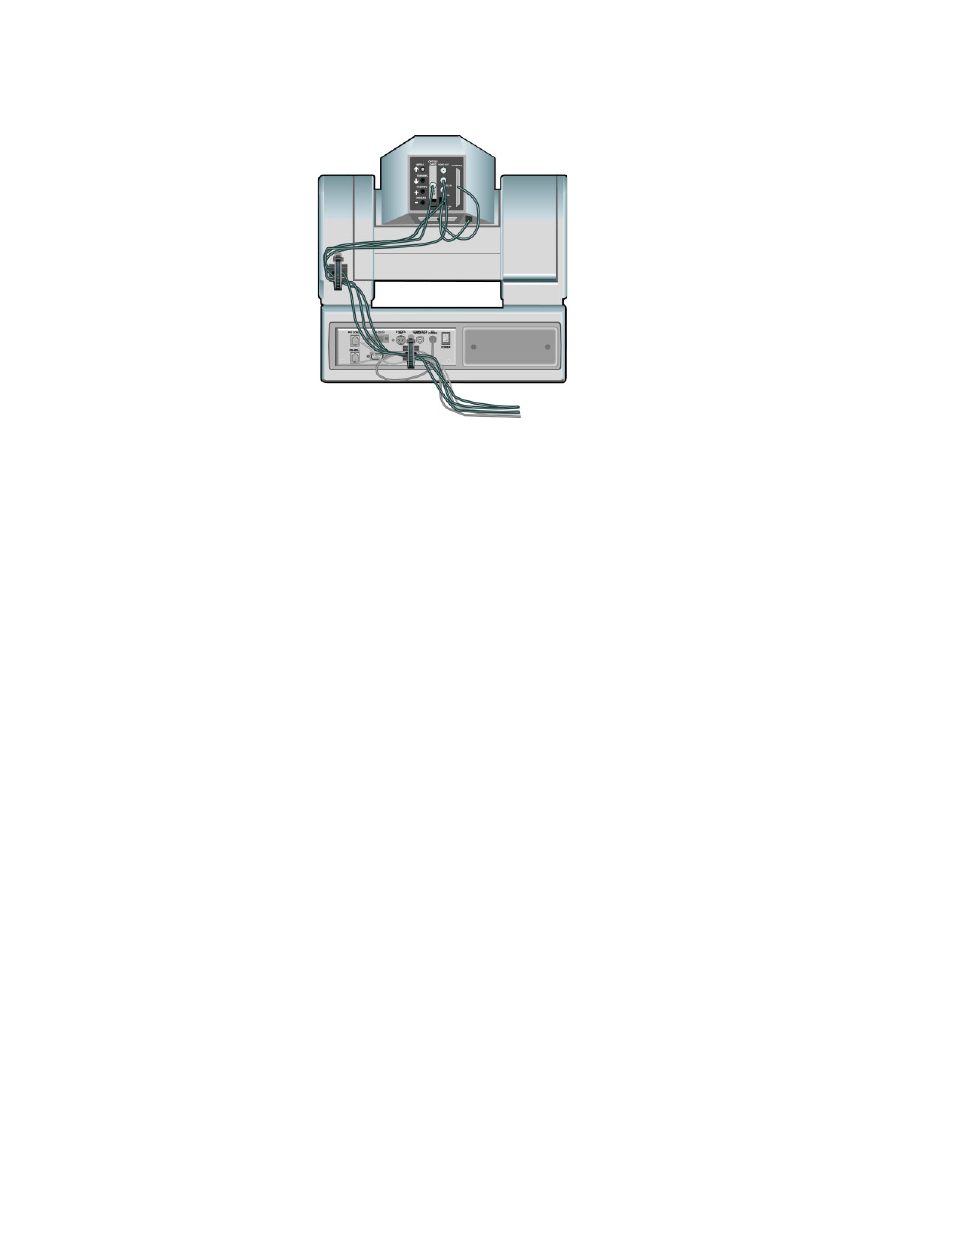
Figure 18. Camera Cable Restraint
Cable Restraint
For upper (i.e. GEN LOCK) cable connections (if used)
1.
Locate the cable restraint on the back left side of the camera.
2.
Insert cable(s) through the cable restraint from left to right.
Note
Allow 16” of cable between the restraint and the connection port to provide
enough slack for the camera’s tilting movement.
3.
Tighten the restraint by pulling on the strap’s “free” end to prevent any
cable from becoming dislodged. (The cable restraint is reusable and
adjustable).
4.
Group the cables with all the other cables connected to the connector
box and follow the instructions below to feed them through the lower
cable restraint.
For lower cable connections
1.
Insert all cables (upper and lower) through the cable restraint from left
to right. This will result in the cables being located approximately in the
center of the camera, instead of near the edge.
2.
Tighten the restraint by pulling on the strap’s “free” end to prevent any
cable from becoming dislodged.
Note
To relieve undue stress on the camera and the cable connections, it is impor-
tant to fasten all cables using the cable restrainer on the back of the camera.
Note
Be sure to leave enough slack in the cables for the camera to pan left and right
free of any constraints.