Single-channel encoder instructions – Grass Valley Aurora Browse v.6.0b Installation User Manual
Page 142
142
Aurora Browse Installation and Configuration Guide
September 22, 2006
Appendix B Legacy systems
Single-channel encoder instructions
The single-channel encoder creates MPEG-1 proxy versions of high-resolution video
in parallel with ingest into a video server. A system may contain multiple
single-channel encoders.
If a system uses Advanced encoders for the creation of MPEG, the single-channel
encoder can be an optional component.
Platform Specifications:
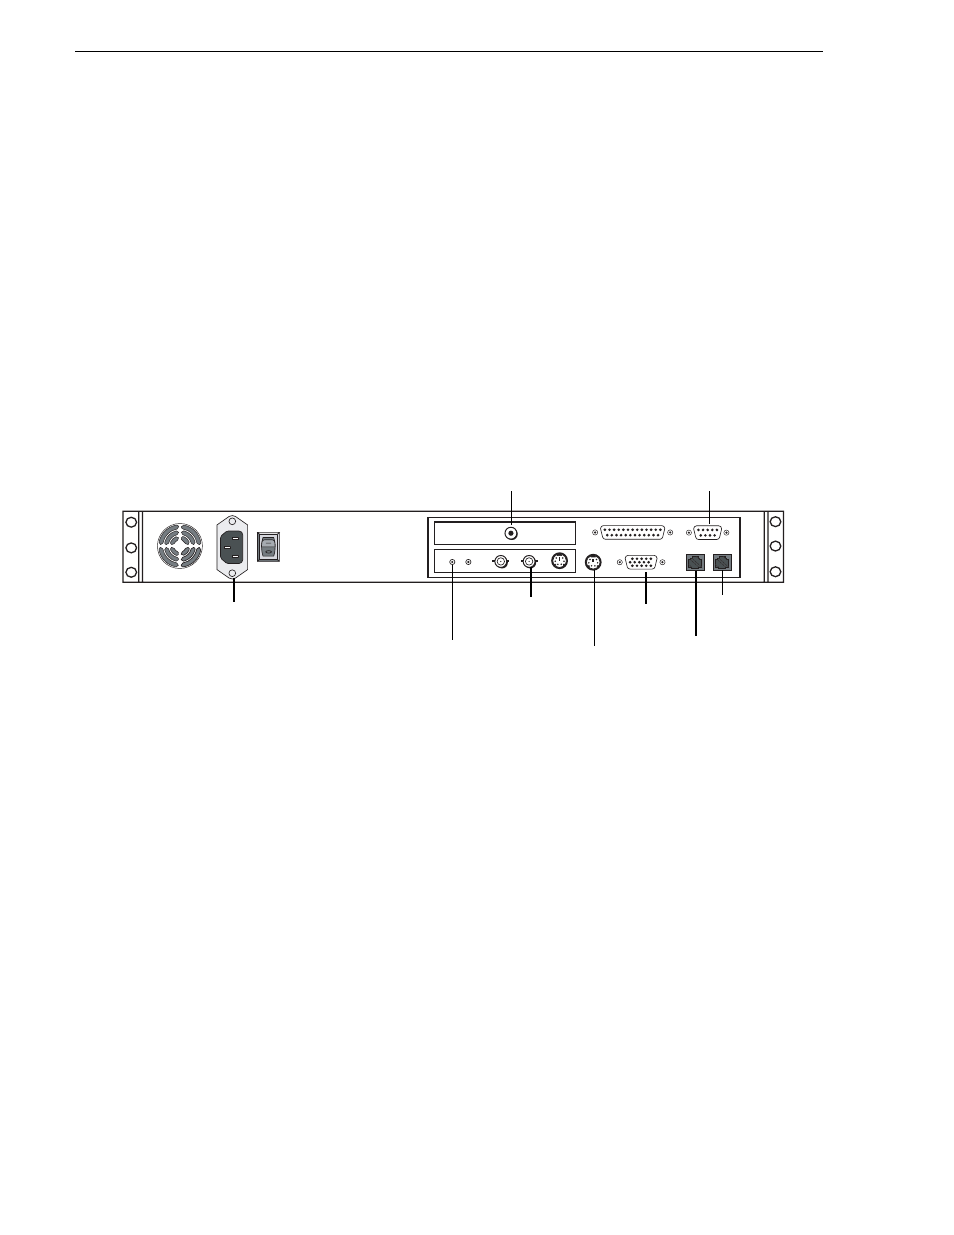
Cable as illustrated and as follows:
• Connect a cable from the Video In port on the Encoder to the analog video feed
source.
• Connect a cable from the Audio In port on the Encoder to the analog audio feed
source.
• Connect a Timecode cable from the Timecode In port (RCA port) to the house
timecode feed.
• For systems with one unified Production network, connect LAN port 1 to the
Production network.
• For systems with a Production network consisting of a media network and a control
network, connect LAN port 1 to the media network and LAN port 2 to the control
network.
• Make sure the LAN port 1 is connected to the network where the Profile exists.
Also make sure that the IP address for LAN port 1 is the host tables. A
single-channel encoder can be configured to control up to two Profiles
simultaneously using Ethernet API.
• Optionally connect a RS-422 control cable from the COM2 port on the encoder to
the RS-422 port on the Profile Media Server (only if API is not used). See below
for cable pinouts.
• P 3, 1Ghz or better (1 or 2 CPU)
• Windows 2000 Server (SP3)
• 512 MB RAM-
• .NET Framework 1.1
• CD-ROM Drive
• Internet Explorer 6 (SP1)
• Minimum 20GB Program Drive
• 100Tx LAN (x2)
Power
LAN port 1
VGA cable
to KVM
Keyboard/mouse
port to pigtail
to KVM
RS-422 Out
for VDCP Control
from Profile Channel
RCA Timecode In
Audio In
from Router
Video In
from Router
LAN port 2
(optional)