Quick start setup guide, Physical installation and initial configuration – Omnia Audio Omnia.9 User Manual
Page 9
Quick Start Setup Guide
We know that you're probably in a hurry to get your new Omnia.9 installed and on the air. If you have
K<:?E@:8C Guide will get you up and running as quickly as possible. &K @J @DGFIK8EK KF I features and capabilities referenced in this guide or in the full product manual may be available in your G8IK@:LC8ILE@K
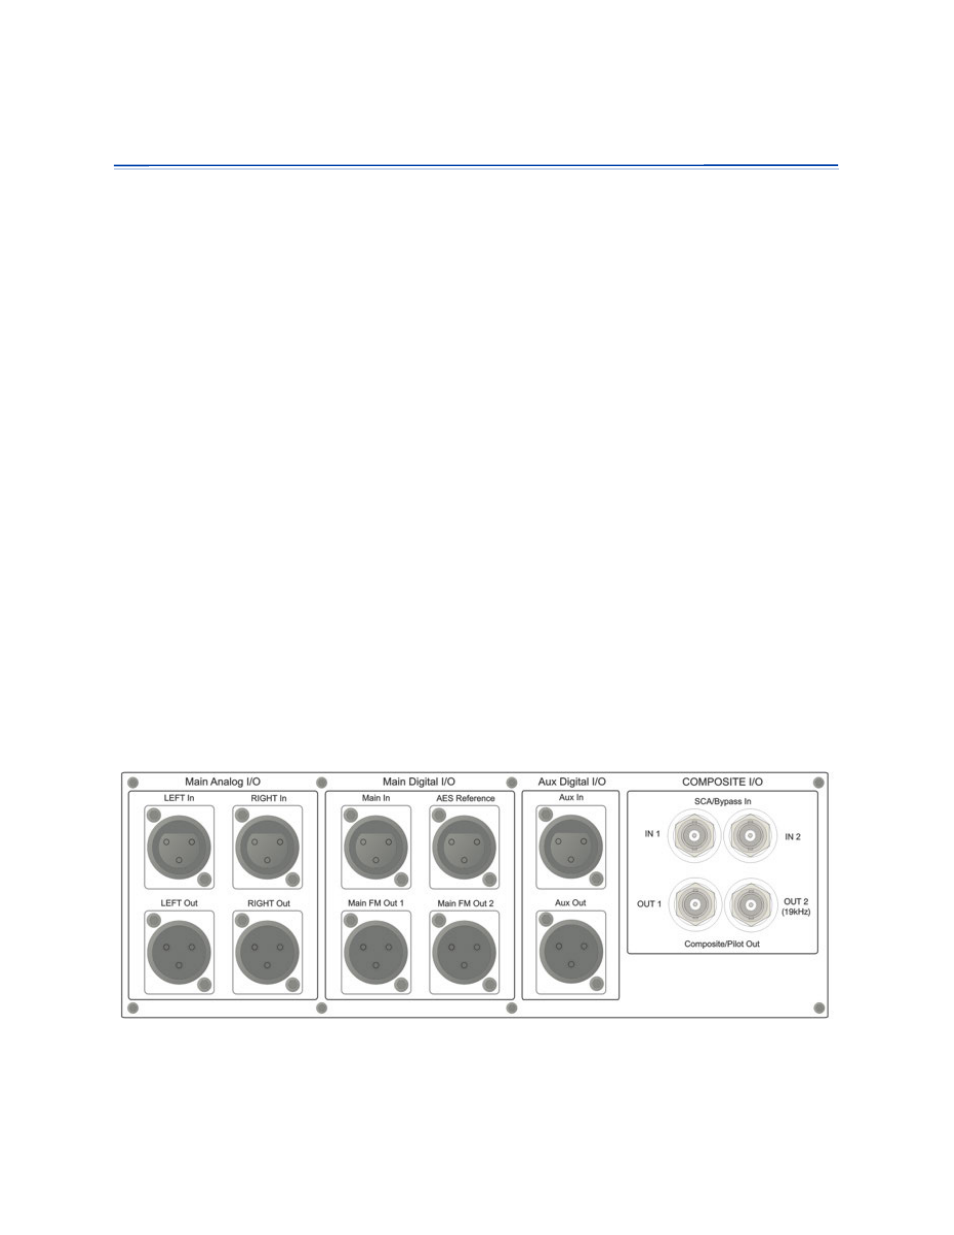
1? We suggest having an assistant on hand when racking up Omnia.9 to help balance the unit during @EJK8CC8K@FE8E;JKIFE>CPI<:FDD :FFC<;C<8M@E>8E Physical Installation and Initial Configuration Connect AC power to both of the internal power supplies. There is no power switch. Failure to use both power supplies is interpreted by the unit as a failure in one of the supplies and will result in an audible alarm which can be silenced by pressing the small red button between the supplies. It is always possible for a supply to fail and so having redundant supplies does help protect you against CFJ@E>GFN 8E @EK JLGGCPJ?FLC;9< =<;=IFD ;@== HL8C@KP2-0N@K?8; =FID8O@DLDI<;LE;8E:P
+ professional line-level analog audio via its Left and Right Inputs in the Main Analog I/O section of the rear G8E K?<*8@E!@>@K8C&,J<:K@FEF=K? A Word about AES Reference and Sample Rates: If you need to sync the Omnia.9 to an external reference, use the AES Reference Input to ensure that the externally generated reference will be used as the main clock for the Omnia.9. Chapter 2: Quick Startup Guide 9