1 offset fanning, 2 fanning selection order, 3 fanning in the universal control panel – LSC Lighting CLARITY LX Series v.1 User Manual
Page 165
Clarity
Proglets
Operator Manual
Page 155
Pressing and holding [Ctrl] (PC) or [Cmd] (Mac) on the keyboard activates the Fanning function
and a vertical bar with three nubs appears on each Attribute Control.
Whilst holding [Ctrl] (PC) or [Cmd] (Mac), move the mouse cursor over the top or bottom nub,
(it changes to a double headed arrow) then click and drag (whilst holding [Ctrl] or [Cmd]) the
nub left or right to fan the values.
[Ctrl] (PC) or [Cmd] (Mac) + dragging the top or bottom nub rotates the bar around the
centre nub and fans the values accordingly.
[Ctrl] (PC) or [Cmd] (Mac) + dragging the centre nub fans from the middle out to the
ends.
21.14.1 Offset Fanning
Whilst holding [Ctrl] (PC) or [Cmd] (Mac), move the mouse cursor over the centre nub (it
changes to a four headed arrow) then click and drag the nub up or down to move the fanning
point off centre. Whilst still holding [Ctrl] or [Cmd], click and drag the top or bottom nubs left
or right to create an offset fan.
21.14.2 Fanning Selection Order
Fanning uses the order in which the fixtures were selected. You can change the look of the fan
by changing the selection order. You can manually select fixtures in a specific order or your
selection order can be stored as a group. See Groups above.
Selection order can also be varied by using the Sort tab. See 21.6.2 Sort, for details.
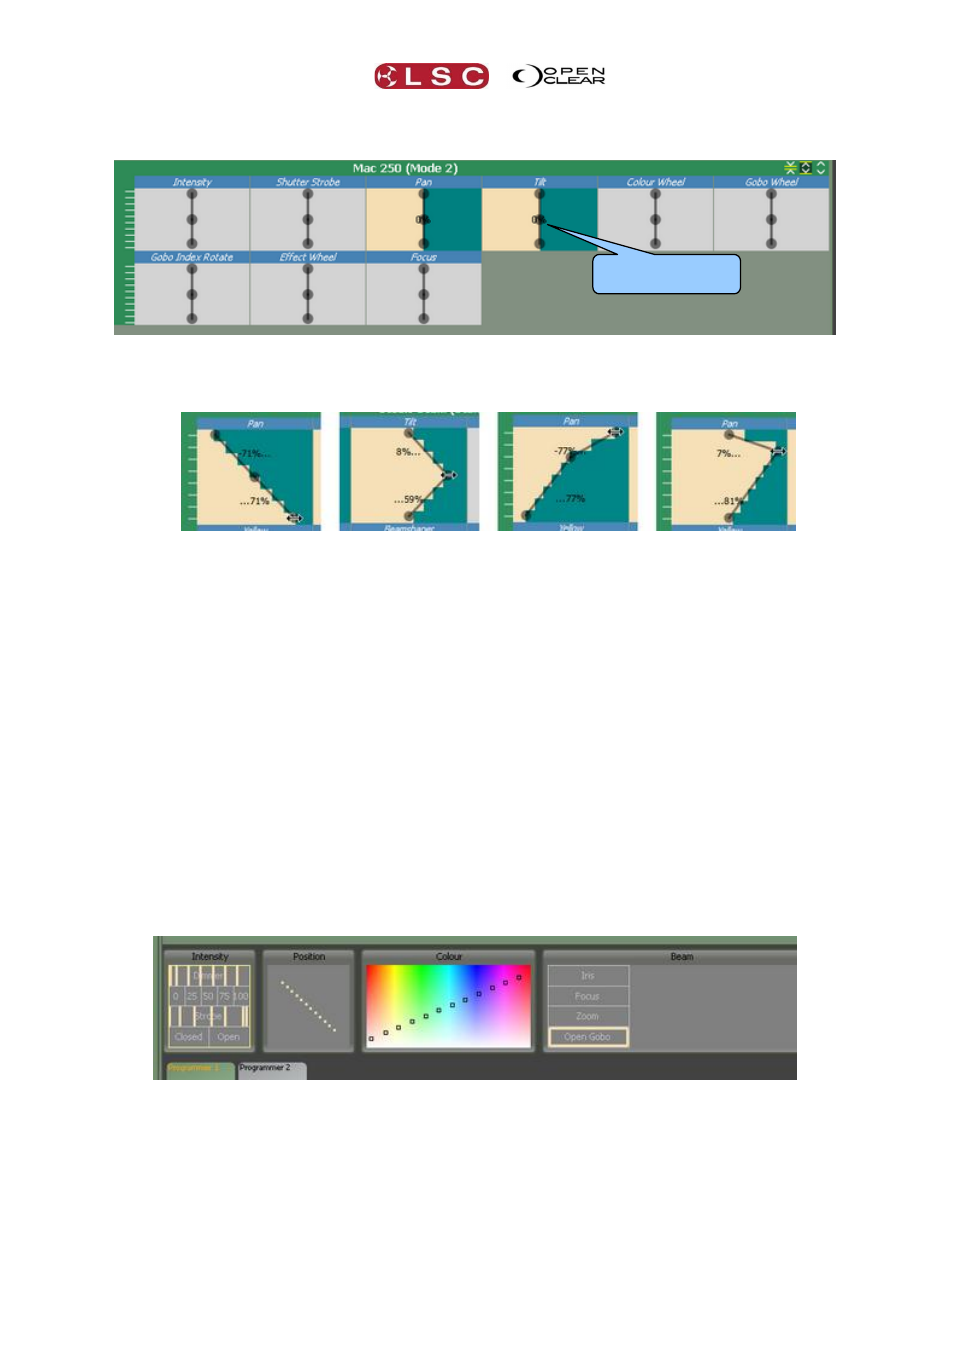
21.14.3 Fanning in the Universal Control Panel
Selected fixtures can also have their attributes fanned by holding [Ctrl] (PC) or [Cmd] (Mac)
and dragging in the Universal Control Panel.
Universal Control Panel showing Intensity, Strobe, Position and Colour all fanned.
Fan Bar with 3 nubs