60 menu descriptions - helicopter – HITEC Eclipse 7 Pro User Manual
Page 62
60
Menu Descriptions - Helicopter
Setting Up The Throttle Curve
1. Press one of the Up Down Edit buttons until the
THCV window appears. The default is for a linear curve,
a straight line from 0 to 100% passing through 50% at
hover (center, point 3).
2. Be sure you’re in the desired flight condition by moving
the Flt. Mode and Flt. Cond switches to their proper
position. Remember, you can
input separate, independent
throttle curve settings for each
flight condition (except for
ST3, throttle hold)! Also, be
sure to center the hovering
throttle knob.
3. You begin at set point #1,
idle. Numeral 1 should be flashing in the display, and a value
of
0% should be shown. Press the Data +Increase or
-Decrease key to change the setting to your desired
value.
4. When you’re finished
with Point 1, move to the
next point with the Cursor
Right key. The numeral 2 should
be flashing that
indicates you are setting the
value for
Point 2. Note that the function is inhibited (Inh) to start
with. If you leave it, you get a straight line from points 1
to 3. Otherwise, you can change this setting with the
Data +Increase or -Decrease keys. You can inhibit
THCV point 2 or 4 by pressing the clear key.
5. Repeat this procedure for Points 3, 4, and 5 by
pressing the Cursor Right key, then adjusting as
desired with the Data +Increase or -Decrease keys.
6. When you’ve completed the settings for the first flight
condition (NOR), test fly your model. When you’re
satisfied with the settings, use them as a basis for the
other flight conditions. Flip the switches as necessary to
get into the new conditions, verify on the display that you
are in the desired flight condition, then set all the five
points in by going through the steps given previously
PTCV - Pitch Curve
Like the throttle curve described
above, pitch curves are
tied to the position of the collec-
tive stick, and are
specified at five points labeled 1
through 5 below. Setup
instructions are the same as those for throttle curve,
except that you may also input a curve for the throttle
hold/ST3 flight condition. You can get a linear response
by making the five settings line up as shown above. But
if you want another shape, you’re free to do it. You can
“flatten out” or “soften” the curve around hover,
which is handy for making the control less sensitive there.
Inputting The Pitch Curve Values
1. Press one of the Up Down Edit buttons until the
PTCV window appears. The default is for a linear curve,
The Throttle Hold function moves the engine throttle
servo to a selected position near idle, and disengages it
from the throttle stick. It is commonly used during autorotation,
and activated with the Flt. Cond. switch on the
right rear of the transmitter. You can set the throttle position
to be held over a -50 to +50% range centered about
the throttle idle position. Activating throttle hold also
disables revolution mixing (RVMX).
Setting Up Throttle Hold
1. Press one of the Up Down Edit buttons until the H0LD
window appears. The default is for the function to be
inhibited. To activate the throttle hold function, press the
Data -Decrease key. This will cause the INH display
to change to a -4% value with an ON or OFF display,
depending on the Flt. Cond. switch’s position.
2. Now you can adjust the throt-
tle hold position with the Data
+Increase or -Decrease keys,
anywhere between -50 and
+50% (To inhibit this feature,
press the Active/Inhibit (Clear)
key).
3. Check that your throttle goes to the desired hold position
by flipping the Flt. Cond. switch one way and the other.
Adjust the number as needed. Be sure to choose an engine
speed that’s fast enough to keep the engine from accidentally
quitting but slow enough to not engage the main rotor clutch.
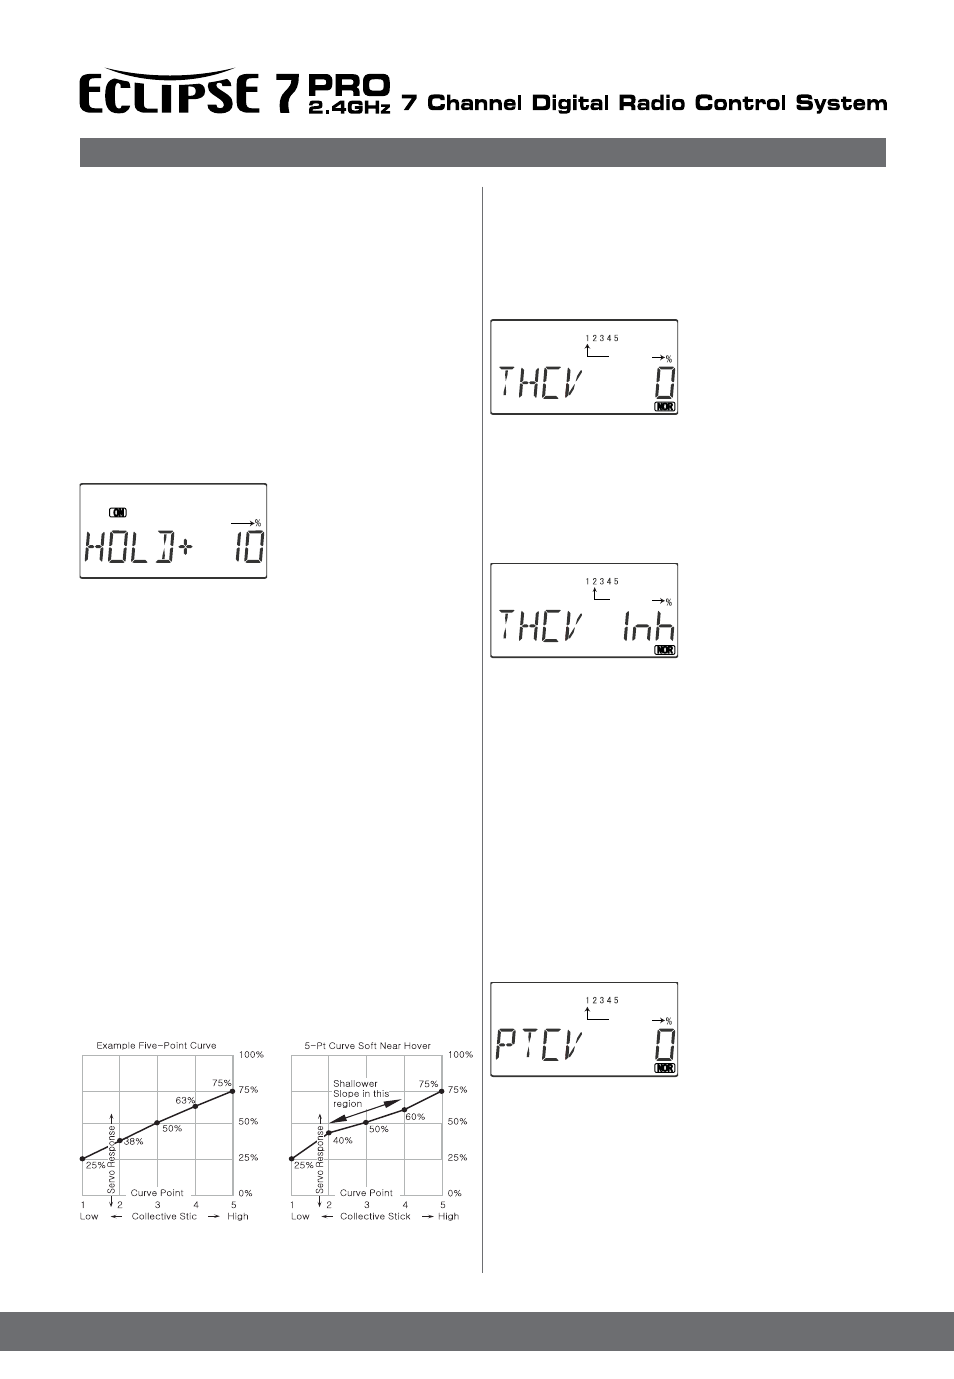
THCV - Throttle Curve
The throttle & pitch curves are tied to the position of the
collective stick, and are specified at five points labeled 1
through 5 below. These “curves” are really straight lines
connecting the settings at the five points, and are defined
by assigning servo movement percentages to five
positions of the left stick: lowest = Point 1, the 1/4-up stick
position = Point 2, half-stick = Point 3, 3/4 position = Point
4, and top position = Point 5. With the numbers as input
as shown, the servo would move 50% of full travel to one
side at low collective stick position, and 50% of full travel
to the other side at high stick position. You can get a
linear response by making the five settings line up as
shown above. But if you want another shape, you’re free
to do it. You can “flatten out” or “soften” the curve around
hover as shown here. This is handy for making the
control less sensitive around hover.
Flashing
Flashing
Flashing
Flashing