6sec, Set-up use of the hitec 2.4ghz system – HITEC Eclipse 7 Pro User Manual
Page 10
8
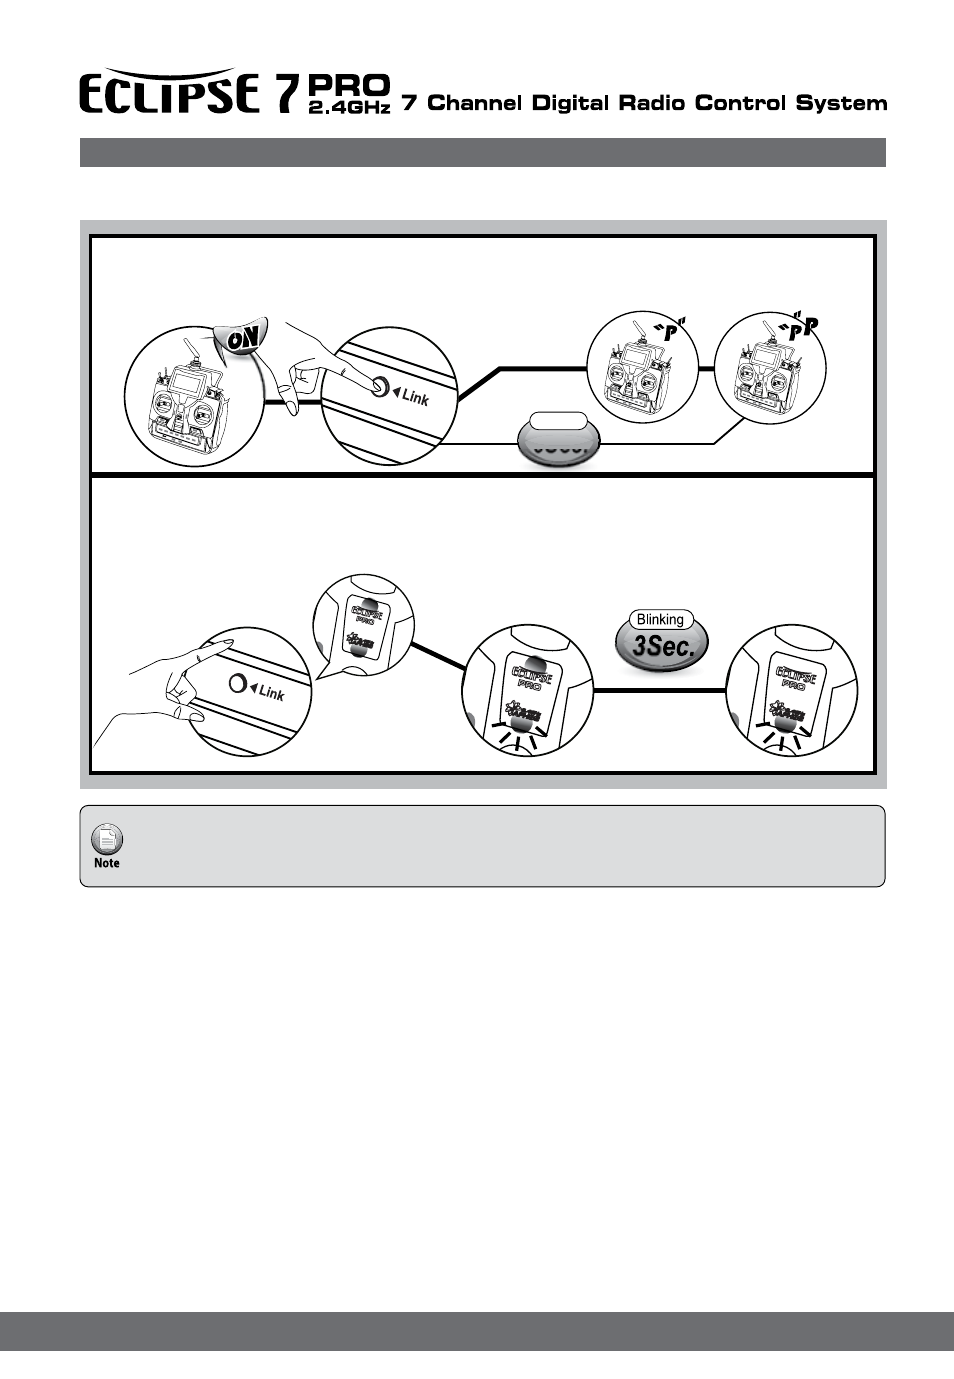
6Sec.
Push
Turn on the transmitter.
Press and hold the LINK button on the ECLIPSE 7 PRO for about 6 sec.
Release the LINK button when you hear two continuous beeps.
The ECLIPSE 7 PRO will automatically scan the frequency to find the cleanest and the most
stable frequency in any area. (The BLUE LED on the transmitter will blink during the scanning for 3sec.)
When the scan is completed, the BLUE LED on the transmitter stops blinking and glows steady.
Re-boot the transmitter (turn Off and On) and follow the link process with your receiver.
After “Scanning,” you need to do the link process again for all your receivers as receivers need new
frequency hopping codes from the Spectra 2.4 module.
FAIL-SAFE and Hold Mode
If you use the FAIL-SAFE function, and set it up properly, should the receiver signal somehow be interrupted or interference
were to occur, the servos will move to your pre-set FAIL-SAFE point you previously stored in the receiver during the FAIL-SAFE
set-up process.
If FAIL-SAFE has not been activated, the signal is switched off after the HOLD period of 1 sec. This means that the servos
become “soft” and remain in their last commanded position under no load (this may equate to full-throttle!), until a valid signal is
picked up again.
In the interests of safety, we recommend that FAIL-SAFE should always be activated, and the FAIL-SAFE settings should be
selected so as to bring the model to a non-critical situation (e.g. motor idle / electric motor OFF, control surfaces neutral,
airbrakes extended, aero-tow release open, etc).
SmartScan Function
Set-up Use of the Hitec 2.4GHz System