Charge the batteries! model setup functions – HITEC Eclipse 7 Pro User Manual
Page 22
20
duplicated) is the current one, indicated by the numeral (lo-
cated higher right)
. To select your destination model number,
press the Left or Right Cursor keys. The selected destination
memory number is shown by the flashing numeral .
4. Press the +Increase and -Decrease Data keys at the
same time. The transmitter beeps twice rapidly, indicating
the copy has been completed. THIS WILL ERASE ALL
THE OLD SETTINGS IN THE SLAVE MODEL MEMORY,
SO BE SURE YOU’RE IN THE CORRECT MODEL
BEFORE YOU COPY MODEL!
5. Switch power off.
6. Switch power back on. If you wish to go to the newly saved
memory, repeat step 1.
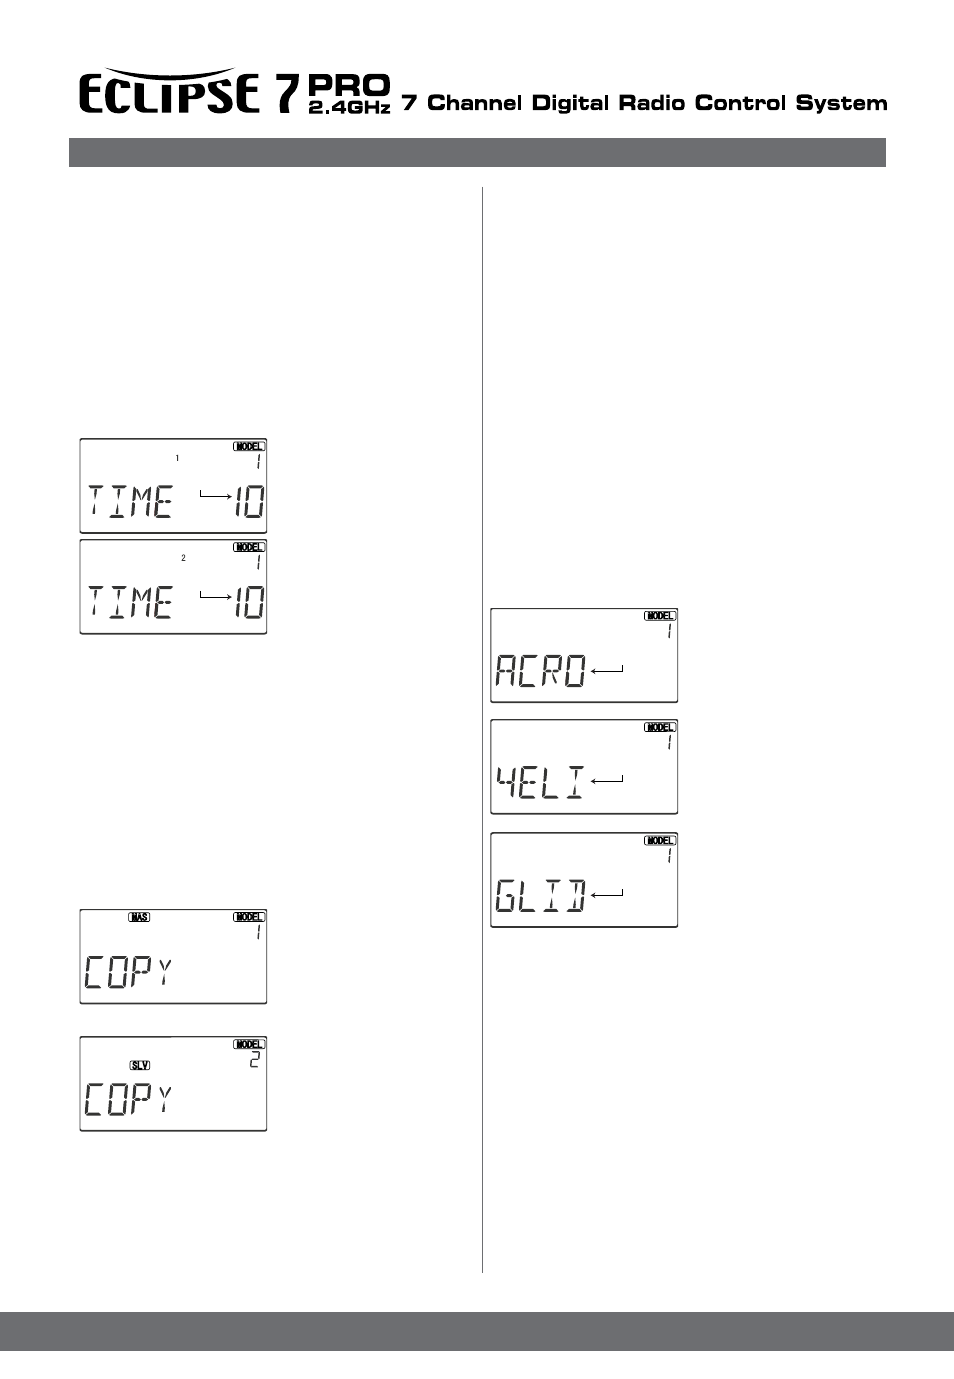
ACRO, HELI, GLID - Model Type Select
This function is used to select the type of model to be
programmed in the current model memory. You may
select from aircraft (ACRO), gliders (GLID), and helicopters
(HELI). If you select glider or helicopter types, you
will need to set the wing type (for a glider) or the swash
type (for a helicopter). These settings are covered below.
Selecting the Model Type
1. With the transmitter switched
off, turn on your transmitter
while pressing both of the two
Edit keys (the two keys
on the far left). The model select
(M.SEL) menu will be
displayed.
2. Press the Down arrow key.
This gets you into the type
select menu. The current
model type will be flashing on
and off. (If you’re already
in the setup menus, you can just
press the Up or Down arrow key
to get here.)
3. If the model type you want is
displayed, you’re done.
[If you wish to change the wing
type or swash type in the GLID and HELI model settings, see
the sections below.]
4. If you wish to change the model type from that displayed,
press on the Left or Right Cursor buttons until the model type
you want, either ACRO,GLID, or HELI, appears.
5. To select your desired model type, press both the
+Increase and -Decrease Data keys simultaneously.
Two beeps tell you that the new model type is now registered.
THIS WILL ERASE ALL THE OLD SETTINGS IN THE
MODEL MEMORY, SO BE SURE YOU’RE IN THE CORRECT
MODEL MEMORY BEFORE YOU CHANGE MODEL TYPE!
6. Press the Up or Down arrow keys to get to another
setup menu, or switch power off.
7. Switch power back on. You may now set up the details
of your model in the Edit mode.
will beep twice to indicate a successful reset.
4. Press the Up or Down arrow keys to get to another
setup menu, or switch power off.
5. Switch power back on. You may now set up the details
of your model in the Edit mode.
CAUTION: WHEN YOU COMMAND RESET, YOU’LL ERA-
SETHE MEMORY YOU’RE IN AND LOSE ANY PROGRAM-
MINGYOU HAVE ENTERED. DON’T DO THIS UNLESS YOU
ARE
POSITIVE YOU WANT TO FLUSH OUT THAT MEMORY
ANDSTART FROM SCRATCH WITH THE FACTORY DE-
FAULTSETTINGS.
TIME – Timer Function Setup
1. With the transmitter switched
off, turn on your transmitter
while pressing both of the two
Edit keys(the two keys
on the far left).
The model select (M.SEL) menu
will be displayed
2. Press the Up or Down
arrow key until you get into
the Reset (TIME) menu. The
word “TIME” will flashing on and
off. (If you’re already in the set-up menus, you can just press
the Up or Down arrow key to get here.)
3. To change the number of minutes shown, press the
+Increase and -Decrease Data keys until you see the
amount you desire. You may select from 0 to 60 minutes.
4.Pressing the cursor will bring you to get second timer .
5. Press the Up or Down arrow keys to get to another
setup menu, or switch power off.
6. Switch power back on. You may now set up the
details of your model in the Edit mode.
COPY-Copy Model
The COPY function is used to copy the model data stored
in the current model memory into another model memory.
This function is handy to use to start a new model that’s
similar to one you have already
programmed, and is also
handy for copying the current
model data into another
model memory as a backup.
Copying from one model memory to another
1. With the transmitter switched
off, turn on your transmitter
while pressing both of the two
Edit keys (the two keys
on the far left). The model select
(M.SEL) menu will be displayed.
2. Press the Up arrow key.
This gets you into the model
copy (COPY) menu. (If
you’re already in the setup
menus, you can just press
the UP or Down arrow key to get here.)
3. The source model memory (the memory that will be
Charge the Batteries!
Model Setup Functions
Flashing
Flashing
Flashing
Flashing
Flashing