Glider model function descriptions – HITEC Eclipse 7 Pro User Manual
Page 51
49
Setting Up Crow Mixing
1. Start by locating the CROW menu with the Up Down
Edit keys. Either the ON or OFF display will be flashing,
depending on the position of the Gear switch (forward is
on).
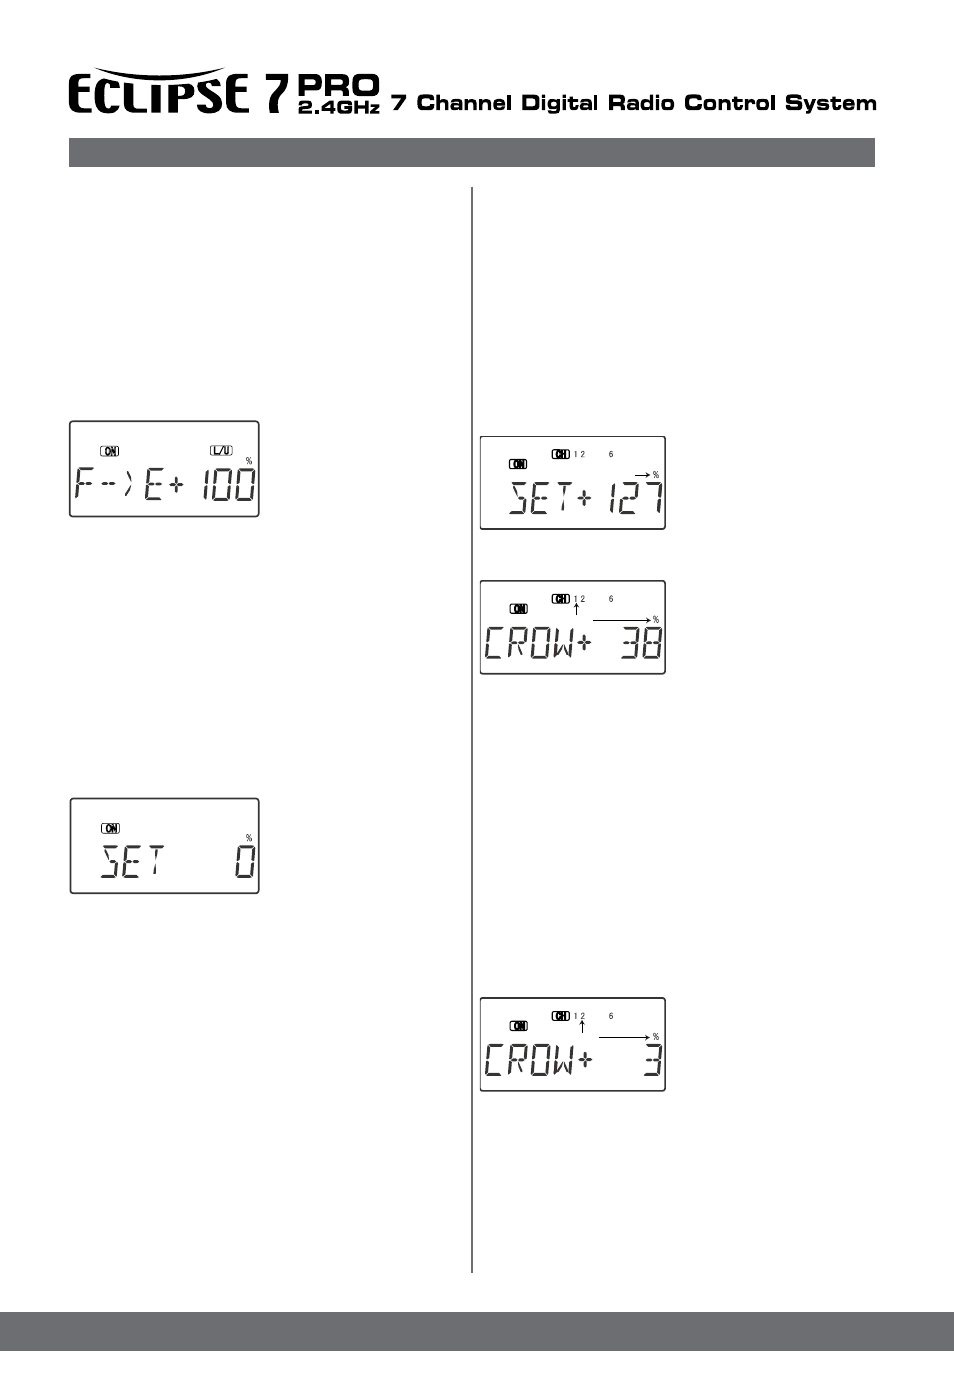
2. First set the CROW function activation point. Hit the
Cursor Left key one time to get to the SET menu. Now
move the throttle stick all
the way up. Enter that
position by pressing the
Clear Active/Inhibit key.
The display should read a
number around +125%.
3. Make sure CROW is ON by moving the Gear switch
forward. Verify by looking at the flashing indicator.
4. Next, set up the throws
for the ailerons. Press the
Right key two times to get
to the aileron setting menu
(the numeral 1 and percent-
age sign will be flashing in the
display).
Press the Data +Increase or -Decrease keys to adjust the
amount of UP
aileron motion. Move the throttle stick all the way down
and be sure the ailerons go UP. If they don’t go up, but
go down instead, press the Clear Active/Inhibit key and
then press the other Data key to achieve the desired up
aileron travel (this may depend on servo orientation).
You’ll probably want a fair amount, but not all, of aileron
travel. Be sure not to use full travel, so you’ll have roll
authority while on approach in full crow command.
Notice that you set the throw for both ailerons at the
same time: this is the reason to have identical control arm
lengths and identical neutral positions.
5. Now press the Right key to get to the elevator
compensation menu (the numeral 2 and percentage sign will
be flashing in the display). Press the Data +Increase or
-Decrease keys to set up the
throw for the elevator as
desired. Move the throttle stick
and be sure the elevator
goes UP with crow. If it
goes down, press the
Clear Active/Inhibit key
and then press the other Data key to achieve the
desired up elevator travel (this may depend on servo
orientation). For starters, use zero or very little up
elevator compensation until you fly and determine what
is needed: if the model pitches up with crow, add down
elevator compensation and if it pitches downwards, add
some up compensation. Make only small changes in
compensation because it has a big effect on trim. Refer
6. You can observe the effect of flap->aileron mixing on
the aileron servos when the function is turned on with the
Ch. 7 switch, and you move the flap knob (VR1) back
and forth.
F->E - Flap Elevator mixing.
Flap Elevator mixing (F->E) is used to make the elevator
move to maintain trim when the camber-changing/
flap knob VR1 is moved. It functions at the same time as
flap->aileron mixing (see previous menu). F->E mixing is
on only if the Ch. 7 switch is forward
Setting Up Flap->Elevator Mixing
1. Get to the flap->elevator mix-
ing function by locating the
F->E menu with the Up Down
Edit keys. The default is
for it to be inhibited (Inh). Press
the Active/Inhibit(Clear)
key so that the ‘+100%’ display is shown, meaning the
elevator follows the flaps 100%. Depending on the position
of the Ch. 7 switch, either ‘On’ or ‘Off’ will be flashing.
2. Press the Cursor Right key once, to get to the
percent setting menu. Press the Data +Increase or
-Decrease keys to adjust the amount of mixing to suit.
You probably want to select a number like 10% or less,
since the elevator is very powerful as a trimming device.
3. Move the flap knob so the R/D display changes to L/U,
or vice versa, and repeat the setting adjustment for that
side of the travel. You can set an input on each side of
the flap knob.
4. If you want to zero out the amount of mixing on one
side of the knob’s travel, press the Active/Inhibit (Clear)
key.
5. If you want to change Set
position, press the Cursor Right
key to change the position of
Flap control channel (VR1)
which value you need, and then
press Clear key.
6. You can observe the effect of flap->elevator mixing on
the elevator servo when the function is turned on with the
Ch. 7 switch, and you move the flap knob (VR1) back and
forth.
CROW - Crow mixing (airbrakes)
The Crow mixing function is useful for increasing the
drag of a model during landing approaches, which makes
the approach steeper and slower, making landings
shorter and easier. This is especially useful for sailplanes,
where applying down elevator to steepen the glide also
speeds things up and makes landings very difficult. Crow
is activated by the flap (throttle) stick position. Ailerons,
elevator, and flaps are the three controls that are
commanded by crow function, which is also called
“butterfly” in the sailplane world. The idea of the crow
function is to simultaneously raise the ailerons (which
reduces the wing’s lift), and drop the flaps (to regain the
lift lost by the up aileron movement). Elevator motion may
Glider Model Function Descriptions
also be also commanded if needed to prevent a trim
change induced by the flap and aileron motion. Normally,
crow is set up so that the maximum control movements
(Maximum drag) occur at “low” throttle stick position
(towards the bottom of the transmitter). The Gear switch
must be forward for Crow to operate.
Flashing
Flashing
Flashing