Model setup functions – HITEC Eclipse 7 Pro User Manual
Page 21
19
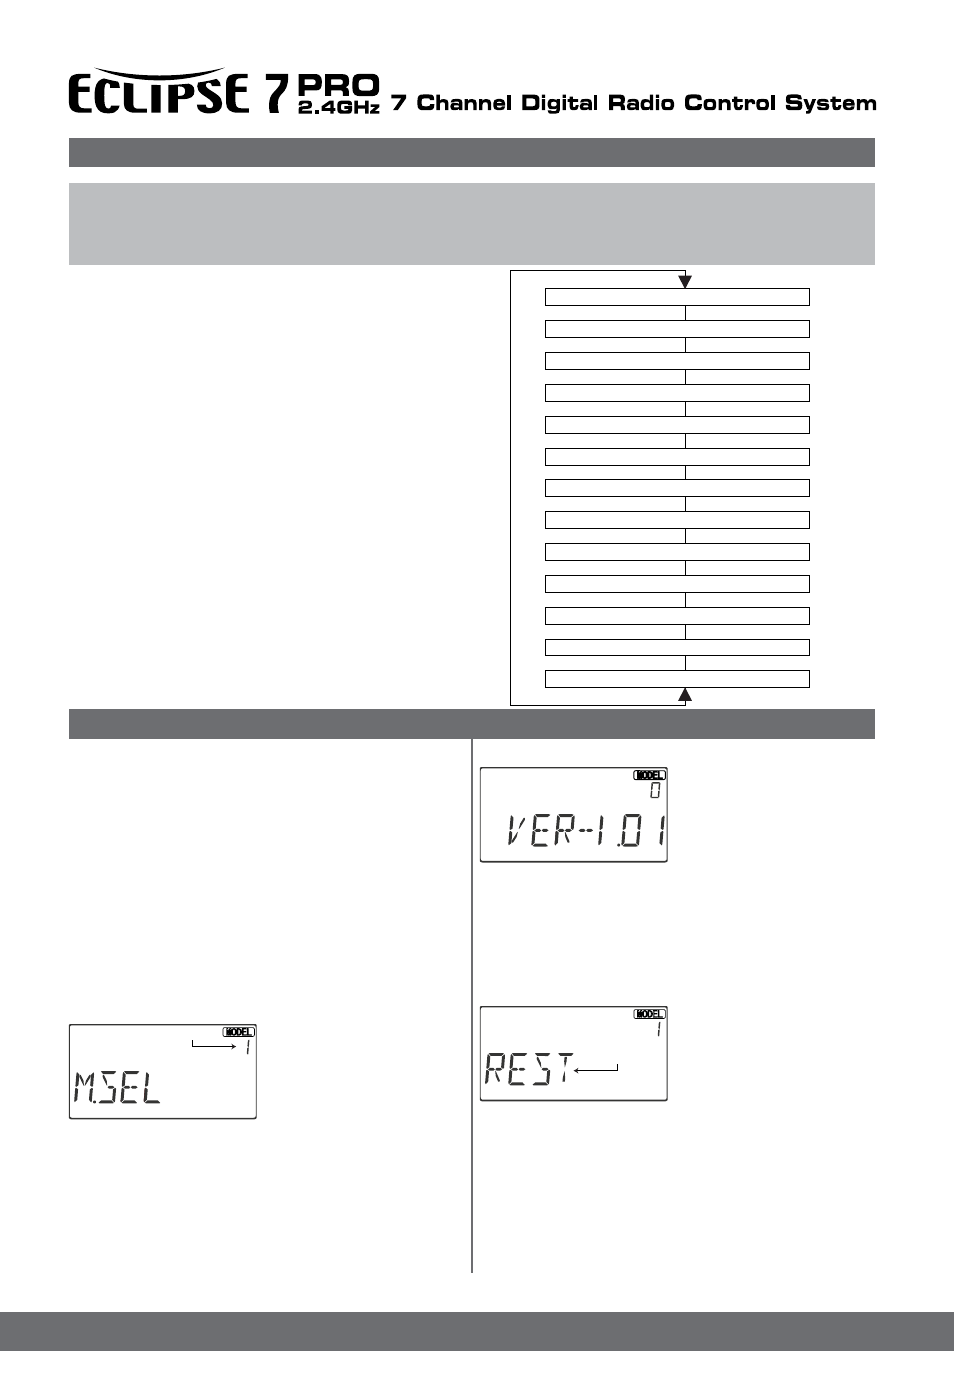
Map of Basic Menu Functions
M.SEL Model select
VER- 1.010
RESET Reset Memory
TIME Timer1, 2 setup
COPY Data Copy
ACRO Acrobatic model mode
HELI Helicopter model mode
GLID Glider model mode
2WING Two Servo Wing (GLID only)
4WING Four Servo Wing (GLID only)
NOR Normal swashplate (HELI only)
120` 120` swashplate (HELI only)
140` 140` swashplate (HELI only)
180` 180` swashplate (HELI only)
**** Model Name (four Letters +
Up to three numbers)
MODE Mode 1, 2, 3, 4 changeable
IMP Unit Select
RPM RPM Check
AMP AMP Check
B,WAR Rx Battery Warning
Model Setup Functions
Model Setup Functions
This section describes the model setup functions that are used to choose all of the operating features of a particular model
memory. These functions are used to select the model memory, the model type (from airplanes, gliders, and helicopters), set
the Timer, and other useful functions. These functions are used to set up a new model or a new model memory, to switch
between memories, and to change transmit shift.
MODL – Model Select
. Your Eclipse 7 PRO system can store up to sixteen inde-
pendent sets of model data in its memory. The Model Select
(MODL) function allows you to choose from any of the
seven sets of model data.
You can assign a four-character name to each model memory.
The model names are not visible when you wish to switch
memories. There are several ways to keep track of which
model is in each memory. You may attach a small piece of
white tape to the transmitter and write the model’s name along
with the model setup number (and its channel number), or you
may use a notebook, or label the model with its memory num-
ber prominently near its on-off switch inside the fuselage.
Choosing a model memory to load
1. Start with the transmitter
switched off.
2. Turn on your transmitter
while pressing both of the
two Edit keys (the two keys
on the far left). This gets
you into the model select (M.SEL) menu.
3. Select the desired model number by pressing the Cursor
Right or Left button. At this time, the selected model number
will blink on and off.
4. Switch power off.
5. Switch power back on. The previously-selected model
number is indicated by the arrow above the model numbers
in the display.
VERSION
Left diagram shows current soft-
ware version of Eclipse 7 Pro.
The software can be upgraded
by using HPP-22 device.
RESET –Data Reset
The Reset function is used to clear out an existing set of
model data within a single model memory, the current one.
This function resets all data to the factory default values, and
may be used to get a “fresh start” so that you may begin with
a clear memory before you input new model settings into a
memory that had been used for another model.
Resetting the memory
1. With the transmitter switched
off, turn on your transmitter
while pressing both of the two
Edit keys(the two keys on the
far left).
The model select (M.SEL) menu will be displayed.
2. Press the Up or Down arrow key until you get into the Reset
(REST) menu.
This display has the word “REST” flashing on and off.
(If you’re already in the setup menus, you can just press the
Up or Down arrow key to get here.)
3. IF YOU ARE SURE YOU WANT TO RESET and clear
out the current model memory, press both the +Increase
and -Decrease Data keys at the same time. The transmitter
Model select ( M.SEL )
Version ( VER- 1.010 )
Reset Memory ( RESET )
Timer1, 2 setup ( TIME )
Data Copy ( COPY )
Acro, Heli, Glide Model Select ( Heli )
SWASH /120 /140 /180 /NOR Select ( NOR)
Model Name Select ( ACRO 001 )
Mode 1, 2, 3, 4 changeable ( MODE )
Unit Select ( IMP )
RPM Check ( RPM )
AMP Check ( AMP)
Rx Battery Warning ( B,WAR )
PowerOnWhilePressing
bothEdit/Displaykeys
Flashing
Flashing