59 menu descriptions - helicopter – HITEC Eclipse 7 Pro User Manual
Page 61
59
Menu Descriptions - Helicopter
Flight Conditions
Your Eclipse 7Pro system’s HELI menu provides three
flight conditions in addition to the normal one (NOR).
Within each condition, you may program an independent
set of dual rates, exponentials, throttle and pitch curves,
revolution mixing, and gyro gain. In the HELI menus,
these are automatically called up whenever you switch
to a new condition. (In ACRO and GLID, you have to
activate them manually.) NOR is intended for hovering
flight. ST1 may be used for forward flight and mild
aerobatics, ST2 may be used for inverted, and ST3 is
used for autorotations as it includes a throttle hold feature
which disengages the throttle servo from collective commands.
These conditions are activated whenever the model
memory is chosen to be HELI type.
These flight conditions are switched on as follows:
NOR: ON when Flt. Mode Switch is back.
ST1: ON, when Flt. Mode Switch centered
ST2: ON when Flt. Mode Switch is forward.
ST3: ON when Flt. Cond Switch is forward.
As these functions are
switched on or off, ST3 =
HOLD has highest priority,
followed by ST2 and ST1.
Regular settings (NOR)
occur when all of the others are
off. You can see which
condition your transmitter is currently in by viewing the
display. The current condition is the one flashing on and
off in the lower right of the TRIM display.
EPA - End point adjust
See ACRO instructions on page 27.
D/R - Dual Rates
Refer to ACRO instructions on page 27.
EXP - Exponential
See the ACRO instructions on page 30.
STRM - Subtrim
Refer to the ACRO instructions on page 31.
REV - Servo Reverse
See ACRO instructions on page 32.
T.CUT - Throttle Cut
Described in the ACRO instructions on page 32.
PMX1, PMX2 - Programmable Mixing
See ACRO instructions on page 32. There are two
programmable mixers in the helicopter menus. PMIX-1
is operated with the Gear switch and PMIX-2 is
selected with the Rudder D/R switch.
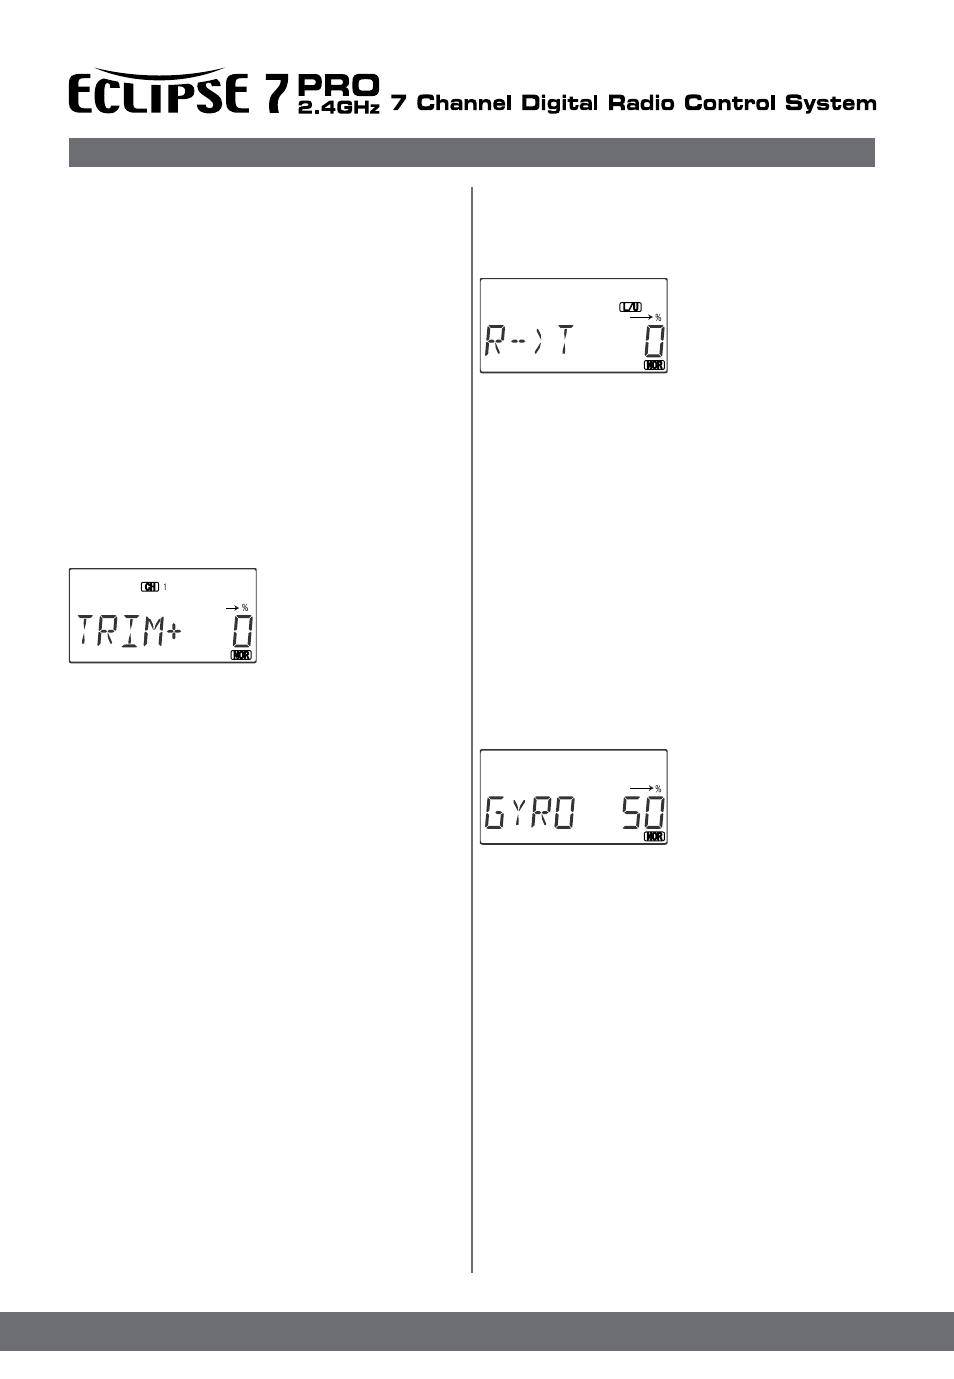
R->T - Rudder Throttle Mixing
Rudder Throttle (R->T) mixing is used to maintain rotor speed
so that altitude is kept constant when the rudder stick is oper-
ated in hover. The reason for this mixing is that when rudder is
commanded, the tail rotor consumes a little more power, which
reduces the power at the main rotor and the helicopter drops
or climbs. For helicopters with normal rotor rotation, command-
ing right rudder (which requires more power) should also
increase throttle slightly, while using left rudder (requires
less power) should decrease the throttle slightly. R->T
mixing is handy for hovering but may also be used in
540 stall turns, hovering eights, nose-in circles, Top
Hats, Pirouettes, and other aerobatics.
Setting Up Rudder-> Throttle Mixing
1. Press one of the Up
Down Edit buttons
repeatedly to select the
R->T window. The function
is activated by switching the
Flt. Mode switch all the way
back. It’s set to 0% on both sides so there is no differential.
2. To set the mixing amount for the left rudder, hold the
rudder stick to the left side (display shows L/U), and
press the Data Decrease key. Continue reducing the
percentage until you reach about 10%. If for some
reason you want a 0% setting, press the Active/ Inhibit
(Clear) key.
3. Input the mixing amount for right rudder by moving the
rudder stick to the right (display shows R/D), and press
the Data Increase or Decrease key to reach about 10%.
4. Note that R->T mixing may only be set up in the NOR
Menu
GYRO - Gyro settings
Gyro settings are used to automatically control the gyro’s
gain in different flight modes. It may be set to different
values in NOR, ST1, ST2, and ST3 flight modes, allowing
you to pick the gain you need for each circumstance.
The Gyro settings control the output at receiver CH7.
Using Gyro Settings
1. Press one of the Up Down
Edit buttons repeatedly to
get to the GYRO menu.
To begin with, the function
is already activated, but it’s
set to 50% in all four flight
modes.
2. To set the mixing amount for the normal (NOR) flight
condition, flip the Flt. Mode switch all the way back.
NOR will be flashing on and off. Set the percentage to
yield the desired gyro gain (this is usually a high-gain
setting). If for some reason you want a 0% setting, press
the Active/Inhibit (Clear) key.
3. Flip the Flt. Mode switch to its center position. ST1
will be appear instead of NOR . Set the percentage to yield
the desired gyro gain in this flight condition (this will usually be
a lower-gain setting for reduced damping in stunts).
4. Flip the Flt. Mode switch all the way forward. ST2 will
be appear . Set the percentage to yield the
desired gyro gain.
5. Now flip the Flt. Cond. switch fully forward. You may
now input a setting for ST3.
6. Make some test flights to try these settings out. Take
note of when more gain is need, and when less gain is
needed. You can adjust all of the gyro settings in each
flight condition to suit your machine.
Note: this function only works with dual rate heading hold
gyros.
HOLD - Throttle Hold
Flashing
Flashing
Flashing