Project 321 voice changer with headphones, Project 319 tone stoppers (v), Project 320 alarm light – Elenco Snap Circuits® Deluxe Sound & Light Combo User Manual
Page 139
-138-
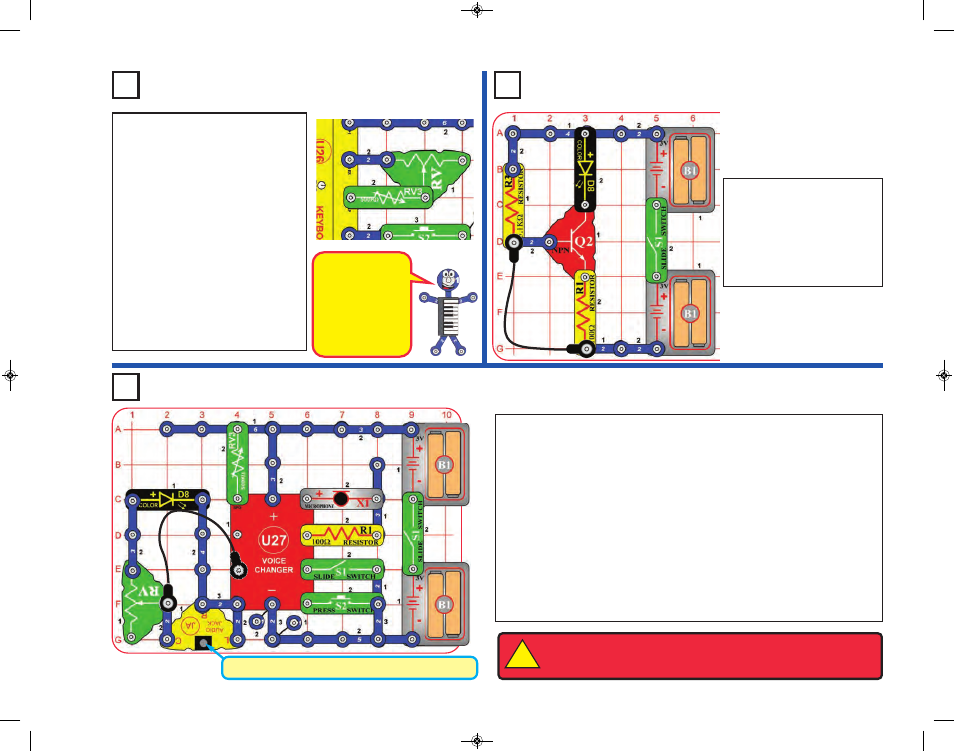
Project 319
Tone Stoppers (V)
Project 321
Voice Changer with Headphones
WARNING:
Headphones performance varies, so use caution. Start with
low volume, then carefully increase to a comfortable level. Permanent
hearing loss may result from long-term exposure to sound at high volumes.
!
Headphones or Stereo Speaker (not included)
This project requires stereo headphones or a stereo speaker (neither
included); connect them to the audio jack (JA). Set the 500kW adjustable
resistor (RV3) to mid-range. Turn on both slide switches (S1), you hear a
beep signaling that you may begin recording. Talk into the microphone until
you hear a beep (signaling that recording time is over), then turn off the left
slide switch to exit recording mode. Push the press switch (S2) to play back
the recording and flash the color LED (D8), and turn the knob on RV3 to
change the playback speed. You can play your recording faster or slower by
changing the setting on RV3.
Adjust the volume to your headphones or stereo speaker using the lever on
the adjustable resistor (RV).
Recording time is 6 seconds at normal speed, but this can be changed
depending on the setting of RV3 when you are making the recording.
In project 318, there is only sound for
a small part of RV3’s range, which
can be difficult to tune. To help,
modify the circuit to add the
adjustable resistor (RV) in series with
RV3, as shown. Slowly adjust RV
and RV3 to vary the tone from lowest
to highest possible, while pressing
S2 on and off, to see how the
capacitors (C7, or C2 or C5) change
the sound.
You can also replace RV3 with the
photoresistor (RP). Set RV to the left,
and then adjust the tone by varying
the light to RP, while comparing the
effects of the capacitors.
Build the circuit with the black
jumper wire connected as
shown, and turn it on.
Nothing happens. Disconnect
the jumper wire and the color
LED (D8)
comes
on,
signalling an alarm.
RV is more
sensitive and can
be adjusted from
200W to 50kW,
compared
to
200W to 500kW
for RV3.
Project 320
Alarm Light
SCC-350_Manual_Part_C.qxp 7/25/14 2:11 PM Page 27