Project 203 keyboard with voice changer, Project 204 optical keyboard with voice changer, Project 205 – Elenco Snap Circuits® Deluxe Sound & Light Combo User Manual
Page 104: Keyboard voice changer & light
-103-
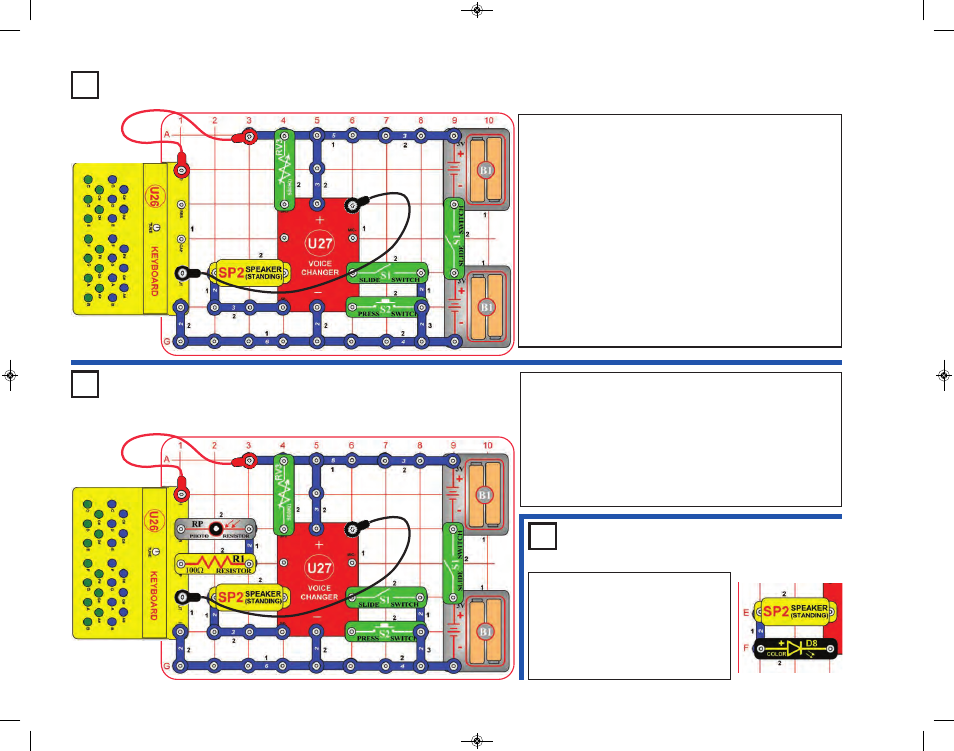
Project 203
Keyboard with Voice Changer
Project 204
Optical Keyboard
with Voice Changer
Project 205
This circuit is similar to the preceding one, but adds optical
control. Modify the preceding circuit by adding the
photoresistor (RP) and the parts next to it.
When making your recording, wave your hand over the
photoresistor to change the sound recorded, in addition to
pressing keys. The photoresistor may have no effect if there is
too much or too little light on it, so adjust the light on it if
necessary.
Use either of the preceding circuits,
but replace the 3-snap wire that is next
to the speaker (SP2) with the color
LED (D8, “+” to the left). Now when
you press S2 to play the recording, the
sound will not be as sound, but the
color LED will be flashing.
Set the 500kW adjustable resistor (RV3) to mid-range, turn OFF
the left slide switch (S1), and then turn on the right slide switch.
Now turn on the left slide switch, you hear a beep signaling that
you are recording. Press keys on the keyboard (U26) until you
hear a beep (signaling that recording time is over), then turn off
the left slide switch to exit recording mode. Push the press
switch (S2) to play back the recording, and turn the knob on
RV3 to change the playback speed. You can play your
recording faster or slower by changing the setting on RV3.
The keyboard overhangs the base grid, so be sure the
connections to it stay secure as you are pressing keys.
Recording time is 6 seconds at normal speed, but this can be
changed depending on the setting of RV3 when you are making
the recording. You won’t hear the notes when you are pressing
the keys during recording; you only hear them during playback.
Keyboard Voice
Changer & Light
SCC-350_Manual_Part_B.qxp 7/25/14 2:06 PM Page 48