Project 264 adjustable led keyboard control – Elenco Snap Circuits® Deluxe Sound & Light Combo User Manual
Page 124
-123-
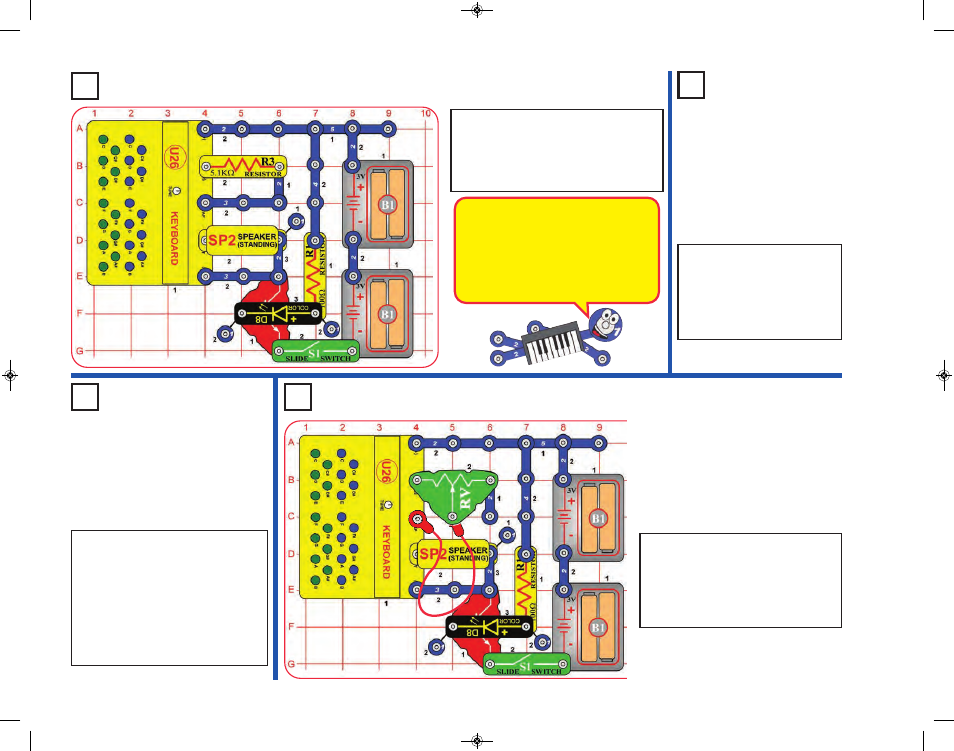
Project 261
LED Keyboard Control
Project 262
LED
Keyboard
Control (II)
Project 263
Photo LED
Keyboard
Control
Use the project 261 circuit, but
replace the 5.1kW resistor (R3) with
the photoresistor (RP). Wave your
hand over the photoresistor or adjust
the room lighting to vary the amount
of light shining on the photoresistor,
and listen to the sounds. You can
also press keys on the keyboard
(U26) to add more sounds.
Build the circuit, and turn on the slide
switch (S1). You hear a sound pattern
that is synchronized with the color LED
(D8) flashing. You can press keys on the
keyboard (U26) to change the sound.
Use the preceding circuit, but
remove the 5.1kW resistor
(R3). Now there is only sound
when you press keys on the
keyboard, and the sounds for
some keys are different.
Modify the project 261 circuit to match
this one. Turn on the slide switch (S1)
and move the lever on the adjustable
resistor (RV) to vary the sounds. You
can also press keys on the keyboard
(U26) to add more sounds.
Project 264
Adjustable
LED Keyboard
Control
The color LED turns off briefly when it
changes colors. Here the color LED
controls the keyboard through the
transistor (Q2), so when the color LED
turns off, the keyboard sound is also
turned off. This produces the sound
effects you hear.
SCC-350_Manual_Part_C.qxp 7/25/14 2:10 PM Page 12