Project 221 adjustable dual range keyboard – Elenco Snap Circuits® Deluxe Sound & Light Combo User Manual
Page 110
-109-
Project 219
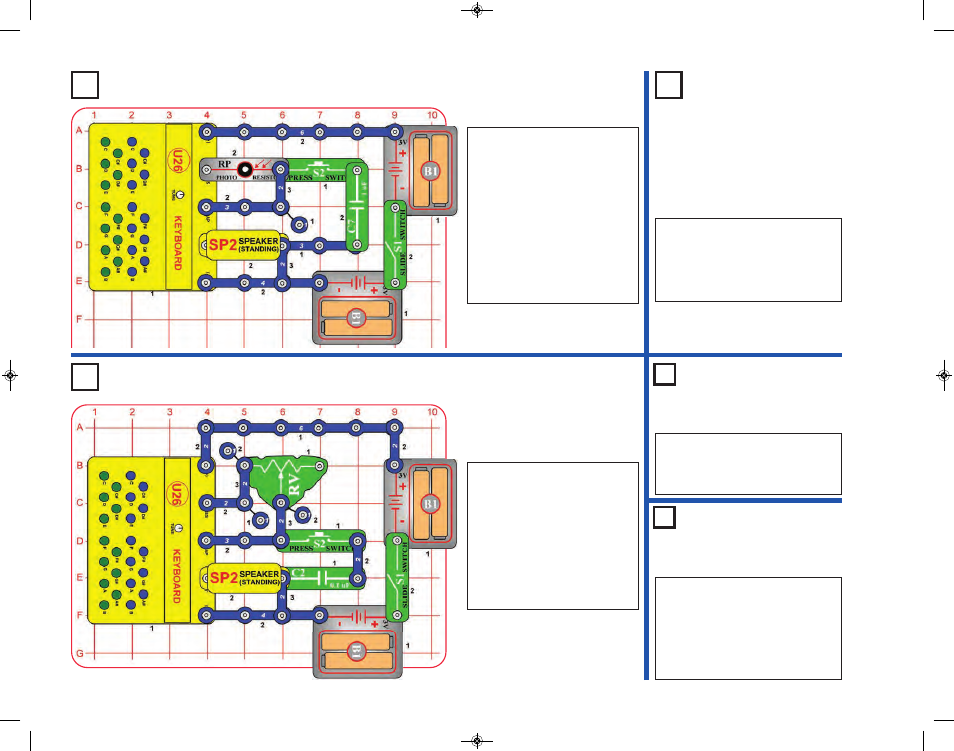
Keyboard with Optical Theremin
Project 220
Keyboard with
Optical
Theremin (II)
Project 222
Adjustable Dual
Range Keyboard (II)
Project 223
Adjustable Dual
Range Keyboard (III)
Use the preceding circuit, but replace the
1mF capacitor (C7) with the
100mF
capacitor (C4, “+” on left) or
470mF
capacitor (C5, “+” on left). You will hear a
click at regular intervals. The interval
depends on the RV setting, it could be
several per second or many seconds apart.
Build the circuit as shown and
turn on the slide switch (S1).
Press keys on the keyboard
(U26) and move the lever on the
adjustable resistor (RV) to
change the sound. Push the
press switch (S2) to change the
pitch of the green keys. There
may not be any sound at some
settings on RV.
Use the preceding circuit, but replace
the 0.1mF capacitor (C2) with the 1mF
capacitor (C7). The pitch of the green
keys is lower when S2 is pressed.
Use the preceding circuit, but
replace the 1mF capacitor (C7) with
the 0.1mF capacitor (C2). The pitch
of the green keys is higher when
S2 is pressed.
Build the circuit as shown and
turn on the slide switch (S1).
Press keys on the keyboard
(U26), wave your hand over the
photoresistor (RP) to adjust the
amount of light shining on it, and
listen to the sound. Push the
press switch (S2) to change the
pitch of the green keys. There
may not be any sound if there is
too much or too little light on the
photoresistor.
Project 221
Adjustable Dual Range Keyboard
SCC-350_Manual_Part_B.qxp 7/25/14 2:06 PM Page 54