Press echo project 299 photo echo, Project 300 loud press photo echo, Project 298 – Elenco Snap Circuits® Deluxe Sound & Light Combo User Manual
Page 133
-132-
Project 301
Knob Echo
Project 297
Super Voice Echo with Light
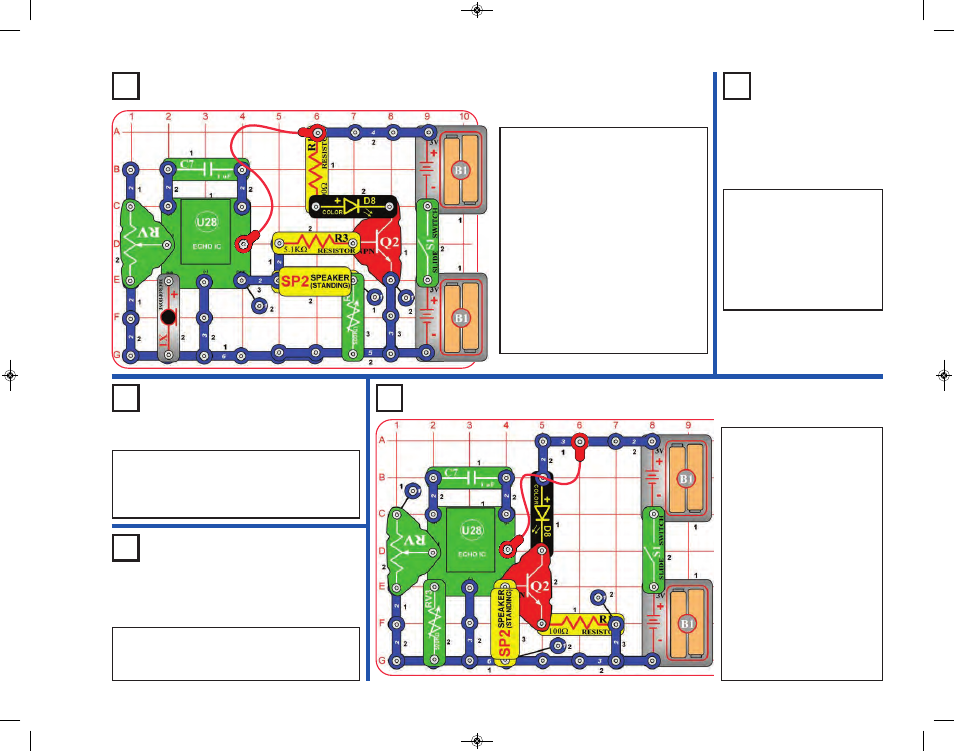
Project 298
Press Echo
Project 299
Photo Echo
Build the circuit as shown,
turn on the slide switch (S1),
and turn the knob on the
500kW adjustable resistor
(RV3). You hear clicking in the
speaker (SP2), and the color
LED (D8) flashes. Adjust the
amount of echo using the
lever on the adjustable
resistor (RV). Try this at
different RV settings.
If you remove the speaker
(SP2) from the circuit then the
color LED (D8) will be a little
brighter, because the echo IC
(U28) isn’t trying to control the
speaker at the same time.
Use the preceding circuit, but
replace the microphone (X1)
with the press switch (S2).
Set RV3 to max volume (turn
it to the left). Press S2 to see
light on the color LED (D8),
and hear a clicking sound
from the speaker (SP2).
Build the circuit as shown, and turn on
the slide switch (S1). Talk into the
microphone, and listen the echo on the
speaker, and see it on the color LED
(D8). Set the sound volume using the
knob on the 500kW adjustable resistor
(RV3). Adjust the amount of echo using
the lever on the adjustable resistor
(RV).
Note: There will only be sound if RV3
is set towards the left (most of its range
will have no sound). Also, at the loudest
RV3 setting the circuit may oscillate
and make a whining sound; just set the
RV3 volume a little lower to stop it.
Use the preceding circuit, but replace the press
switch (S2) with the photoresistor (RP), Adjust
the amount of light shining on the photoresistor
to change the sound and light.
Use the circuit from project 298 (with S2) or 299
(with RP), but replace RV3 with a 3-snap wire. The
sound will be louder but the light will be dimmer.
Project 300
Loud Press
Photo Echo
SCC-350_Manual_Part_C.qxp 7/25/14 2:10 PM Page 21