Project 207 sound controlled light, Project 206 voice changer with echo – Elenco Snap Circuits® Deluxe Sound & Light Combo User Manual
Page 105
-104-
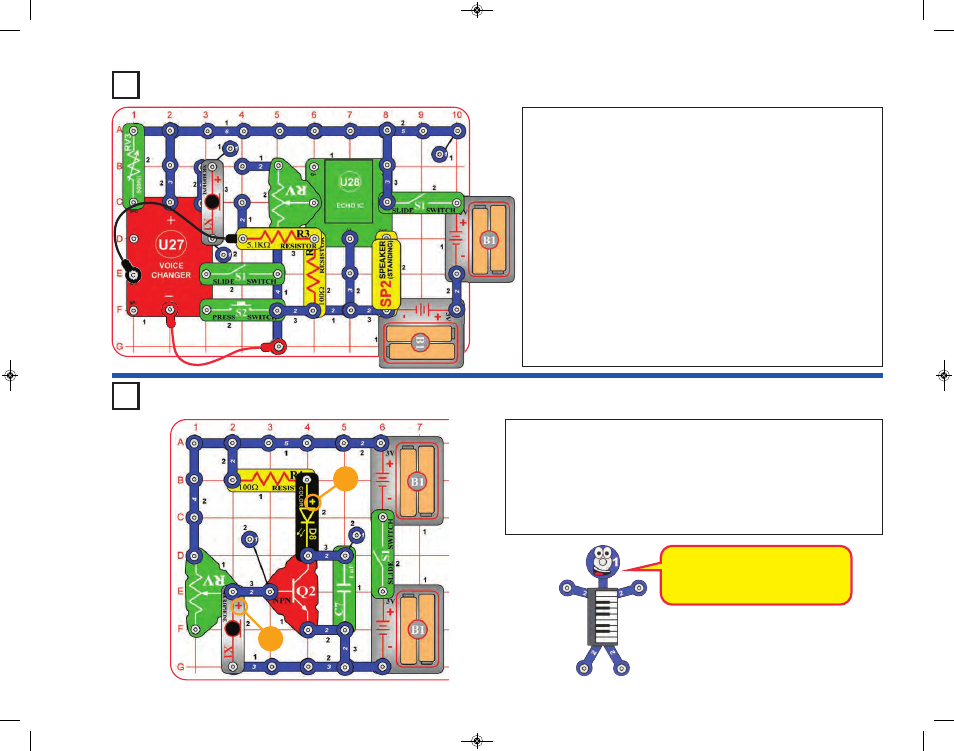
Project 207
Sound Controlled Light
If the adjustable resistor’s lever is set too
low then the color LED will never turn
on; if it is set too high then the color LED
will never turn off.
+
+
Project 206
Voice Changer with Echo
Build the circuit as shown. Turn on the switch (S1) and set the lever on
the adjustable resistor (RV) so the color LED (D8) is just off. Talk loud into
the microphone (X1) or clap loudly near it to activate the color LED. Try a
long loud “ahhhhhhhh” directly into the microphone; this can make the
color LED change patterns.
The color LED may not be very bright, so this circuit works best in a dimly
lit room.
Build the circuit as shown; note that the microphone (X1) is covering a
2-snap wire, and that the 5.1kW resistor (R3) is a tight fit over the
adjustable resistor (RV) but does fit. Set the 500kW adjustable resistor
(RV3) to mid-range, set the adjustable resistor (RV) lever towards R3,
turn OFF the left slide switch (S1), and then turn on the right slide
switch.
Now turn on the left slide switch, you hear a beep signaling that you
are recording. Talk into the microphone (X1) until you hear a beep
(signaling that recording time is over), then turn off the left slide switch
to exit recording mode. Now move the lever on RV to set the echo level,
turn the knob on RV3 to change the playback speed, and push the
press switch (S2) to play back the recording. You can play your
recording faster or slower by changing the setting on RV3, and with
more or less echo by changing the setting on RV.
Recording time is 6 seconds at normal speed, but this can be changed
depending on the setting of RV3 when you are making the recording.
RV should be set for no echo when making a recording.
SCC-350_Manual_Part_B.qxp 7/25/14 2:06 PM Page 49