Lettering - shapes and modes, Professional sew-ware – SINGER PSW 1.10-WORKBOOK User Manual
Page 26
Attention! The text in this document has been recognized automatically. To view the original document, you can use the "Original mode".
Professional Sew-Ware
Lettering - Shapes and Modes
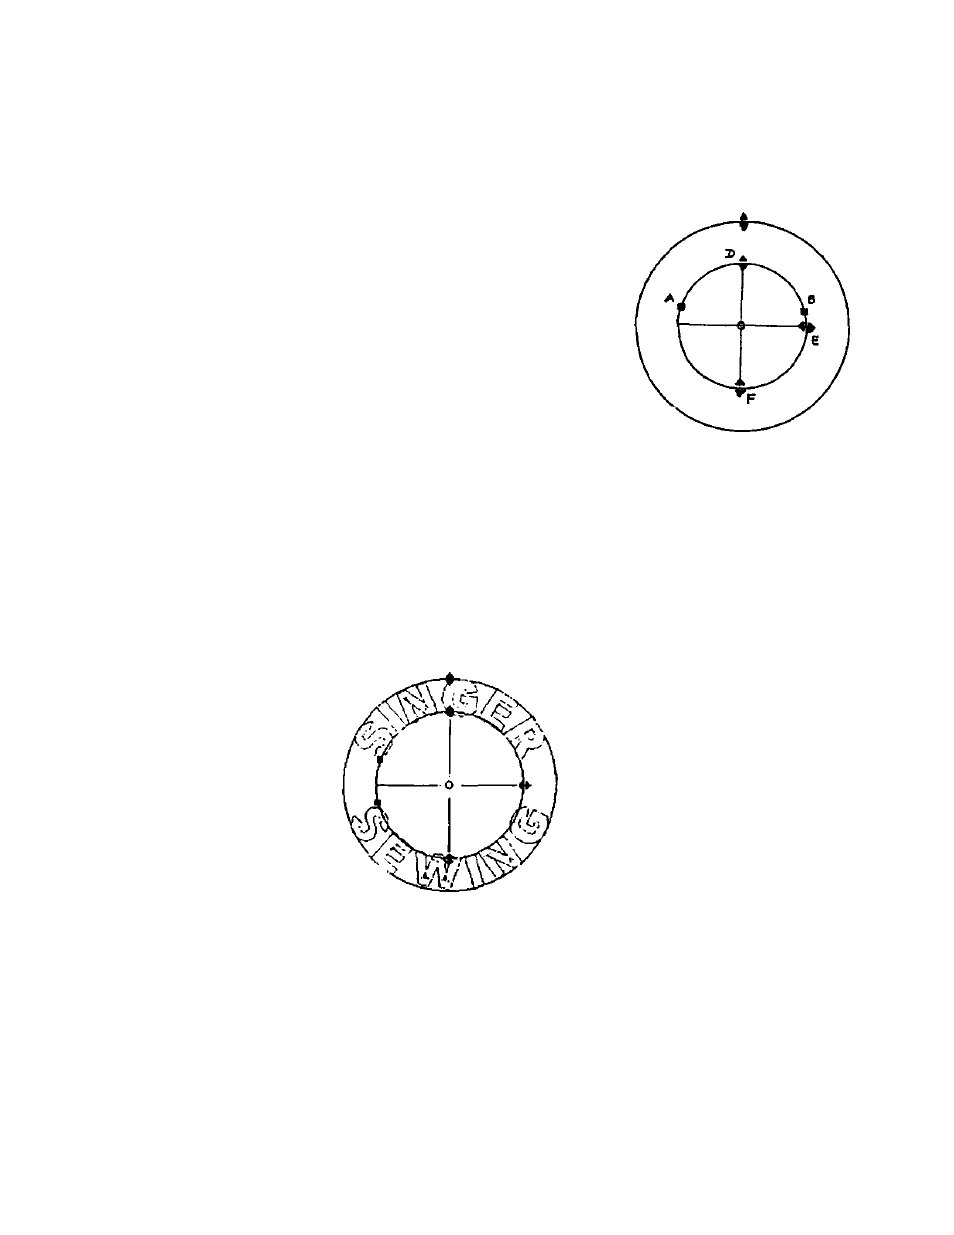
Reference points on the circle allow for further
alteration of word placement and circular shapes.
Click and drag on the various points of the circle to
manipulate the shape as desired.
A - move beginning point of 1*‘ word in the circle
B - move end point of last word in the circle
C - move outside circumference up or down
D - move inside circumference up or down
E - change circle into ellipse horizontally
F - change circle into ellipse vertically
Click on Letters frame.
Click on third of 3 circle shapes
Click on the Letter icon in the left vertical tool bar. In the Text box type
SINGER; press the ENTER key on the keyboard and type Sewing. This will
place the text on two separate lines. Click OK.
(Use the following settings: Font; Block Small - Size: 200, Space: 20, Justify
Center, Density 5.0)
Click on the Letters frame icon. Choose the third circle shape position the
text will be in the upper and lower part of the circle.
9 Circle Shapes, Point Mode
Click on Point Mode.
Now letters may be individually manipulated while in circle form. (There will
be reference points on each individual letter)
10. Click the right mouse to input the stitches.
11. Click on the Special Function icon and choose STOP to insert a color stop.
24