Channel a (up). yr (down) buttons, Menu buttons, S.-vhs (aux3) – Philips LCD PROJECTOR User Manual
Page 6: Audio tacks, Video in (aux 3), Headphones " a, Mirror, Etting, Tarted, Rojector
Attention! The text in this document has been recognized automatically. To view the original document, you can use the "Original mode".
G
etting
S
tarted
- P
rojector
C
ontrols
(
continued
)
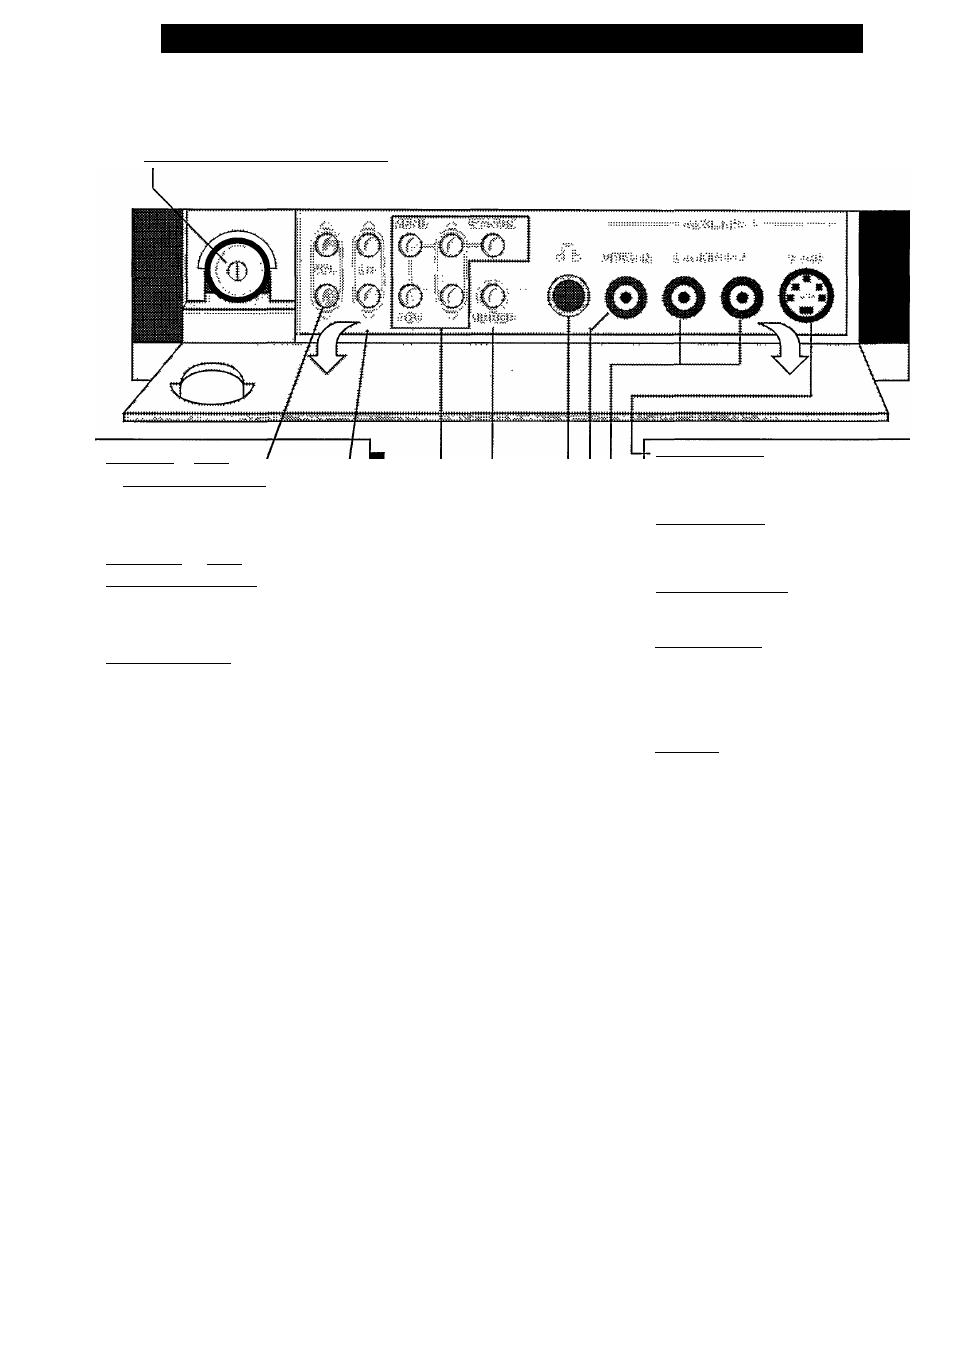
Projector Front Panel Buttons and Jacks
POWER ON / STAND BY BUTTON
VOLUME A (UP).
•W
(DOWN> BUTTONS
Press to adjust the Projector sound
level.
CHANNEL A (UP).
yr
(DOWN) BUTTONS
Press to scan up or down through the
channel numbers.
MENU BUTTONS ------------------
Press the MENU button to display On-
Screen feature controls.
Press ADV(ance) to move through the list
of On-Screen features.
Press
A
to get a menu of a selected On-
Screen feature.
Press
A
and
'y
to adjust the menu item
selected.
In Menu mode, press STATUS (EXIT) to
switch On-Screen displays OFF.
In normal mode, press STATUS (EXIT)
once to get short display of settings, twice
to get long, more detailed display.
S.-VHS (AUX3)
Jack for S-VHS, Video input from VCR or
camcorder.
AUDIO TACKS
L(eft) jack for left-channel audio input.
R(ight) jack for right-channel audio input.
VIDEO IN (AUX 3)
RCA Jack for VCR or camcorder.
HEADPHONES " A "
Jack for headphones (6,3 mm).
You can switch off the internal speaker with
the IN IEKNAUEX
i
E
k
NAL speaker switch
on die back of the Projector (See page 7).
MIRROR
This button controls an internal electronic
“mirror” which determines how the picture
appears on your screen. You only need to use
this control when you want to use the
Projector with a rear projection screen or
minor. Each time you press the button it
changes the orientation of the picture on
your screen (See page 11).
The Projector 'remembers' its last setting.