Choosing the screen size, Etting, Tarted – Philips LCD PROJECTOR User Manual
Page 11: Rojector, Creen, Continued
Attention! The text in this document has been recognized automatically. To view the original document, you can use the "Original mode".
G
etting
S
tarted
- S
etting
up
the
P
rojector
+ S
creen
(
continued
)
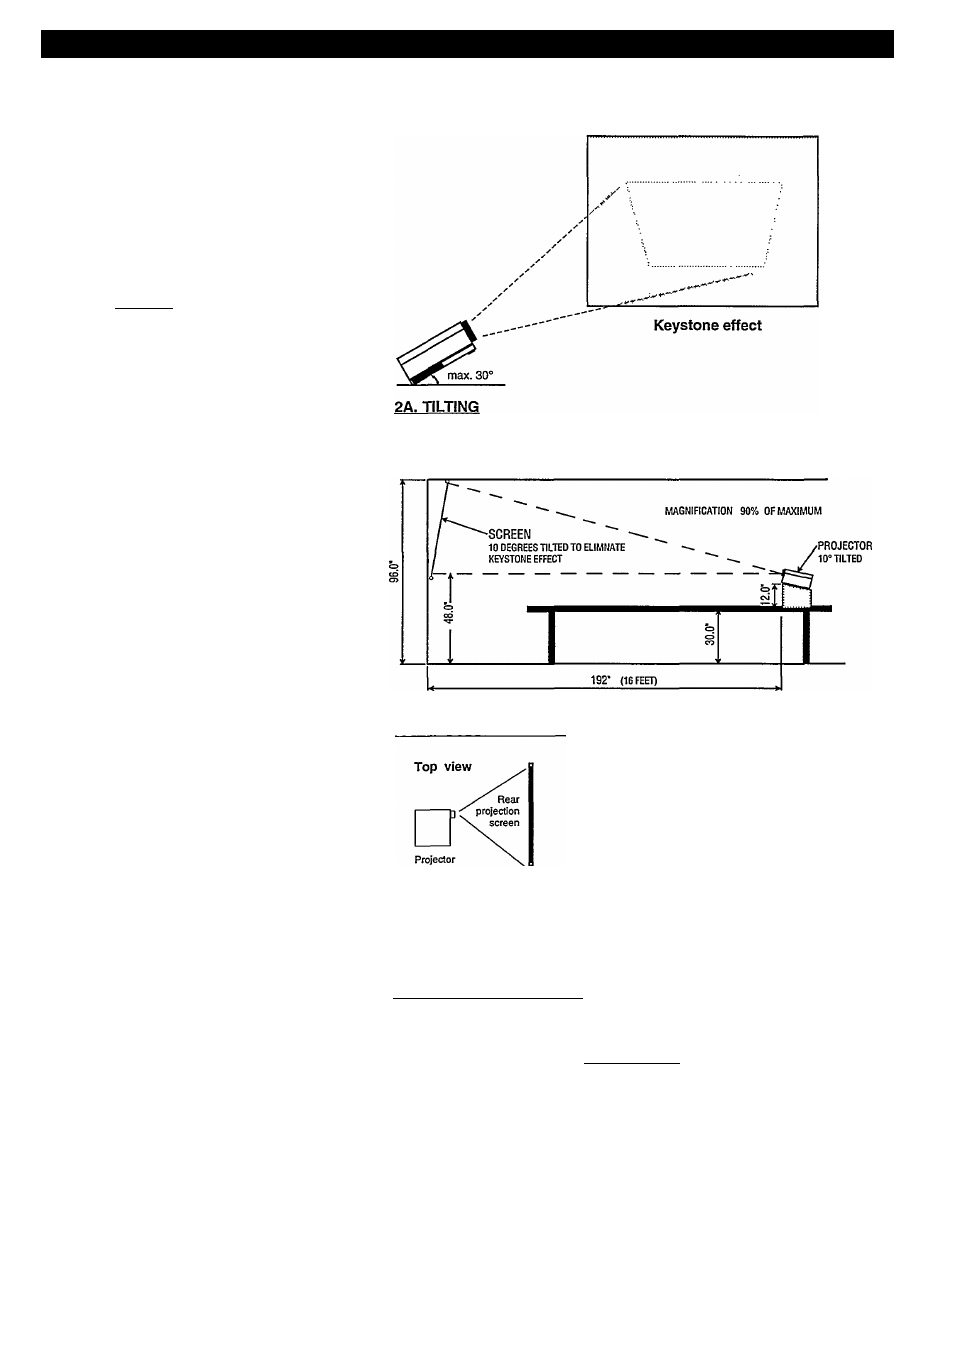
If you cannot put the Projector at the
same height as the top of the screen, but
rather lower, you have two choices:
2 A. The front of the Projector can be
tilted upwards; the picture will not then be
perfectly rectangular when the screen
hangs vertically. This is called the
"keystone” effect.
Note: The Projector should not be tilted
up or down more than 15 degrees from its
normal horizontal position.
2B. If you want to use the Projector with a
rear projection screen or in a ceiling mount
(Projector positioned upside down), you
will need to change the internal mirror.
You do this using the button marked
MIRROR which is behind the swing-out
control door on the front panel. Each time
you press MIRROR, the picture on the
screen changes orientation.
3) Choose the size of screen
Choose a screen size that fits the planned
seating capacity and room dimensions.
A good guide is:
* Two times the screen width should equal
the distance from the screen to the front
row of seats
* Six times the screen width should equal
die distance from the screen to the back
row of seats.
SAMPLE SET-UP FOR TABLE TOP USE
2B. REAR PROJECTION
viewers
3. CHOOSING THE SCREEN SIZE
Top view
6 X screen width
viewers | ^ 2 x screen
width ^ ^
Back
row ^
Front
row
screen
width
i
11