Lighting, Mounting, Top view – Philips LCD PROJECTOR User Manual
Page 10: Etting, Tarted, Rojector, Creen
Attention! The text in this document has been recognized automatically. To view the original document, you can use the "Original mode".
G
etting
S
tarted
- S
etting
up
the
P
rojector
+ S
creen
P
roper installation of your Projector will
ensure that you make the most ofthe
set's features. Read all of pages 10 throu^
12 carefidly before starting to install your
Projector.
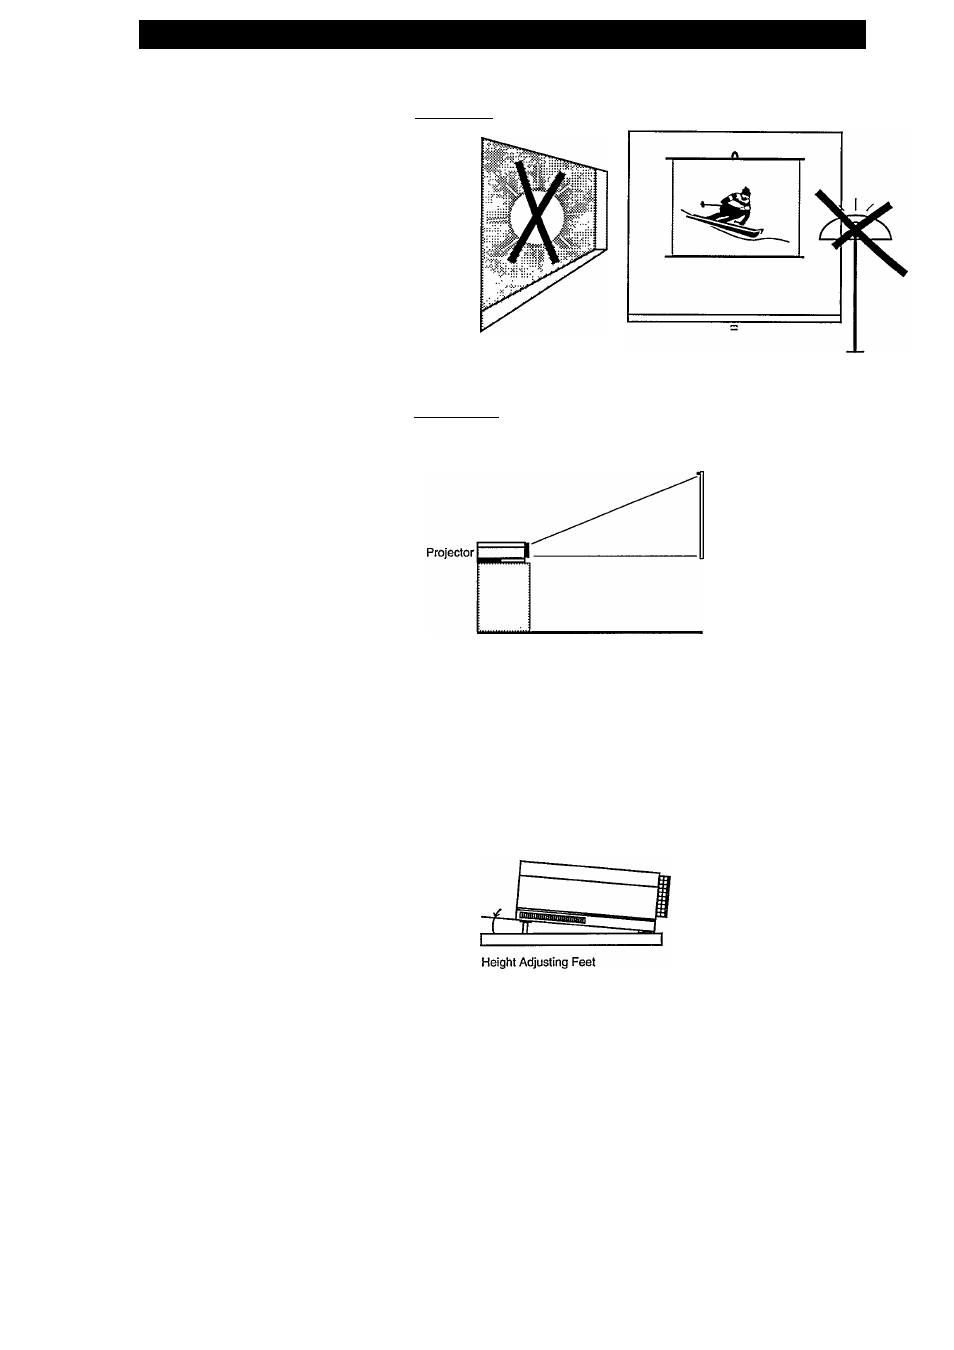
1) Choose the screen position
You get maximum picture contrast when
the least ambient light fells on the
screen. Place the screen where light from
windows, room lighting etc. does not
disturb the picture.
2) Choose the Projector position
Ideally, the Projector should be located
at about the same height from the floor
as the top of the screen and directly in
front of it
The Projector can be placed on a wall-
mounted shelf (minimum size 17 x 24
inches), a cabinet top, or a rack can also
be used. Make sure you can hide the
cables connected to the set
The Projector has adjustable feet at the
rear. Turn these if you need to point the
Projector downwards to the screen.
1. LIGHTING
2. MOUNTING
Side view
Top of screen
Projection Screen
Top view
SO"
Side view
to
lower
to
raise
(Continued on next page)
10