Replacing the lamp (continued), Operating hours timer, Features screen – Philips LCD PROJECTOR User Manual
Page 55: Operating hours timer menu screen
Attention! The text in this document has been recognized automatically. To view the original document, you can use the "Original mode".
R
eplacing
T
he
L
amp
(
continued
)
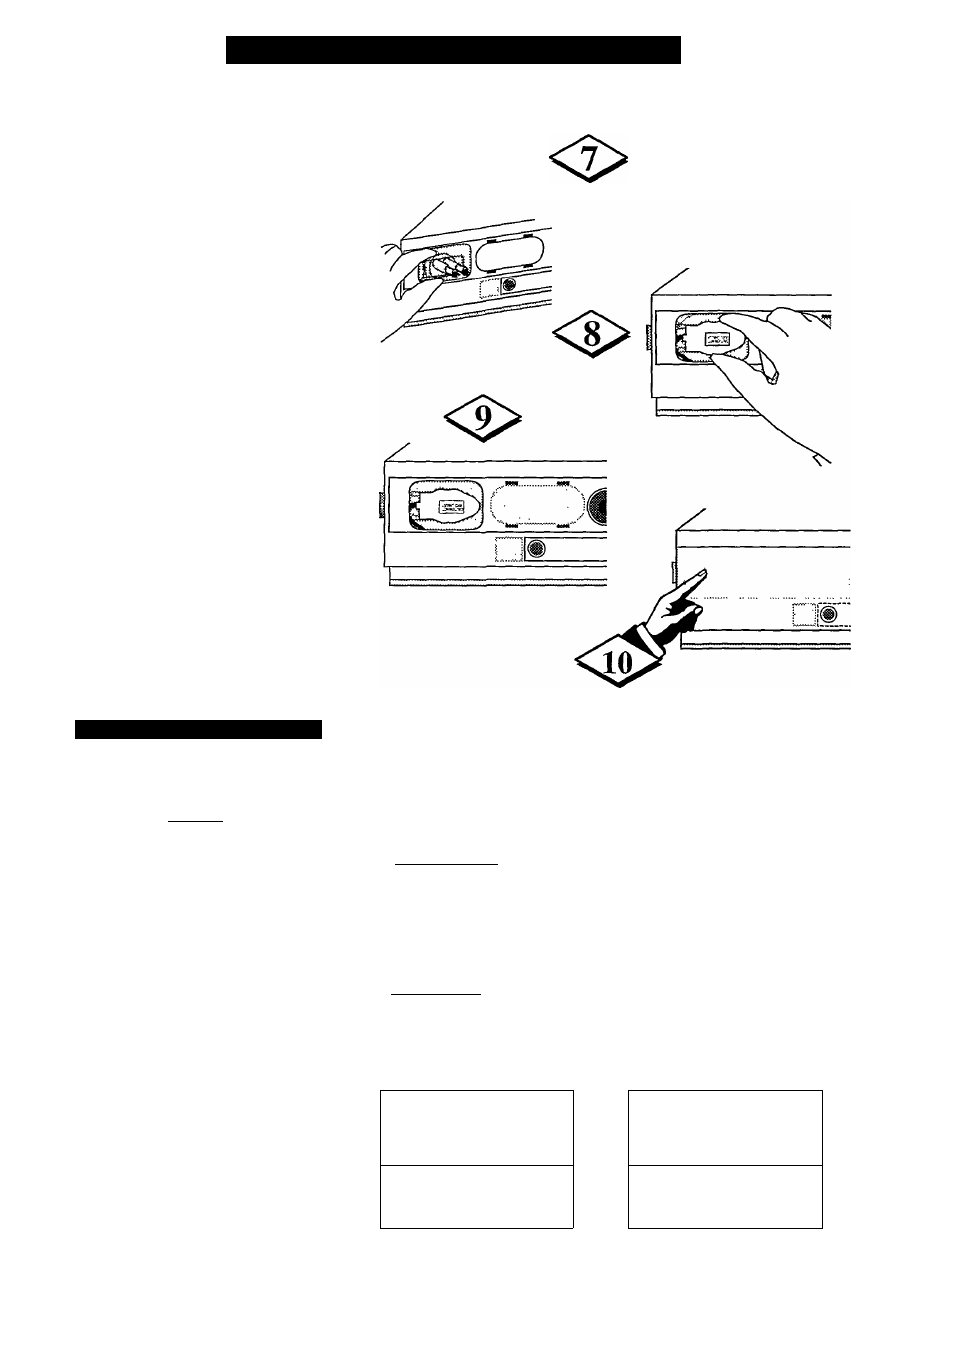
Hold the spring clips between the
tliumb and forefinger of your left hand and
swing the assembly back into position over the
lamp base. Press the clips together, push down
and release them so they lock into position.
<8>
Push the lamp coimector onto its base
until you feel a slight 'click'. Make sure the
cable fits between the spring clips as shown in
the diagram.
Replace the spare lamp cover.
<#■ Press the front grille back into
position making sure that the front left side
latch clicks firmly into its slot.
Plug in the power line and press the
ON switch.
OPERATING HOURS TIMER
A
fter replacing the lamp, you must reset the
operating hours timer.
I
BEGIN
I
Press MENU (or M button on the
remote) to show MAIN MENU.
Press 5 on the remote to select
FEATURES (on the MAIN Menu).
Press
6
on the remote to select
OPERATING HOURS TIMER.
Press 2 on the remote to select RESET
OPERATING HOURS.
Press + to reset OPERATING HOURS.
You will see the operating hours
screen with 0000 HRS.
<$> Press the STATUS/EXIT button to
return to normal viewing.
PUSH
0TO
VIEW
OR
RESET
OPERATING HOURS TIMER
1. TIMESET
2. OPTIONS
3. CAPTIONS
4. CHANNEL CONTROL
5. PERSONAL PREFERENCE
16. OPERATING HOURS TIMER
7. AUTOSTART
1253 HOURS
FEATURES Screen
11. OPERATING HOURS_____________
2. RESET OPERATING HOURS
OPERATING HOURS TIMER
MENU Screen
PUSH Q
t
O RESET
0000 HOURS
OPERATING HOURS
1. OPERATING HOURS
11. OPERATING HOURS 1
|2. RESET OPERATING HOURS |
2.
RESET OPERATING HOURS
55