Nput, Uning, Ontrol – Philips LCD PROJECTOR User Manual
Page 27: Dtustments, Continued
Attention! The text in this document has been recognized automatically. To view the original document, you can use the "Original mode".
I
nput
(T
uning
) C
ontrol
A
dtustments
(
continued
)
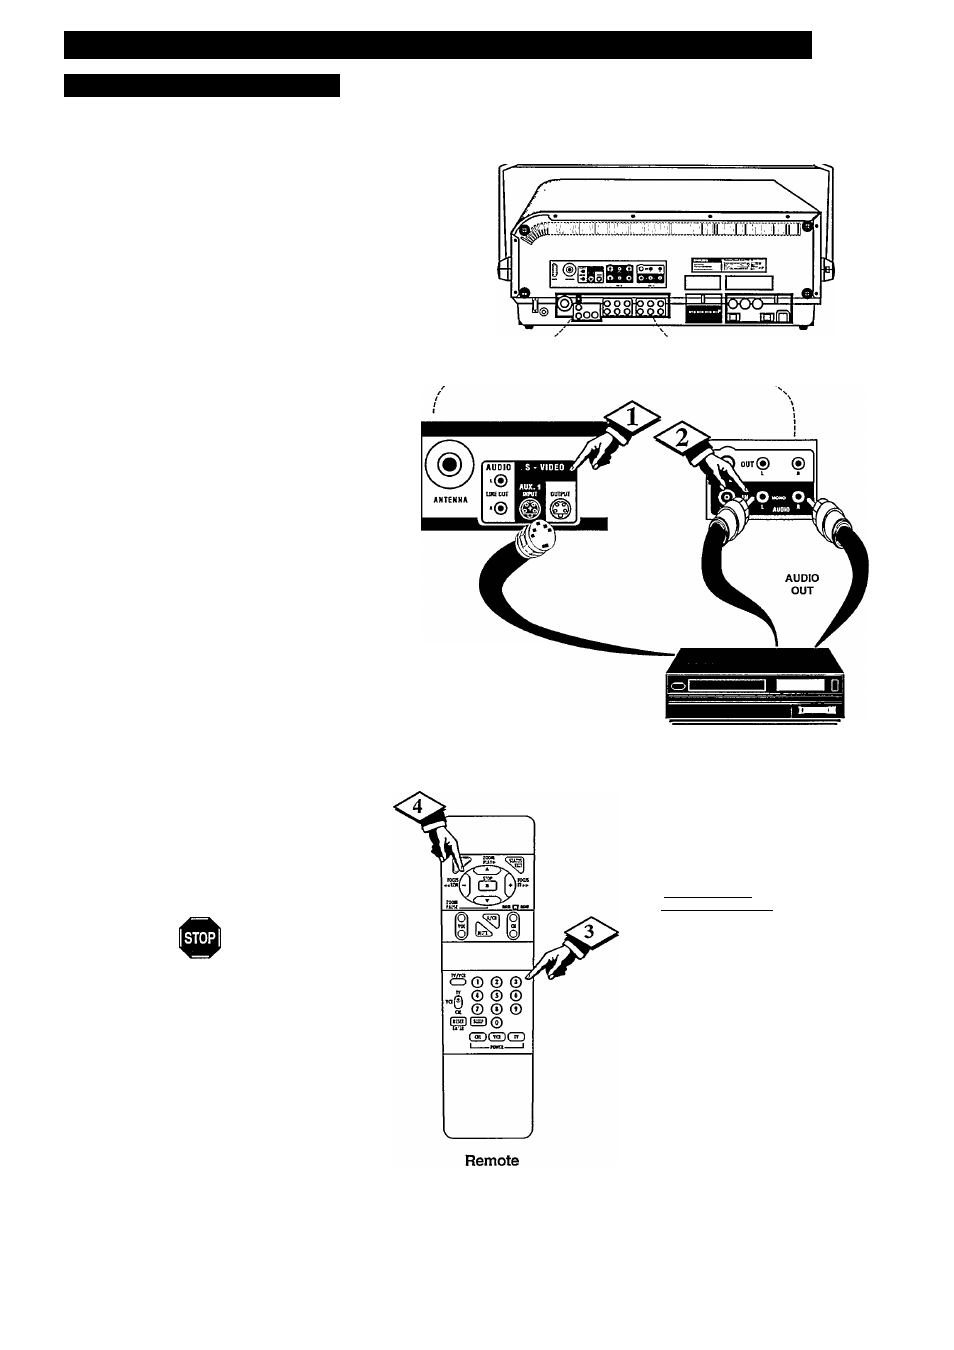
3. PICTURE SOURCE - S-VIDEO
T
he S(uper)'VIDEO connection available
on the rear of the Projector can result in far
better picture clarity and detail, for the playback of
VCR tapes or Video Discs, than the normal
antenna connections.
Note: The VCR (or Compact Disc Player) must
be equipped with a S-VIDEO OUT(put) jack in
order to complete the connections shown on this
page.
I
BEGIN
I
Connect the S-VIDEO (or S-VHS)
OUT jack from the VCR (or CDV) to the
S-VIDEO IN jack on the Projector.
,
Connect the AUDIO OUT jacks
R(ight) and L(eft) from the VCR to the
AUX 1 AUDIO IN jacks on the Projector.
Select PICTURE SOURCE control
on the Projector.
With the INPUT Menu displayed, press 3 for
PICTURESOURCE.
:
Press the (+) or (-) buttons to place
die Projector in the AUX 1 mode for
S-VIDEO 1.
"AUX 1" is highlighted to confirm the
setting.
Turn the VCR (or CDV) ON and
place it in the S-VIDEO (or S-VHS)
playback mode. Insert S-VHS cassette tape
and playback in a normal manner.
Press STATUS/EXIT to see: S-VIDEO 10:04.
Remember. The S-VIDEO
connecting cable will be supplied with the
S-VHS VCR (or Compact Disc Player).
S-Video (or S-VHS) and audio can also be
connected to the front panel jacks (AUX 3)
Back of Projector
S-VIDEO OUT
VCR
ANTENNA
RGB
I
AUX 1
I
AUX 2 AUX 3
1. TUNING
2. CHANNEL SCAN
|3. PICTURE SOURCE
I
INPUT Screen:
PICTURE SOURCE
Adjustment
Selected
27