Picture source - aux 1,2 and 3, Picture source - aux 1, aux 2 & aux 3, Nput – Philips LCD PROJECTOR User Manual
Page 26: Uning, Ontrol, Djustments, Continued
Attention! The text in this document has been recognized automatically. To view the original document, you can use the "Original mode".
I
nput
(T
uning
) C
ontrol
A
djustments
(
continued
)
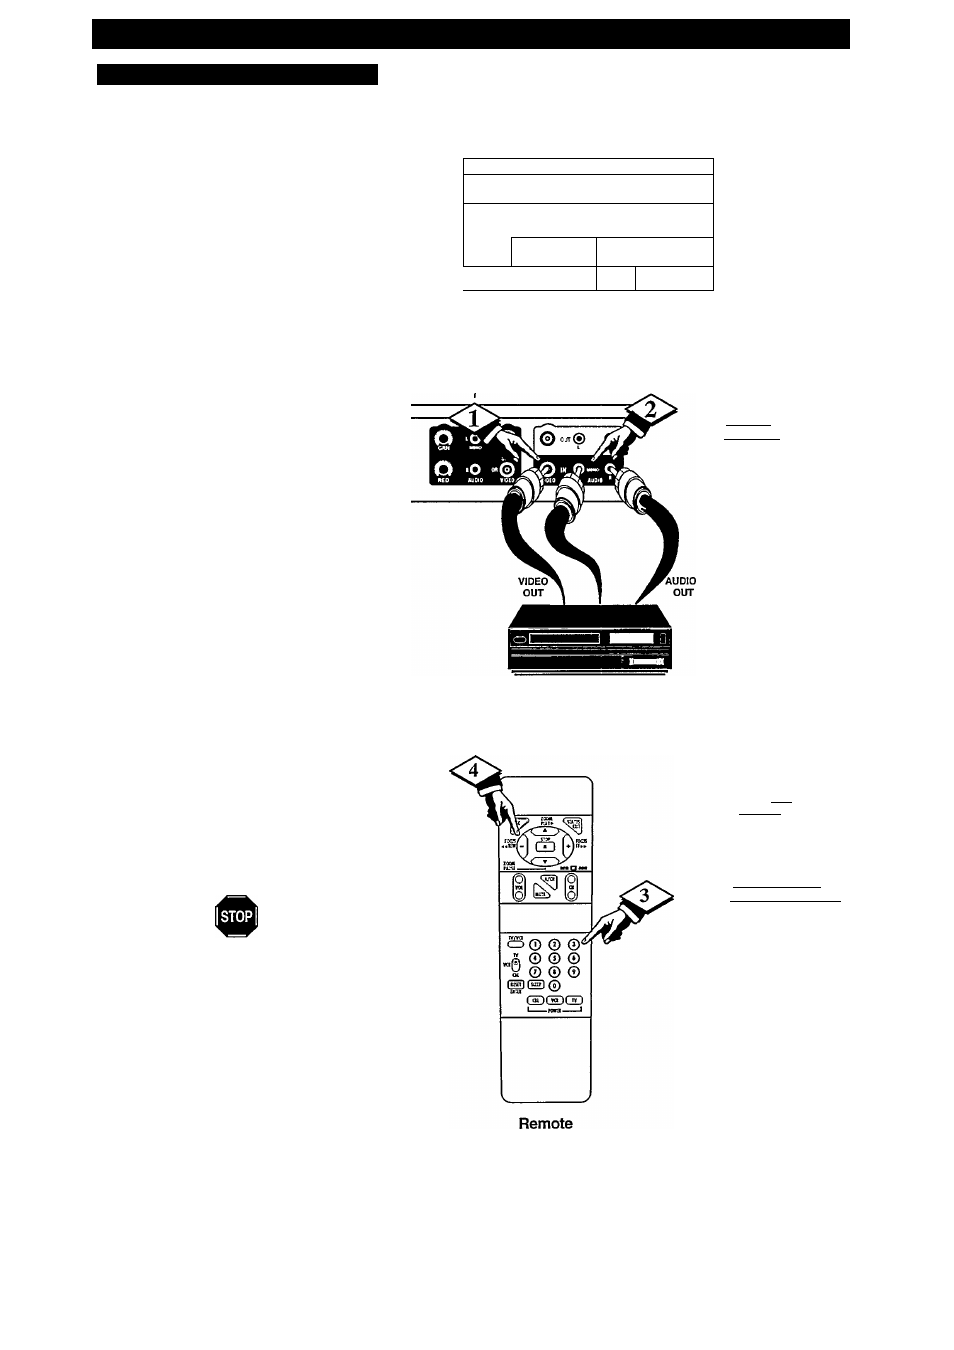
3. PICTURE SOURCE - AUX 1,2 and 3
T
he Projector's Picture Source controls allow
you to use the INPUT jacks (Audio,
Video and S(uper)'Video located on the jront and
rear of the Projector. The Projector's INPUT
jacks may be used for direct picture and sound
connections with VCRs (or Video Disc Players,
etc) that have their oivn Audio/Video OUTPUT
jacks.
To view the playback of a VCR tape (or Video
Disc) by using the Audio/Video jacks on the
Projector:
BEGIN
I
Connect the VIDEO OUT jack
from the VCR (or CDV) to the AUXl
VIDEO IN jack on the Projector.
Coimect the AUDIO OUT jacks
R(ight) and L(eft) from the VCR to the
AUX 1 AUDIO IN jacks on the Projector.
Select PICTURE SOURCE control
on the Projector.
With the INPUT Menu displayed, press 3 for
PICTURE SOURCE
Press the (+) or (-) buttons to place
the Projector in the AUX 1 mode.
"AUX 1" is highlighted to confirm the
setting.
Press STATUS/EXIT to clear screen.
Turn the VCR (or CDV) ON and playback
the tape (or disc) in a normal manner.
Connections and operation of the
Projector's AUX 2 and 3 INPUT jacks are frie
same as those described for the AUX 1 jacks
(except" AUX 2 or 3" is selected as the
PICTURE SOURCE)
PICTURE SOURCE RGB
Connect RGB and SYNC to the AUX 2
inputs and select RGB as picture source.
(The SYNC signal must be composite
negative sync.)
(Continued on next page)
Back of Projector
/
—X
ttiTiminiiiffiTiiiTiiirmiTif
's' IfiUfil <
'rt
:;D~
CU--------------- 1 ..
BB
CD on
VCR
TELEVISION ADJUSTMENTS
1. AUDIO
2. VIDEO
|3. INPUT I
4. DATA INPUT
5. FEATURES
6. LENS CONTROL
7. CLOSED CAPTIONING
AOTENNA RGB
I
AUX 1
I
AUX 2 AUX 3
1. TUNING
2. CHANNEL SCAN
|3. PICTURE SOURCE I
INPUT Screen:
PICTURE SOURCE
Adjustment
Selected
(Continued on next page)
26