Back of projector, Input screen, Nput – Philips LCD PROJECTOR User Manual
Page 28: Uning, Ontrol, Djustments, Continued
Attention! The text in this document has been recognized automatically. To view the original document, you can use the "Original mode".
I
nput
(T
uning
) C
ontrol
A
djustments
(
continued
)
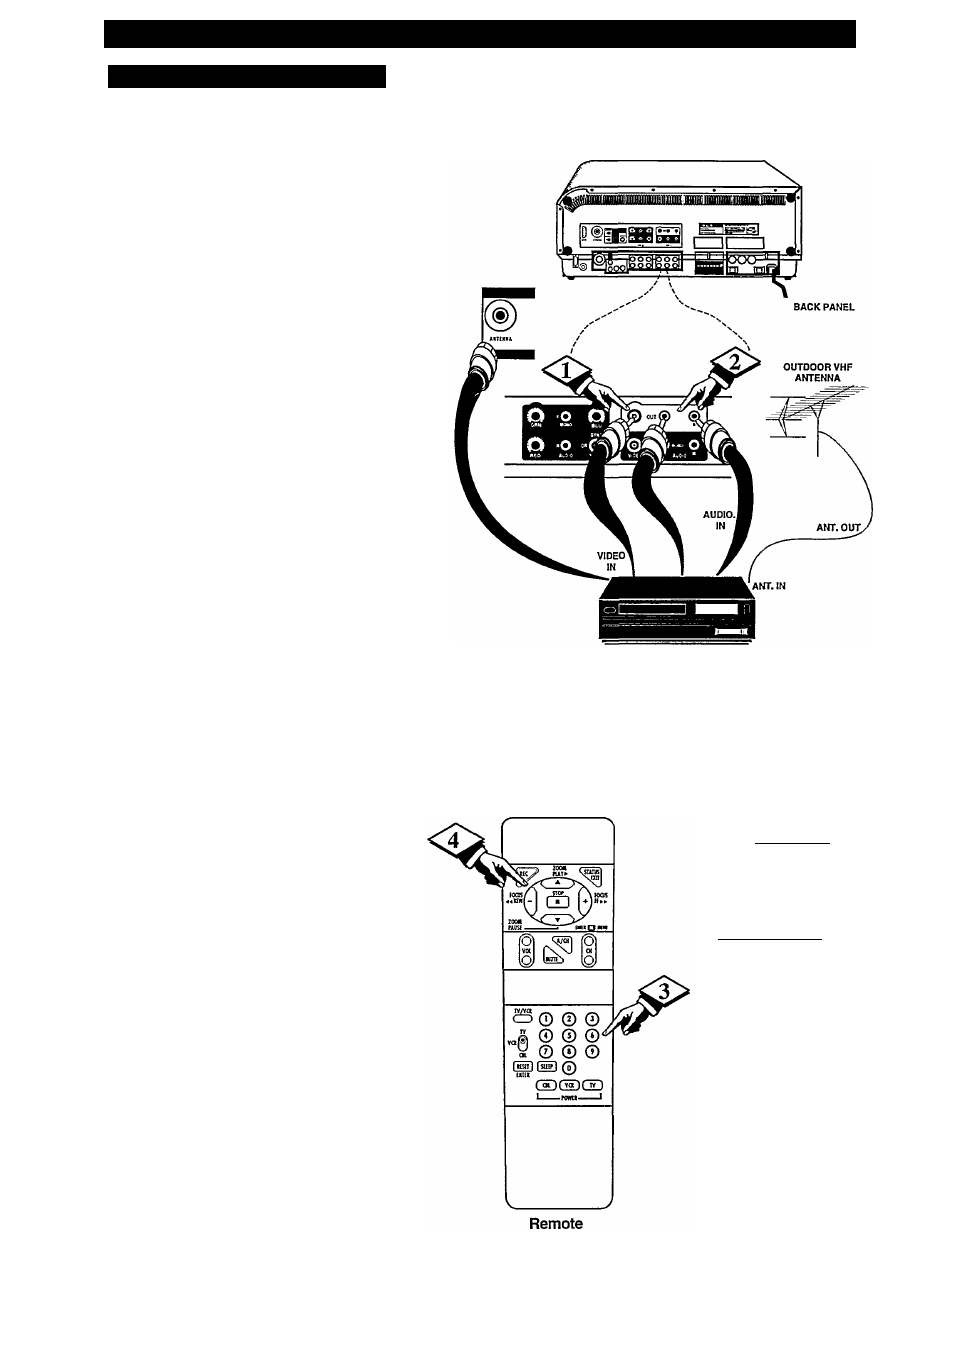
3. PICTURE SOURCE-TV PROJECTOR
T
he AUDIO/VIDEO OUT(put) jacks cm
your Projector can be used to record TV
programs on VCRs equipped with AUDIO/
VIDEO IN(put) jacks or to connect a TV or
monitor.
To record TV programs by using the AUDIO/
VIDEO jacks on the TV Projector:
Connect the VIDEO OUT jack
from the Projector to the VIDEO IN jack on
the VCR.
Connect the AUDIO OUT jacks
R(ight) and L(eft) from the Projector to the
AUDIO IN jacks on the VCR.
Select PICTURE SOURCE control
on the Projector.
With the INPUT Menu displayed, press 3 for
PICTURE SOURCE
Press the (+) or (-) buttons to place
the TV Projector in the ANTENNA mode.
"ANTENNA" is highlighted to confirm the
setting.
Select the TV charmel to be recorded.
Turn the VCR ON. Place cassette
tape in unit and place the VCR in the
RECORD mode.
1^;
Remember. AUX 1 output is related
to the selected input, i.e. what you are
watching on your Projector.
However, with the RGB input selected, there
is no video output available.
Remember, if the VCR has an
INPUT SELECTOR switch, place it in the
LINE or CAMERA position.
Since the Projector must be ON for the VCR
to record. Unattended Timer Recordings with
the VCR are possible, but not recommended
with this connection.
Back of Projector
VCR
I
ANTENNA
I
RGB
AUX 1 AUX 2 AUX 3
1.
TUNING
2. CHANNEL SCAN
|3. PICTURE SOURCE
I
INPUT Screen
28