LAARS NeoTherm NTV1000 - Install and Operating Manual User Manual
Page 62
LAARS Heating Systems
Page 58
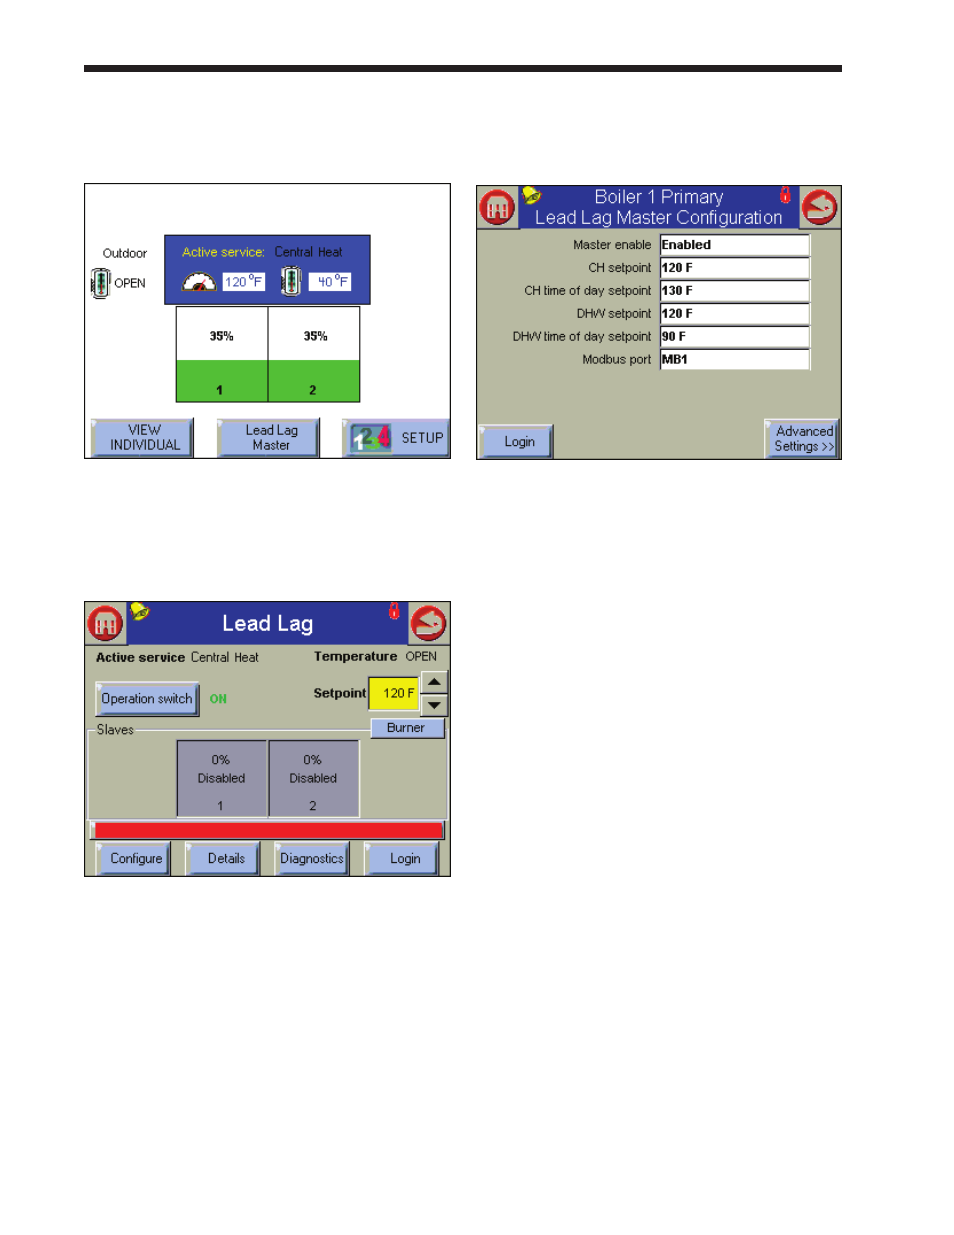
2. In a running system, the following screen
would normally show the current activity of
each unit in the Lead/Lag system. See Fig. 58.
fig. 58 – lead/lag Screen
3. To set up the Lead/Lag Master function, press
the button for Lead Lag Master. Fig. 59 shows
the screen that follows.
fig. 59 – lead/lag master Screen
4. Press the Configure button. The display will
present the Lead/Lag Master Configuration
Screen (Fig. 60).
Fig. 60 – Lead/Lag Master Configuration
5. This screen shows the most important settings
for the Lead/Lag system. The settings can be
changed from this screen. Some of them will
require passwords.
We will enter all of the Lead/Lag control
values in a moment. For now, just press on the
line for Master Enable. Change the setting to
Enable.
Press the Home button to go back to the Home
screen.
Job D - Disable the lead/lag master
function on the lead/lag Slaves
(This is an individual function – do this for each of the controls,
except the one used as the Lead/Lag Master. Use the separate
Operator Interface on each boiler.)
At the beginning of this section, we described the
Master and Slave arrangement used with the Lead/
Lag system. In the previous section, we explained
how to set up one controller as the Lead/Lag Master.
As we said, the controller used as the Master (usually
the Primary controller for Boiler 1) also serves as a
Slave (usually Slave 1). A single controller performs
both functions.
When the controllers arrive from the Laars factory,
they will all be configured as slaves. Your job in this
step is to disable the Lead/Lag Master function on
each of the controls, except for the one control that
will be used as the Lead/Lag Master – usually the
Primary control on Boiler 1.