Tail feathers, Get ready to build, Build the fins and rudders – Great Planes F-14 60 Kit - GPMA0435 User Manual
Page 7
GET READY TO BUILD
D 1. Unroll the plan sheets and re-roll them inside
out. This will help them lie flat.
D 2. Remove all parts from the box. As you do,
determine the name of each part by comparing it with the
plans and the parts list at the back of this book. Using a
felt tip pen, write the part name or size on each piece to
avoid confusion later. Use the die-cut part patterns
shown on page 6 to identify the die-cut parts, but do not
punch them out until you are ready to use them. Save
all scraps. If any of the die-cut parts are difficult to
punch out, do not force them! Instead, first cut around
the parts with an X-acto knife. After punching out the
die-cut parts, use your T-Bar or sanding block to lightly
sand the edges to remove any die-cutting irregularities.
D 3. As you identify and mark the parts, separate
them into groups, such as fuse (fuselage), wing, fin and
stab (stabilizer), and hardware.
"TAIL FEATHERS"
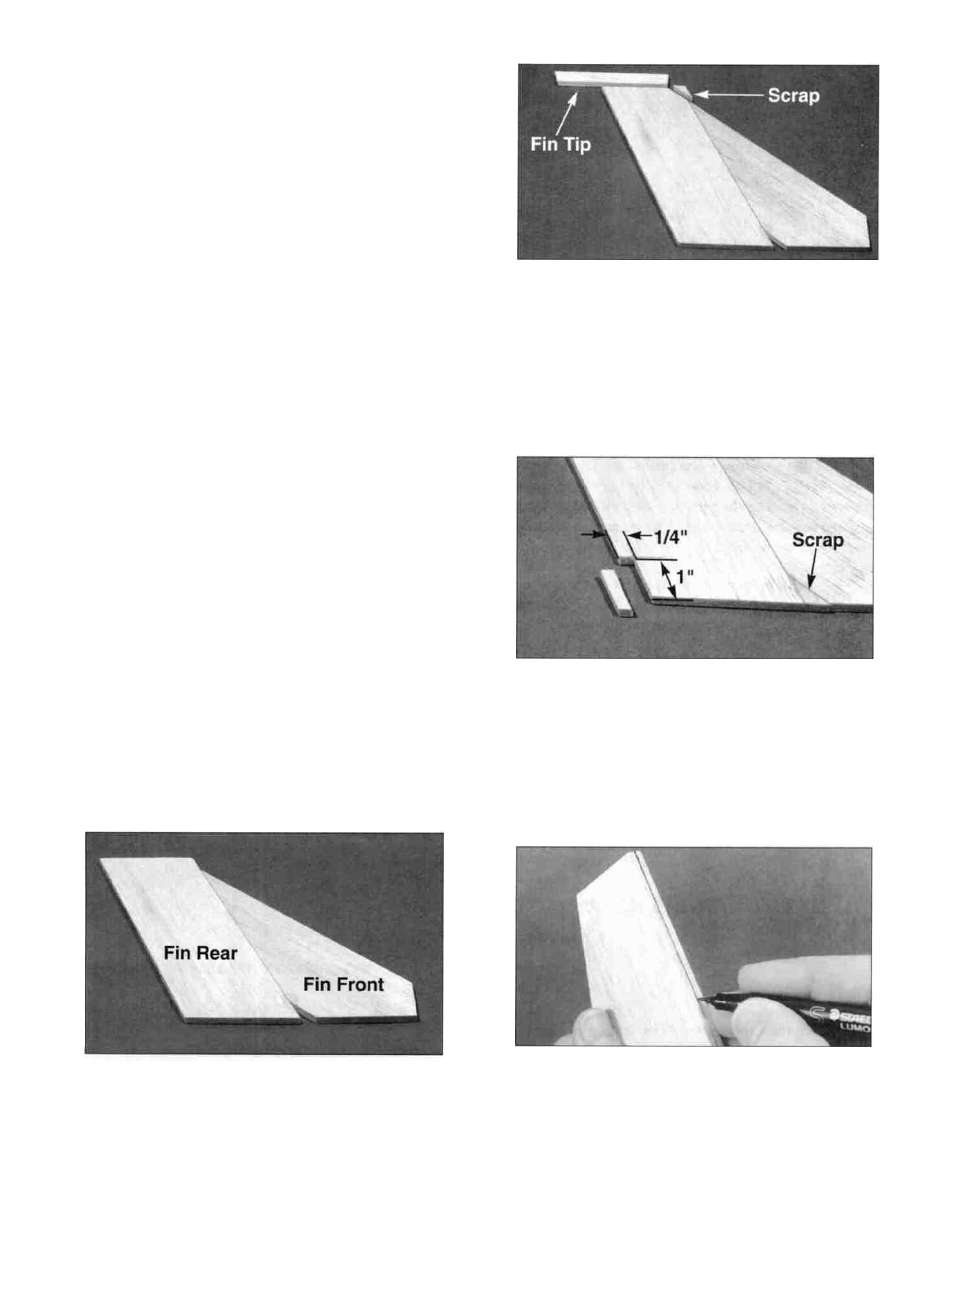
D D 3. Cut the tip of the fin rear to match the leading
edge sweep of the fin front. Glue the little triangle piece
of scrap into the "V" at the bottom. Cut the 1/4" x 5/8"
x 9" balsa stick (F146R04) in half to make two 4-1/2"
long fin tips. Glue the tip in place at the end of the fin
rear.
BUILD THE FINS AND RUDDERS
D 1. Tape the fuselage side view portion of the plan
down onto your flat work surface. Tape a piece of waxed
paper over the fin and rudder portion of the plan.
D D 4. Draw a line parallel w i t h the trailing edge of
the fin and 1/4" in front of it. Draw another line parallel
with the bottom edge of the fin and 1" above it. Cut out
a clearance notch for the torque rods using the lines as a
guide as shown in the photo.
D D 2. Glue the 1/4" balsa fin from ( 1 4 6 R 0 1 ) to
the 1/4" balsa fin rear (F146R03) so their bottoms are
even with each other. Note that there will be a triangle of
wood missing between the two pieces. This can be filled
in the next step.
D D 5. Use a sanding block with medium (150) grit
sandpaper to sand the edges and both sides of the stab
smooth. Carefully draw a centerline all around the
edges of the stab and elevator. This will make it easier to
maintain symmetry when sanding later.
7