Final sanding, Balance the airplane laterally, Covering – Great Planes F-14 60 Kit - GPMA0435 User Manual
Page 48
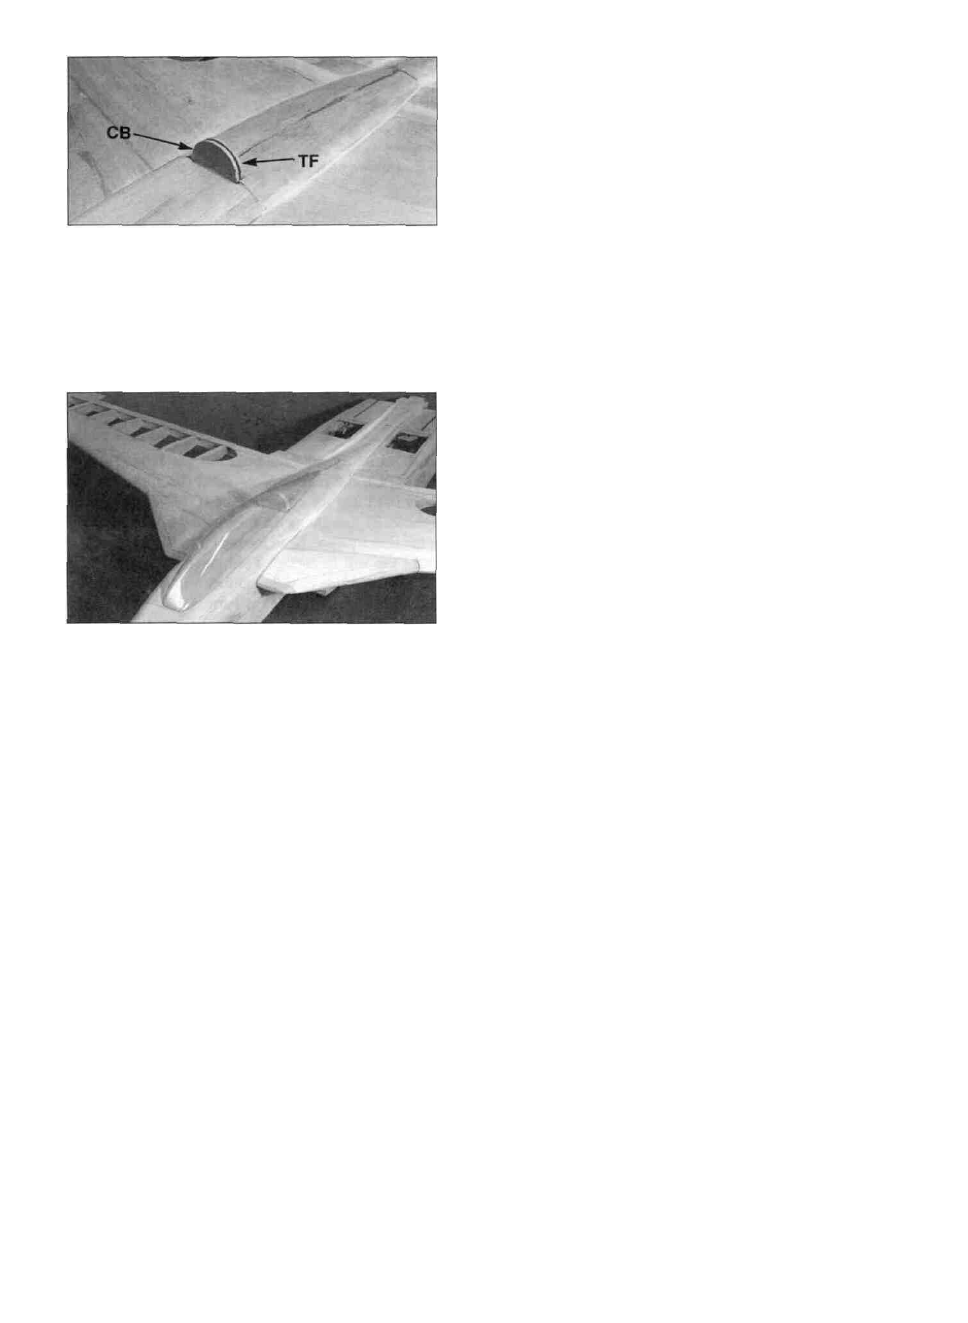
D 2. Tack glue the die-cut 1/8" balsa cockpit back
(CB) (F146F12) to the top of former F-2. It should be
centered in relation to the fuselage and perpendicular to
the fuse top. Tack glue the die-cut 1/8" balsa turtle
deck face (TF) (F146W01) to the w i n g and
approximately 1/8" directly behind the cockpit back.
Now that you have the basic airframe nearly
completed, this is a good time to balance the airplane
laterally (side-to-side). Here is how to do it:
D 1. Temporarily attach the wing and engine (with
muffler) to the fuselage.
D 2. With the wing level, lift the model by the engine
propeller shaft and at the centerline of fuse rear (this may
require two people). Do this several times.
D 3. If one wing always drops when you lift, it means
that side is heavy. Balance the airplane by gluing weight
to the inside of the other wing tip. NOTE: An airplane
that has been laterally balanced will track better in
loops and other maneuvers.
FINAL SANDING
Check over the entire structure carefully, inspecting
for any poorly glued joints, gaps and "dings". Apply
additional glue and/or balsa filler as necessary. Then
sand the e n t i r e fuselage and w i n g smooth using
progressively finer grades of sandpaper. Vaccum the
entire structure before covering.
D 3. Trial fit the canopy onto the fuse, lightly
pressing it into place. Refer to the plans to get an idea
where the canopy should be positioned. Trim and sand
as necessary for a good fit. You can also sand the
cockpit back and the turtle deck face if needed to get the
canopy to fit. NOTE: The trim line on the canopy is
approximate. Your canopy trim will vary, depending on
how you sanded the fuselage. When satisfied with the fit
of the canopy, securely glue the cockpit back and the
turtle deck face in place.
D 4. Final sand the edges of the canopy with fine
(320 grit) sandpaper. It is important that the canopy does
not have any nicks along the edges, as the engine
vibration could cause them to spread. Add the canopy
frame by applying striping tape (or paint) along the
molded in lines on the inside of the canopy. NOTE: Do
not glue the canopy in place until after you have covered
your model.
BALANCE THE AIRPLANE
LATERALLY
SPECIAL NOTE: Do not confuse this procedure
with "checking the C.G." or "balancing the airplane
fore and aft." That very important step will be
covered later in the manual.
COVERING
Because it is assumed that you have had some
previous model building experience, we won't go into
detail in regard to the covering procedure. Follow the
instructions included with your covering material.
A FEW COVERING NOTES
1. When covering the tail surfaces, cut the covering,
before applying it, to overlap the fuse joint lines you
drew earlier by about 1/8". DO NOT, under any
circumstances, attempt to cut the covering material
after it has been applied to the fin and stab, except
around the leading and trailing edges and the tip.
Modelers who do this often cut through the covering and
part-way into the balsa fin or stab. This can weaken the
fin or stab to the point where it may fail in flight!
2. Allow the covering to overlap onto the nozzles
approximately 1/8" but have the iron on a slightly lower
heat setting so you do not melt the nozzles. It is a good
idea to test the temperature of the iron on a scrap piece of
40 ABS you cut from the tip of the nozzles.