Great Planes F-14 60 Kit - GPMA0435 User Manual
Page 25
D 9. Glue the turbine bottoms into place. Make sure
the die-cut s t r u t opening is near the outside of the
fuselage. Temporarily replace the main gear to check the
size and location of the strut opening. Enlarge it if
necessary to allow for the flexing that will occur during
rough landings. Skip ahead to GENERAL FUSELAGE
ASSEMBLY on page 27.
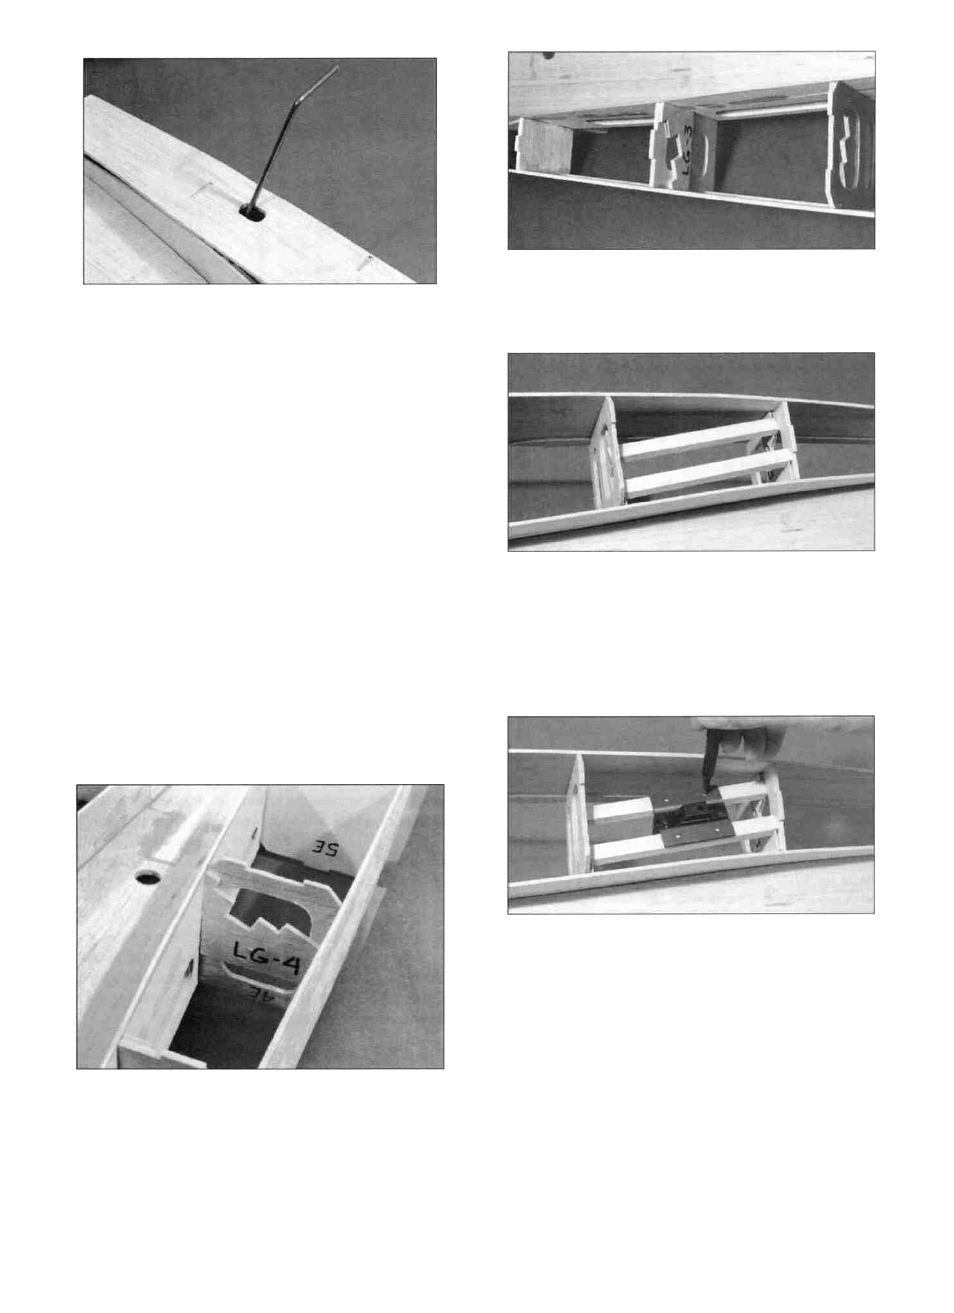
F-3 and LG-4 on the front of F-4. Sand them if
necessary and then epoxy them in place.
RETRACTS
The following instructions explain how to install
Hobbico Low Profile Mechanical Retracts (HCAP4000).
If you are using another type of retract, you will have to
m o d i f y the f o l l o w i n g i n s t r u c t i o n s to s u i t your
installation.
D 2. Locate the 1/4" x 1/2" x 4-7/8" basswood
retract rails (F146F23) and sand them to fit between
F-3E and F-4E. Take your time and try to get a good
joint between the rails and the formers. Epoxy them in
place.
D 1. Test fit the 1/8" ply landing gear doublers LG-3
and LG-4 (F146F32) a g a i n s t formers F-3 and F-4
respectively. They should be positioned as shown in the
cross section views on the plans: LG-3 on the back of
D 3. Position the retract between the rails (from the
bottom of the fuse) so the strut is approx. 1-1/2" behind
F-3E. Mark where the retract mounting holes should be,
remove the retract and d r i l l 1/16" holes in the retract
rails. It is important to keep the drill perpendicular to
the rails when drilling since the retract is actually going
to be installed from the top. NOTE: Due to the angle of
the retract, it is very helpful to use socket head sheet
metal screws (not included) along with a ball driver to
secure the retract. We used Du-Bro #380 #2 x 3/8"
SHSMS. Larger #4 screws could be used but are not
necessary.
25