Install fuel tank, Final fuselage construction – Great Planes F-14 60 Kit - GPMA0435 User Manual
Page 35
with the top surface of the fuse side. You can cut relief
slots in the triangle if needed to get it to bend easier.
allow room for the nose sides. Route the outer guide
tube through the openings in the formers back to the
throttle servo. Drill any holes necessary to keep the
pushrod as straight as possible. Cut the pushrod to
length and use nylon clevises and 1" threaded studs on
both ends. Sand the outside of all the plastic pushrod
guide tubes with 100-grit sandpaper. Then glue them in
place.
D 3. Now remove all three retracts and fuelproof the
inside of the fuel tank compartment and the area between
F3E and F5E by brushing on a coat of polyester resin,
finishing epoxy or other fuel proof paint. This will keep
the wood from getting fuel soaked and soft when residue
gets blown or splashed in through the wheel wells.
When this has cured, replace the retracts.
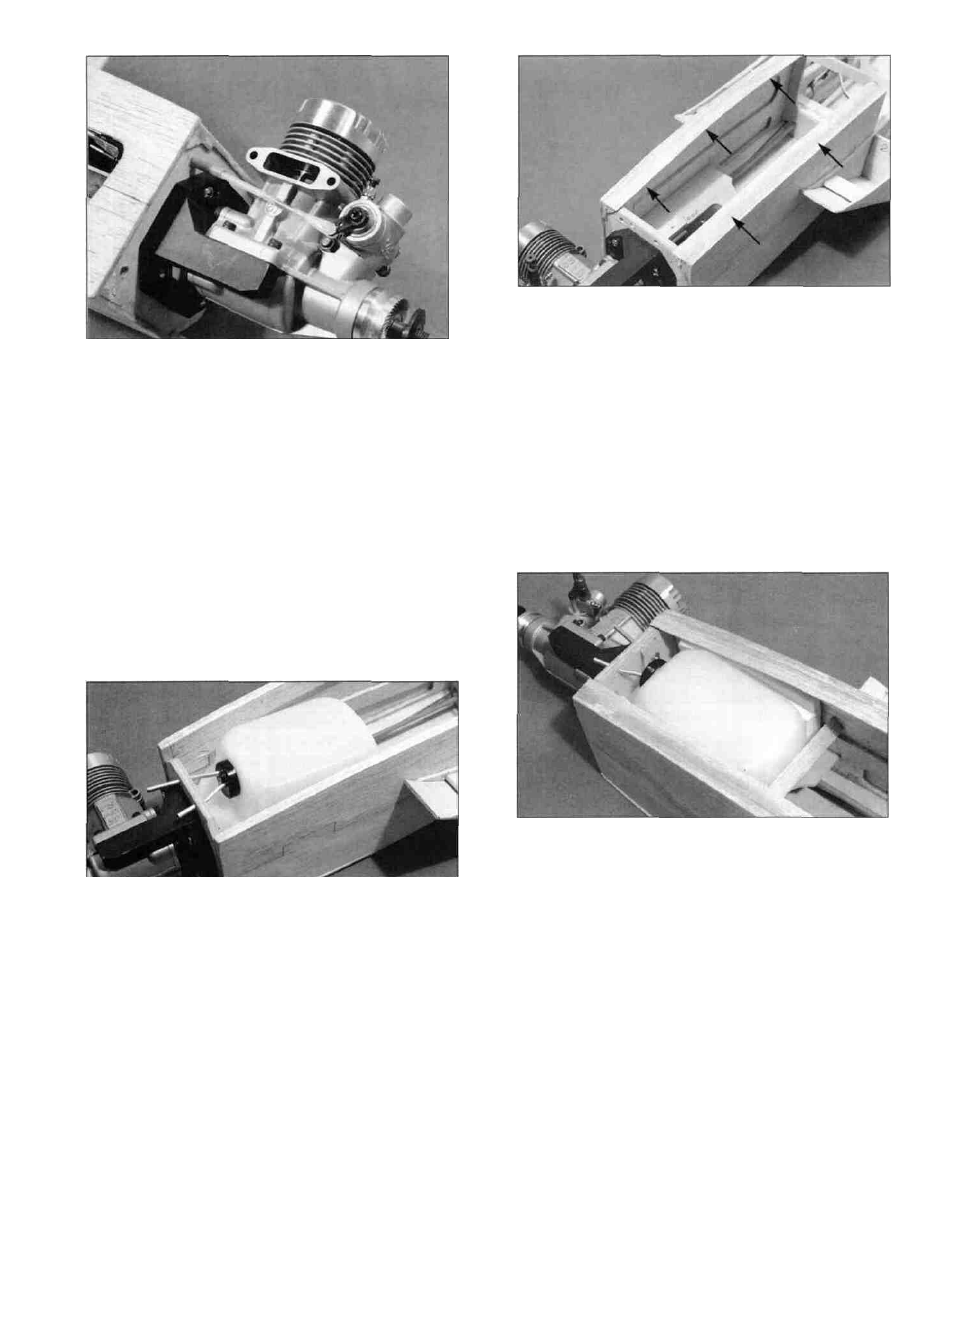
INSTALL FUEL TANK
D 1. Assemble y o u r 10 oz. fuel tank. We
recommend using a Dubro 10 oz. tank and bending the
brass tubes as shown in the photo. This keeps the fuel
lines on the outside of the fuselage where they will be
accessible. Drill two 5/32" holes above the engine
mount for the tubes to pass through the firewall. HINT:
To avoid kinking the tubes when bending, we use K&S
Tubing Bending Springs. Cut the brass tubes off so
they protrude approximately 1/2"- 3/4" past the firewall.
D 4. Replace the fuel tank and mark on the firewall
which brass tube is which. Put an "F" next to the fuel
tube and a "V" next to the vent tube. Cut pieces of latex
foam rubber and place them on both sides of the fuel
tank to cushion the fuel tank from engine vibration.
Apply silicone adhesive around the tubes to seal off the
holes in the firewall. Cut a scrap piece of balsa to fit
behind the tank and glue it in to hold the tank in place.
D 2. Remove the tank and install two 10-1/2" long
pieces of 1/2" balsa triangle (WSTR001H) along the
top edge of each fuse side. Bend the triangle to conform
FINAL FUSELAGE CONSTRUCTION
D 1. Sand the top surface of the fuse sides above the
tank compartment with a sanding block.
35