Install nose gear retract – Great Planes F-14 60 Kit - GPMA0435 User Manual
Page 28
well for this because it allows you to hold them in
position and then add the glue. After gluing them in
position apply a bead of medium CA from the inside of
the fuselage.
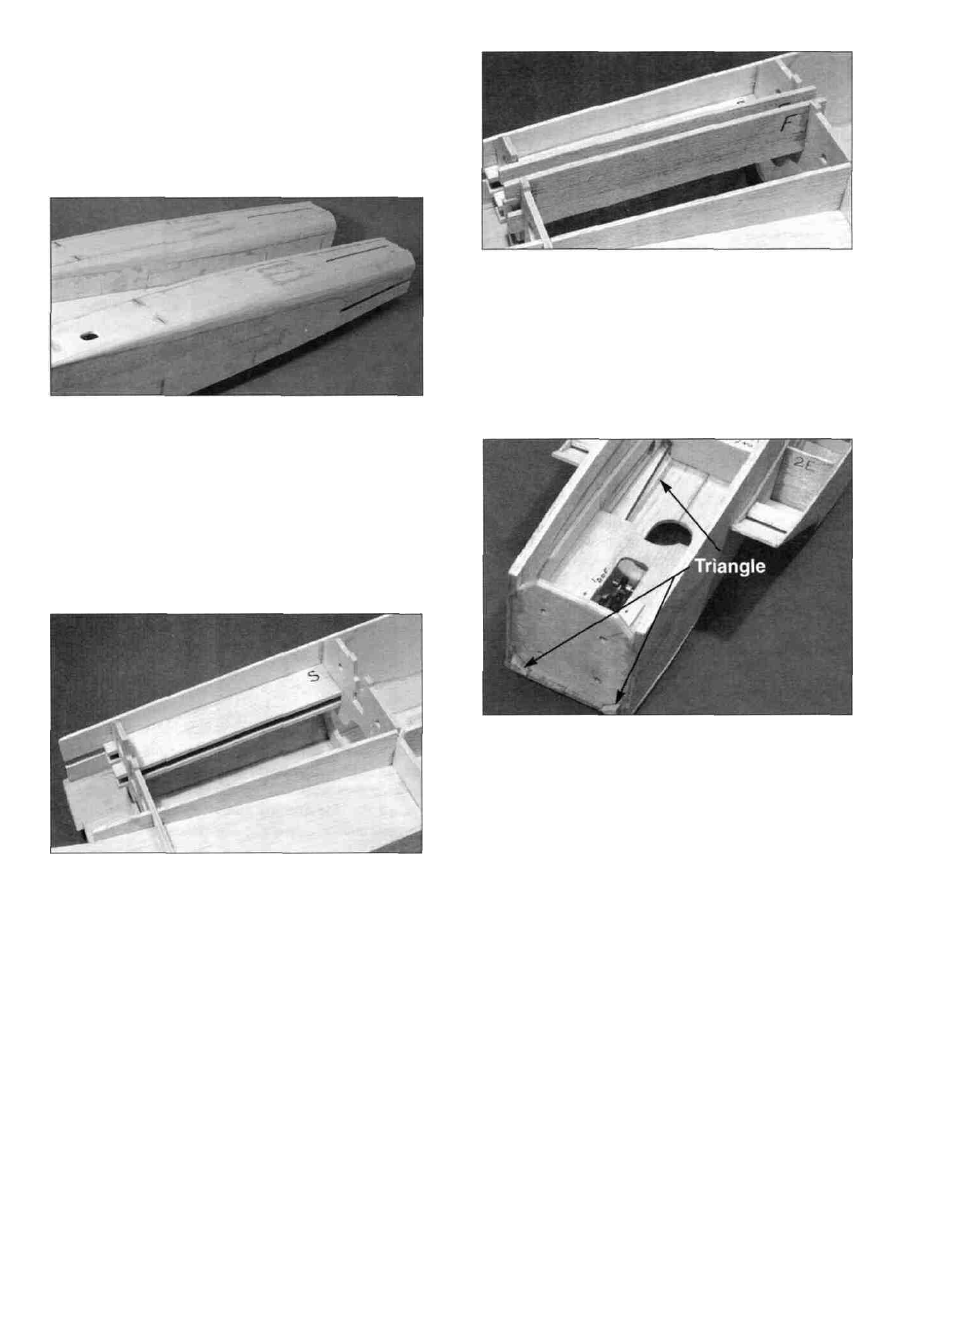
top corner of the fuselage. Trim them if necessary to
make them fully seat in the notches and insert a piece of
1/4" thick balsa (a fin) to check the support positioning.
A tight fit is preferred and a loose fit is not acceptable.
Hold the supports against the balsa if neccessary to get a
good fit and glue them to the formers.
D 4. Trim the excess wood off of the turbine comers
with a hobby knife. Save a couple large scraps of this
wood for use when constructing the nose cowl. Then use
a razor plane and a sanding block with coarse sandpaper
to roughly shape the turbine corners to the cross sections
shown on the plans. There is no need to fine sand the
comers yet, because they may get banged around during
the rest of the construction.
D 5. Locate the four die-cut 1/8" balsa stab supports
(F146F04) and notice that they have an "S" embossed on
them near one corner of the support. Test fit them into
place between F-6 and F-7 so the "S" is in the forward,
outside corner of the fuselage. Trim them if necessary to
make them fully seat in the notches and insert a piece of
1/4" thick balsa (a stab) to check the support positioning.
A tight fit is preferred and a loose fit is not acceptable.
Hold the supports against the balsa if neccessary to get a
good fit and glue them to the formers.
D 6. Locate the four die-cut 1/8" balsa fin supports
(F146F01) and notice that they have an "F" embossed on
them near one corner of the support. Test fit them into
place between F-6 and F-7 so the "F' is in the forward,
D 7. Cut two 10-1/2" pieces of 1/2" triangle from the
1/2" x 30" triangle stock (WSTR001H). Slide these
into place along the fuse bottom through the gaps by the
firewall. They extend from F-2 to the front of the
firewall. Press them into the corner of the fuselage and
glue them in place with thin CA. If you are not using
retracts, skip ahead to "Install Radio" on page 29.
INSTALL NOSE GEAR RETRACT
D 1. Glue the die-cut 1/8" ply front retract rails
(F146F32) in place on top of the fuel tank floor as shown
in the photo for step 5 of this section.
28