Prepare the firewall (f1) assemble fuselage – Great Planes F-14 60 Kit - GPMA0435 User Manual
Page 21
PREPARE THE FIREWALL (F1) ASSEMBLE FUSELAGE
NOTE: Photos show a 60-size engine mount (Great
Planes MM60 i n c l u d e d ) set up for a side mounted
2-cycle engine. If you will be using a different mount,
you'll have to determine the correct mounting position.
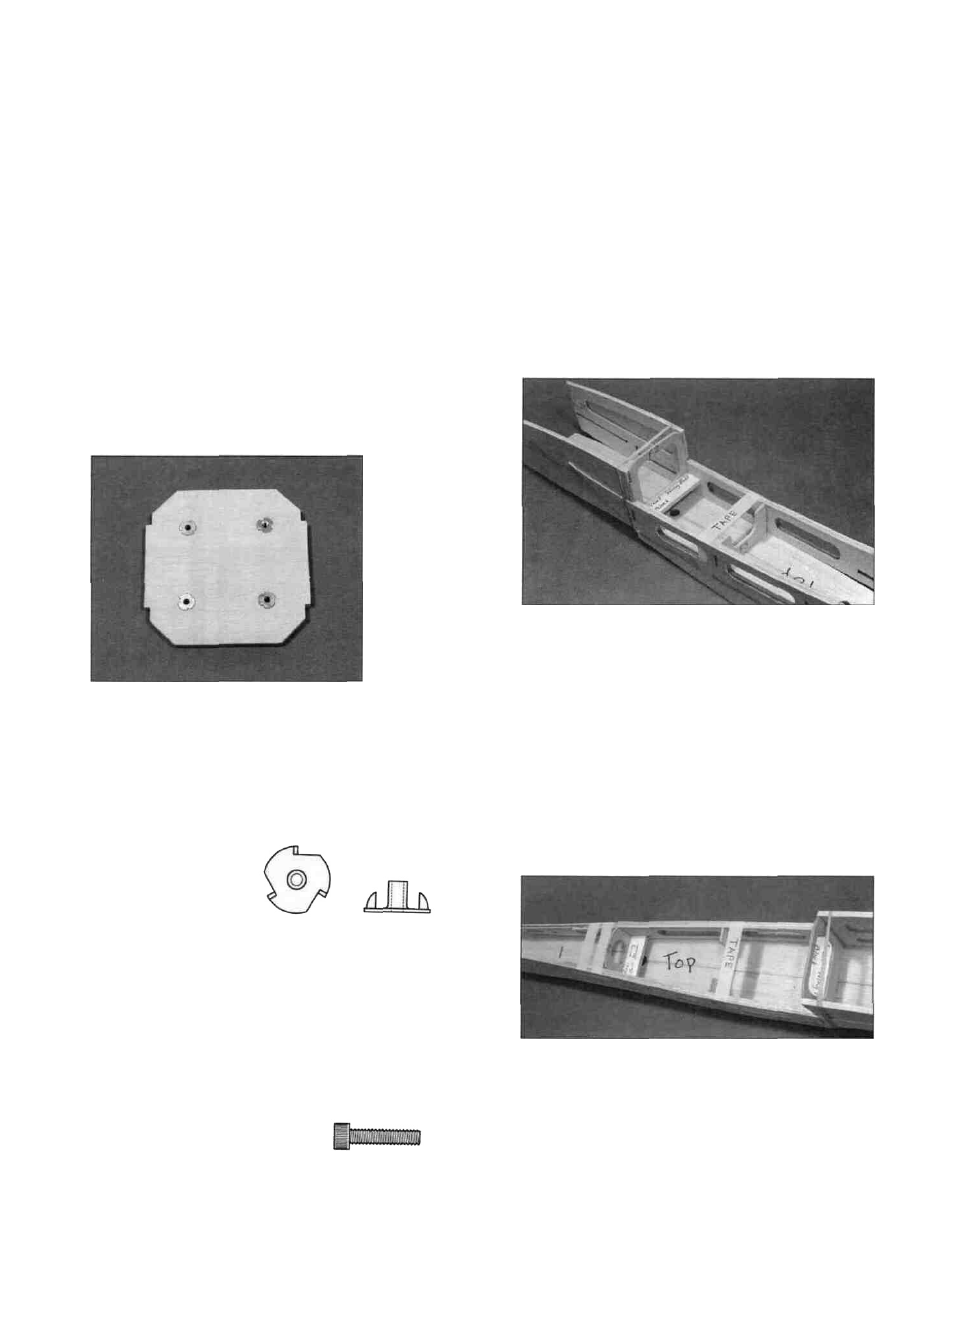
D 1. Locate the two 1/8" die-cut ply F-l's (F146F18)
and use a fine sanding block to remove any fuzzy edges.
Use epoxy to glue the two pieces together, making a 1/4"
thick firewall. Make sure they are accurately lined up
with one another and one of the sides with the punch
marks is showing. Wipe off any excess glue before it
cures.
D 1. Trial fit the die-cut 1/8" ply formers F-2, F-3,
F-4, F-5 (F146F15). the 1/4" ply front wing bolt block
(F146F20) and the 1/4" ply rear wing bolt block
(F146F25) to make sure they fit into the appropriate
slots. If there is any excess glue in any of the fuse
doubler slots, clean it out with an X-acto knife. If it is
necessary to trim any of the formers, be sure to trim both
sides of the formers the same amount to keep them
symmetrical.
D 2. If you are using the engine mount supplied, you
can drill at the punch marks provided. If you are using a
different mount, center the engine mount on the firewall
and mark the bolt locations through the mount. Drill
5/32" holes at the bolt locations, then install the 6-32
blind nuts (NUTS003) on one side of F-l. This will be
the back. Press the
b l i n d n u t s in with a
vise, or tap them in
with a hammer.
D 3. Temporarily attach the engine mount to the
f i r e w a l l w i t h the 6-32 x 5/8" socket head bolts
(SCRW037) to make sure the holes are in the correct
position. Adjust the holes if necessary and then glue the
blind nuts in place. Remove
the mount.
D 2. Assemble formers F-2, F-3 and the 1/4" ply
front wing bolt block between the two fuse sides. Add
the bottom (with the word "top" toward the formers) to
keep everything straight and use masking tape and/or
rubber bands to hold things together. Make sure all the
tabs are fully seated in their notches and add a couple of
drops of thin CA to each joint. Use only as much glue as
required to hold things together. We will come back and
securely glue everything a few steps later.
D 3. Install the 1/4" ply rear wing bolt block and
former F-4 using thin CA. Push the rear of the fuse
bottom down below the fuse sides to allow the sides to
relax some. This will make it easier to hold the fuse
sides against F-4.
21