Great Planes F-14 60 Kit - GPMA0435 User Manual
Page 26
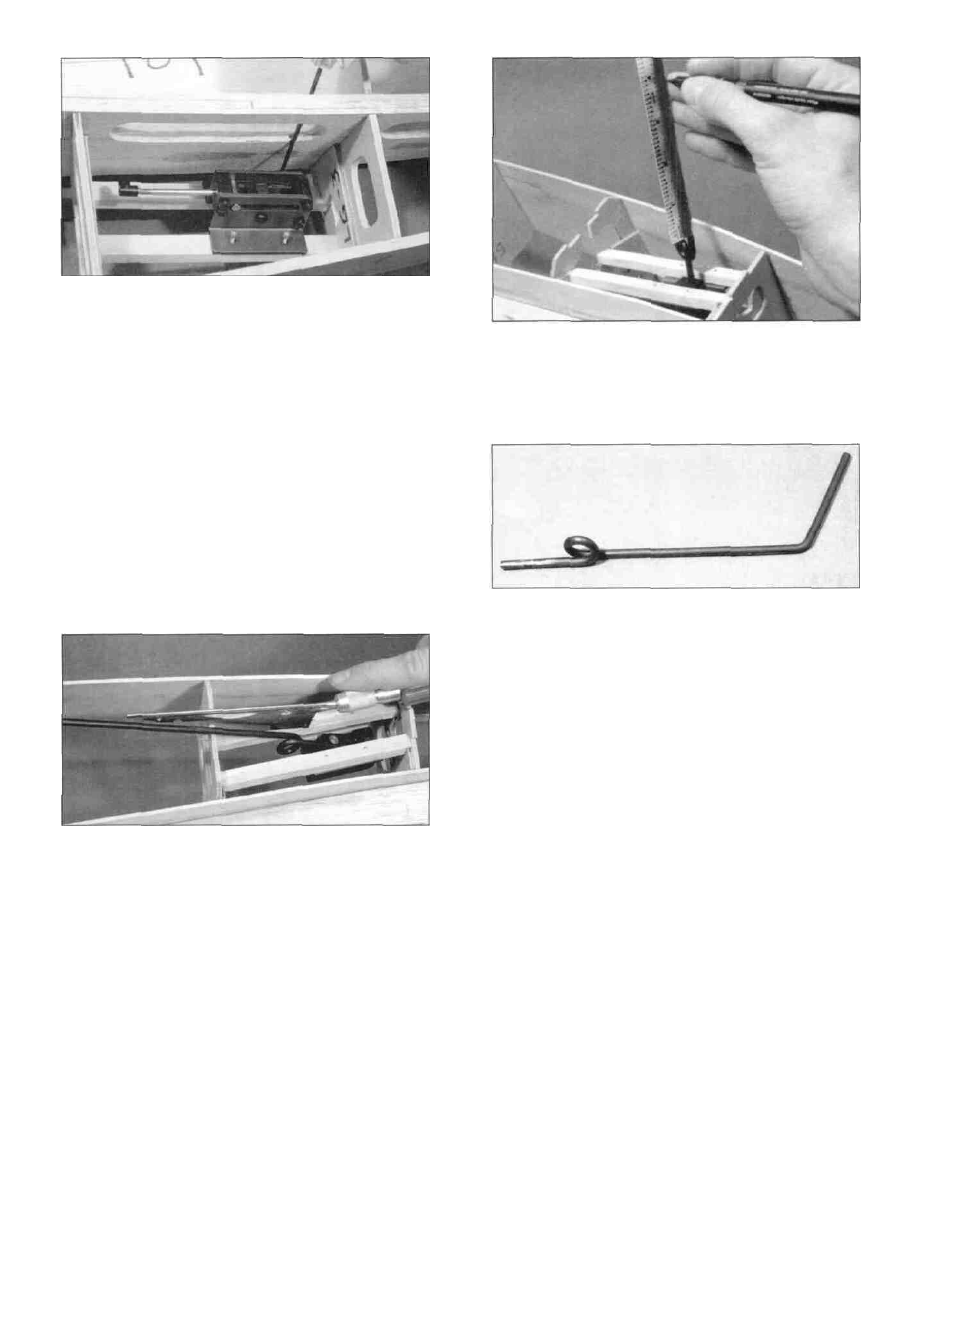
D 4. Using the socket head sheet metal screws, install
the retract (from the top), with the actuator arm pointing
towards the rear. u s i n g the socket head sheet metal
screws. Note: There is a right and a left strut. Install
the retracts so the bottom leg of the strut is "outside" of
the coil.
front as best as possible so you make the bend correctly
and keep the coil pointing the way it should.
D 5. Use a 2 mm ball driver to loosen the strut
retaining set screw in the retract and twist the strut so the
coil is pointing towards the rear of the plane. Re-tighten
the set screw.
D 6. Retract the strut until it hits former F-4E. Use a
razor saw to cut through the former approx. 1/8" on each
side of the strut. Fully retract the strut to make sure the
coil doesn't hit the actuator arm. If it does, loosen the set
screw and twist the strut slightly until it retracts without
binding. Re-tighten the set screw.
D 7. With the retract in the down position, check to
make sure the top end of the strut is flush with the top of
the retract mechanism (this is how they came). If it isn't,
loosen the set screw and move the strut up or down until
it is. Make a mark 3-3/4" below the bottom of the coil
on the front of the strut. If your strut is black, you can
make a light scratch. It is important that you mark the
D 8. Remove the strut from the retract and make a
bend where you made the mark. Try to keep the bend
perpendicular to the front of the strut (where your mark
is) and be sure to make a right and a left. Use the
Retract Strut Template on the plan to achieve the
correct angle. If you don't have a wire bender that will
bend the wire in a tight radius, you can use a vise and a
hammer. Insert what will be the axle part of the strut into
the vise with the front mark even with the top of the vise
jaws. Make sure the mark is directly facing the side of
the vise jaws and use the hammer to help bend the strut.
If you push on the coil while you tap the strut just above
the v i s e j a w s , you w i l l get a n i c e t i g h t bend.
Occasionally remove the strut and check it against the
Retract Strut Template on the plans to get the right
amount of bend.
D 9. Determine the correct length for the axles by
installing the wheels and collars, and cut off the excess
axle flush with the wheel collar. A Dremel tool with a
reinforced cut-off wheel works well for cutting this
hardened wire, but always wear eye protection.
D 10. Use a small piece of 150 grit sandpaper to make
some fine scratches on the front of the strut in the area
where the existing notch (for the set screw) is. Use a
black permanent marker to color the area you just
scratched up. Replace the struts in the retracts with the
wheels attached and twist them u n t i l the wheels are
26