Finishing, Blend wing to fuse, Instrument console & seats – Great Planes F-14 60 Kit - GPMA0435 User Manual
Page 47: Prepare the canopy
D 5. Repeat this procedure for the left side retract.
"FINISHING"
F146F10. There are two sheets of each. Very lightly
sand the edges of the seat back (SB), the seat cushion
(SC) and the head rest (HR) with fine sandpaper to
remove any burrs. Glue the seats together as shown in
the photo. Sand the bottom of each seat so it will tilt
back as shown on the fuse side view of the plans.
BLEND WING TO FUSE
D 1. We need to blend the wing turtle deck into the
fuse at F-2 and at F-4. It will usually require some filling
and sanding. Use lightweight wood filler anywhere you
might sand through the sheeting trying to get it to match
up. Try to achieve a nice, smooth transition from the
fuse front to the wing and back to the fuse. Don't be
afraid of using plenty of filler or scrap wood to achieve
the correct shape.
D 2. Sand the inner turbine side/turbine top corners
to a nice radius. You should also use lightweight wood
filler to fill the corners formed between the fuse top and
the turbine sides. Be careful not to sand into the hatch
area here.
INSTRUMENT CONSOLE & SEATS
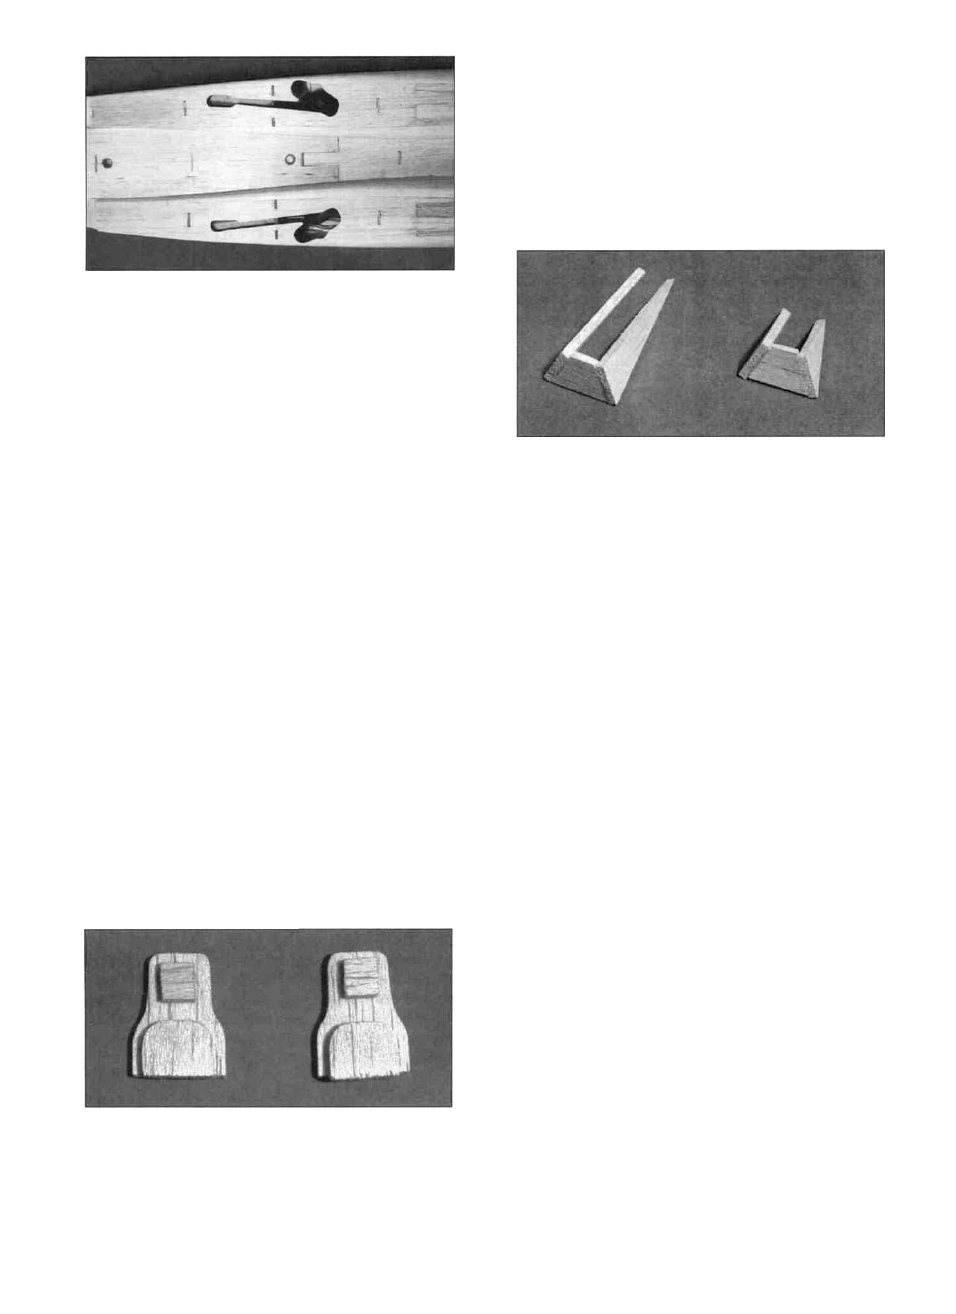
D 1. You will find the instrument console and seat
parts on the 3/32" balsa die-cut sheets F146F09 and
D 2. Lightly sand the edges of the front console
sides (FC), the rear console sides (RC), the console
faces (CF) and the console tops (CT). Assemble the
consoles by first gluing the sides onto the faces as shown
in the above photo. Sand the top edges of both consoles
so the top will fit nicely. Then glue the tops on. Sand
the bottoms of the consoles so they will sit flat and then
final sand them to remove any burrs.
D 3. Paint the seats and the consoles. We used flat
black on the consoles and seat backs with a military
green on the head rest and seat cushion.
PREPARE THE CANOPY
NOTE: Although the real F-14's generally have clear
canopies, some modelers prefer to tint their canopies.
You may tint your canopy by i m m e r s i n g it in a
concentrated mixture of Rit Dye and hot tap water. The
colors blue, black, brown and dark green work well.
Remove the canopy after 5 minutes and rinse it off to
check the amount of tint. The hotter the water and the
longer you leave it in the dye solution, the darker it will
tint. The powdered dye will produce a darker tint than
will the liquid. CAUTION: Do not heat the dye water
above hot tap water temperature, as this could deform the
canopy.
D 1. Using a scissors, carefully cut the canopy
(CANPY054) along the trim line. The trim line is
actually a little lower than normal to give you more room
to accurately sand the canopy to fit the fuselage.
47