Great Planes F-14 60 Kit - GPMA0435 User Manual
Page 15
NOTE: The edge of the TE sheet may not be exactly
straight, but just position the sheet so it slightly overlaps
past the TE, and any overlap can be sanded off flush with
the TE later.
aft edge of the sheeting is approximately in the middle of
the spar, then cut off the excess sheeting on the ends,
leaving approx. 1/4" extra to allow for positioning.
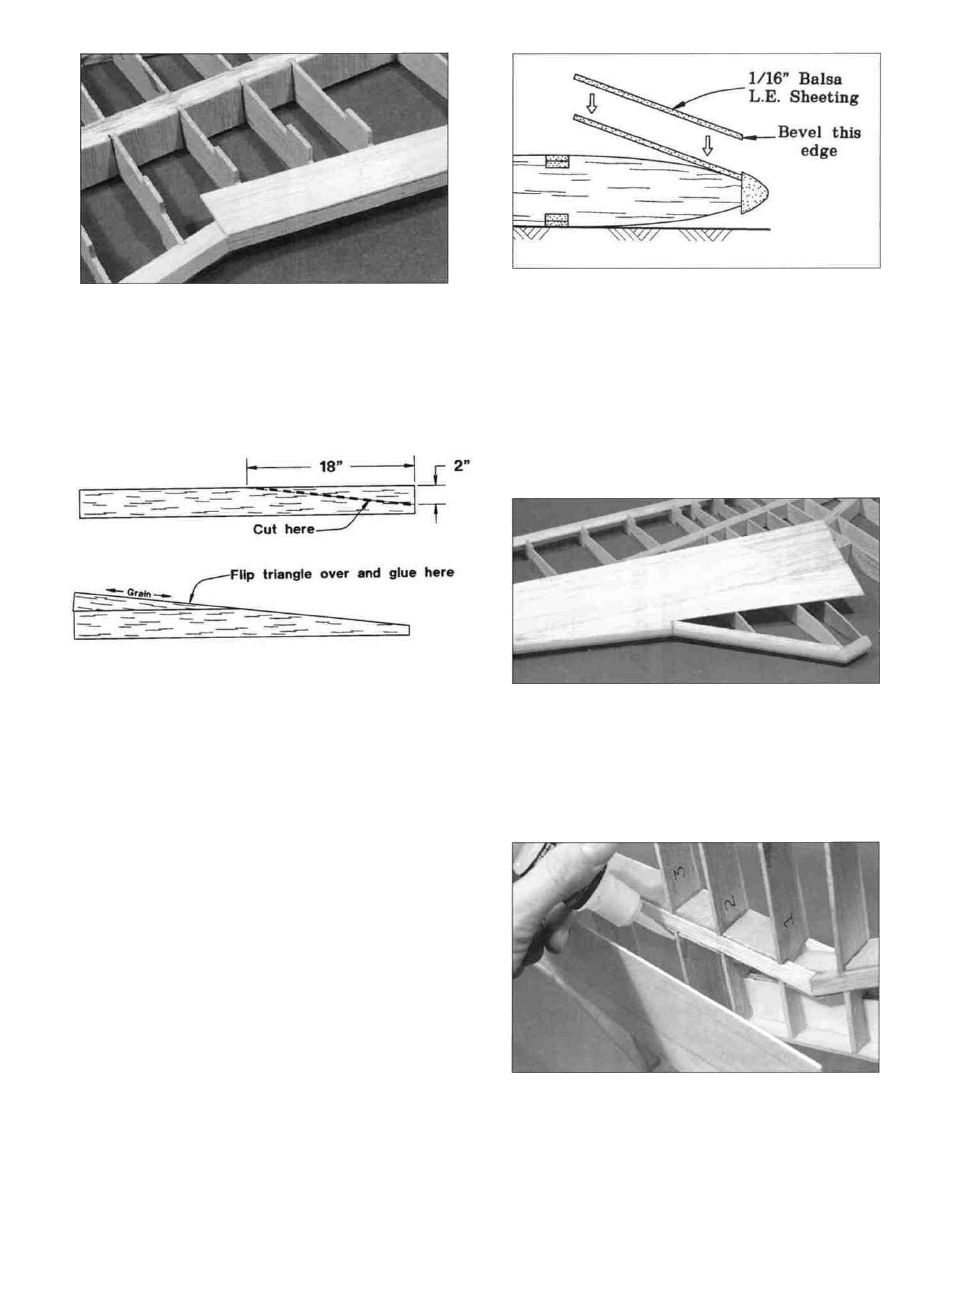
D 2. Make four leading edge sheets by cutting a
triangle 2" wide on the end and 18" long off of one end
of each 1/16" x 3" x 36" balsa wing sheet (F146W13).
HINT: Use an X-acto knife and cut a straight line using a
metal straightedge. Flip the triangle over and glue it to
the rest of the sheet as shown in the sketches above.
Notice the grain direction on the small triangle.
NOTE: It will be helpful to have the following items
handy for the next steps: Thin CA, thick (slow cure) CA
and a straight piece of wood (such as an aileron).
D 6. Hold the sheeting t i g h t l y against the LE at a
slight angle so it sits down on the LE of the ribs. Use
thin CA to glue the sheeting to the LE only. Do not glue
it to the ribs yet.
D 3. Sand the both sides of each LE sheet smooth
with a sanding block and fine grit sandpaper.
D 4. Before applying the leading edge sheeting in the
next steps, use your T-bar to lightly sand off the edges of
the shear webs and smoothly blend the ribs to the spar.
Also, clean up the LE/rib joints to remove any glue
globs.
D 5. Sand the front edge (the edge with the triangle
glued to it) to a slight bevel so it will fit snugly against
the back of the l e a d i n g edge. Trial f i t it before
proceeding. Position the sheeting left or right until the
D 7. Tilt the wing up, with the LE down, and apply a
drop or two of thick or slow curing CA to each rib. Hold
the wing at an angle so the glue will flow down and coat
the edge of each rib. Apply a l i n e of g l u e to the
15