Install aileron torque rods – Great Planes F-14 60 Kit - GPMA0435 User Manual
Page 18
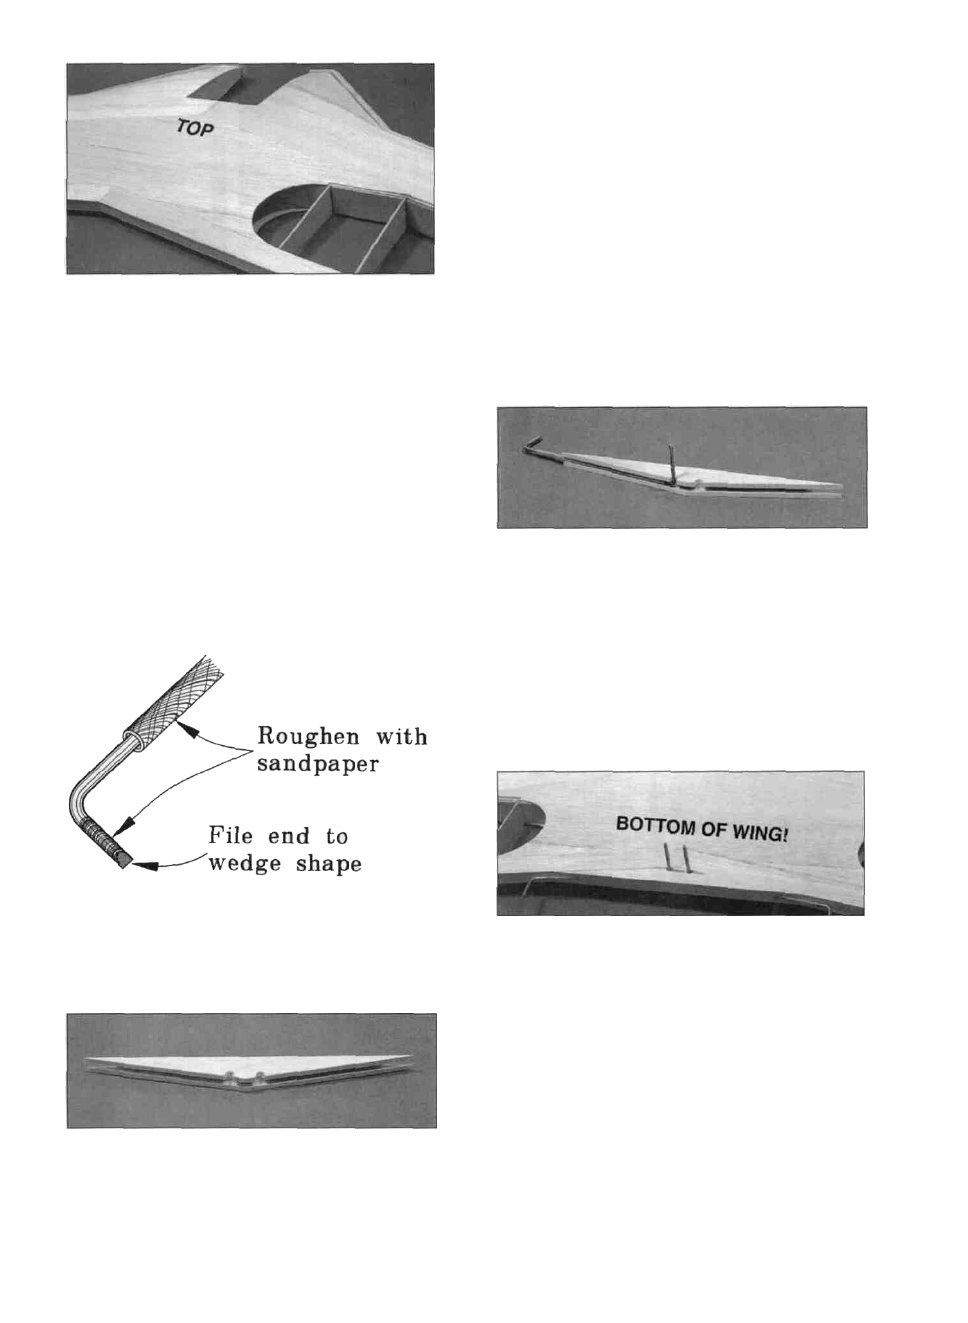
D 19. Flip the wing over. On the side that still has the
jig tabs attached, write the word "top" near the center of
the wing. Trim and sand off the remaining jig tabs.
Touch up the ribs with a fine grit sanding block and add
the rear sheeting just as you did in steps 17 and 18. Trim
all sheeting flush with the W11 ribs and lay the wing
aside until later.
INSTALL AILERON TORQUE RODS
rods come up through it. Cut notches there to clear the
torque rods. Test fit the wedge on the wing and sand it if
needed to get a good fit. Test fit the torque rods in the
groove to make sure they fit OK. If not, sand the groove
and notch u n t i l they do. Also cut small clearance
notches on the bottom side of the w i n g where the
threaded portion of the torque rod will be located. Note:
The torque rod horns must exit the BOTTOM of the
wing!
D 5. Slide the plastic bearings toward the threaded
end of the torque rods. Then use a toothpick to apply a
small amount of petroleum jelly to the ends of the plastic
tubes (to help prevent glue from getting inside and
locking up the torque rods).
D 1. Roughen the un-threaded end of the aileron
torque rods (WBNT167) with 100-grit sandpaper, and
file the same end to a wedge shape.
D 6. Use epoxy to glue the plastic bearing tubes into
the grooves in the rear wedge. Make sure the torque rods
are fully seated in the groove. Wipe off any excess glue
and allow it to harden.
D 2. Roughen the surface of the plastic bearing tubes
with 100-grit sandpaper.
D 3. Clean the torque rods and bearing tubes with
alcohol.
D 4. Position the 1/2" balsa grooved rear wedge
(F146W10) over the plans and mark where the torque
D 7. Sand the TE of the wing to make it straight with
square edges.
D 8. T r i a l f i t the rear wedge/torque rod assembly
onto the wing trailing edge. It should be centered up and
down on the wing TE so the torque rods are located at
the centerline of the TE. Sand the TE if necessary to get
a good fit then glue the wedge in place w i t h epoxy.
HINT: Use masking tape to hold the wedge against the
wing TE and to aid in positioning it.
D 9. Locate the tapered balsa center TE (F146W09)
(it is 10-1/8" long and has the same cross section as the
18