Einstellen von datum und uhrzeit, Setting the date and time – Panasonic NVRX50EG User Manual
Page 32
Attention! The text in this document has been recognized automatically. To view the original document, you can use the "Original mode".
DEUTSCH
Einstellen von Datum und
Uhrzeit
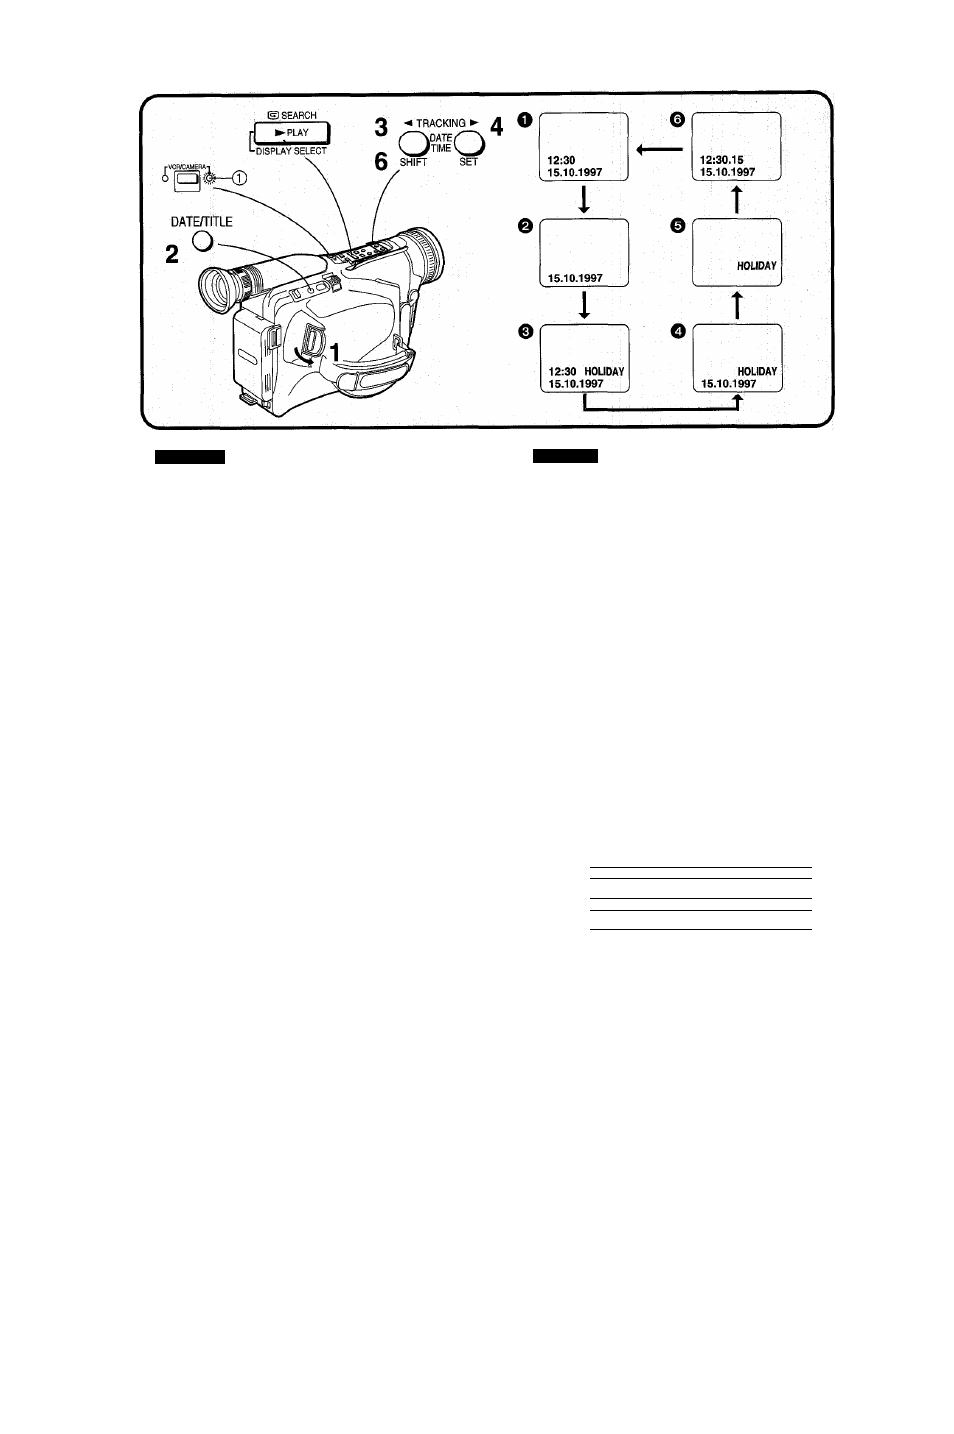
1
Den Schalter [POWER] nach außen
drehen, um den Camerarecorder
einzuschalten.
• Die Anzeigelampe [CAMERA] 0 leuchtet auf.
2
Die Taste [DATE/TITLE] drücken, so
daß die Datums-/Uhrzeit-/Titel-Anzeige
im Sucher erscheint.
•Zum Einstellen von Datum und'Uhrzeit muß eine
der oben gezeigten Anzeigen ^ jedoch nicht die
Titelanzeige allein © - im Sucher sichtbar sein.
Falls die Titelanzeige
0
allein angezeigt wird,
die Taste [PLAY/DISPLAY] einmal drücken.
3
Die Taste [SHIFT] drücken, bis der
Anzeigeteiifür„Jahr“ blinkt.
4
Die Taste [SET] wiederholt drücken,
bis das gegenwärtige Jahr (z.B. 1997)
angezeigt wird.
• Die Zahlen in der Datums-ZUhrzeit-Anzeige
ändern sich in folgender Reihenfolge:
Jahr:
Monat:
Tag:
Stunde:
Minute:
1990-^1991-
1^2->.............
1^2->.............
0^1^...............
00
^
01
^ . . .
2089-^ 1990^
........ -^12^1^
........ -^31^1^
........ ^23^0-^
... ^59^00^
Anschließend auch „Monat“, „Tag“,
„Stunde“, „Minute“ einstelleh, wie in
den Schritten 3 und 4 erklärt.
Nach beendetem Einstellen von
Datum und Uhrzeit überprüfen, ob sie
korrekt sind, und dann die Taste
[SHIFT] drücken.
• Die Uhr läuft an.
ENGLISH
Setting the Date and Time
1
Turn out the [POWER] Switch to turn
the Movie Camera on.
•The [CAMERA] Lamp © lights.
2
Press the [DATE/TITLE] Button to
make the Date/Time/Title Indication
appear in the Finder.
•To set the date and time, one of the indications
other than the Title'Indication alone
0
shown
above must be displayed in the Finder. If the Title
Indication
0
alone is displayed, press the
[PLAY/DISPLAY SELECT] Button once.............
3
Press the [SHIFT] Button until the
“Year” portion flashes.
4
Press the [SET] Button repeatedly
until the current year (for example:
1997) is displayed.
•The figures in the Date/Time Indication change in
the following order:
Year:
Month:
Day:
Hour:
Minute:
1990^1991^.............. . ^2089->1990
........... ^12^1
.....................
1-^2->........................ ........... -^31-»1
......... ^23^0
00^01^....................... ......... ^59^00
Also set the “Month”, “Day”, “Hour”,
“Minute” in the same way as
explained in steps 3 and 4.
After you have set the date and time
and confirmed that they are correct,
press the [SHIFT] Button.
•The operation of the clock starts.
-32-