Installation guide, Overview, Installation hardware (for installation) – Panasonic CQ VAD9300U User Manual
Page 74: Installation guide a, Warning
Attention! The text in this document has been recognized automatically. To view the original document, you can use the "Original mode".
Installation Guide
A
WARNING
This installation information is designed for experienced installers and is not
intended for non-technical individuals. It does not contain warnings or cautions of
potential dangers involved in attempting to install this product.
Any attempt to install this product in a motor car by anyone other than qualified
installer could cause damage to the electrical system and could result in serious
personal injury or death.
□ Overview
This product should be installed by a professional.
However, if you plan to install this product yourself, your
first step is to decide where to install it. The instructions in
these pages will guide you through the remaining steps:
(Please refer to the “WARNING” statement above).
• Identify and label the car wires.
• Connect the car wires to the wires of the power connec
tor.
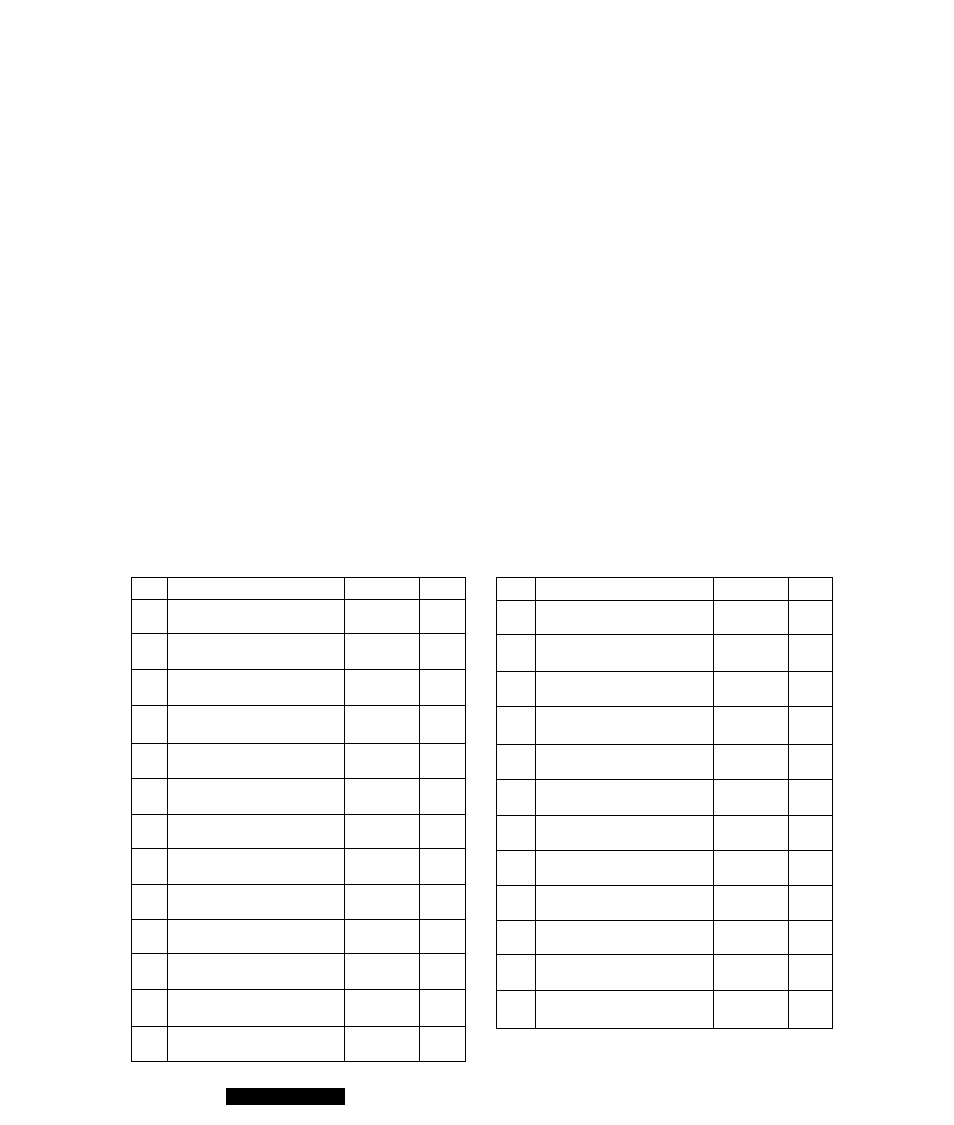
□ Installation Hardware (For Installation)
• Install the unit.
• Check the operation of the unit.
If you encounter problems, please consult your nearest
professional installer.
Caution: This unit operates with a 12 volt DC nega
tive ground auto battery system only. Do not attempt to
use it in any other system. Doing so could cause seri
ous damage.
No.
Item
Diagram
Qty
©
Trim Plate
1
Mounting Collar
1%
1
©
Mounting Spring
0
2
©
Rubber Pad
1
Mounting Bolt (M5)
1
Flange Nut (M6)
1
Washer Assembling Hex.Bolt
(M5
X
10 mm)
1
Washer Assembling Hex.Bolt
(M6
X
20 mm)
1
Rear Support Strap
1
Binding-Head Screw
{M5
X
6 mm)
2
Flat-Head Screw
{M5
X
6 mm)
4
Binding-Head Screw
(M4 X 3 mm)
Ç,
4
(0)
Spacer
2
No.
Item
Diagram
Qty
Double-Faced Adhesive Tape
(for spacer)
lo
1 set
©
Double-Faced Adhesive Tape
(for speaker)
O
1
Clamp (for speaker)
%
2
©
Binding-Head Screw
(M5
X
8 mm)
4
Tapping Screw
(0 6
X
20 mm)
4
©
Hex. Nut (M5)
4
©
Mounting Bracket
2
Base Bracket
2
©
Double-Faced Adhesive Tape
(for hide-away unit)
2
@
Velcro Tape
2
(g)
Antenna Clamp
i
4
©
Cord Clamp (for antenna)
4
74
CQ-VAD9300U