4) press the color – Canon PIXMA MP560 User Manual
Page 17
The print confirmation screen will appear.
4.
Start printing.
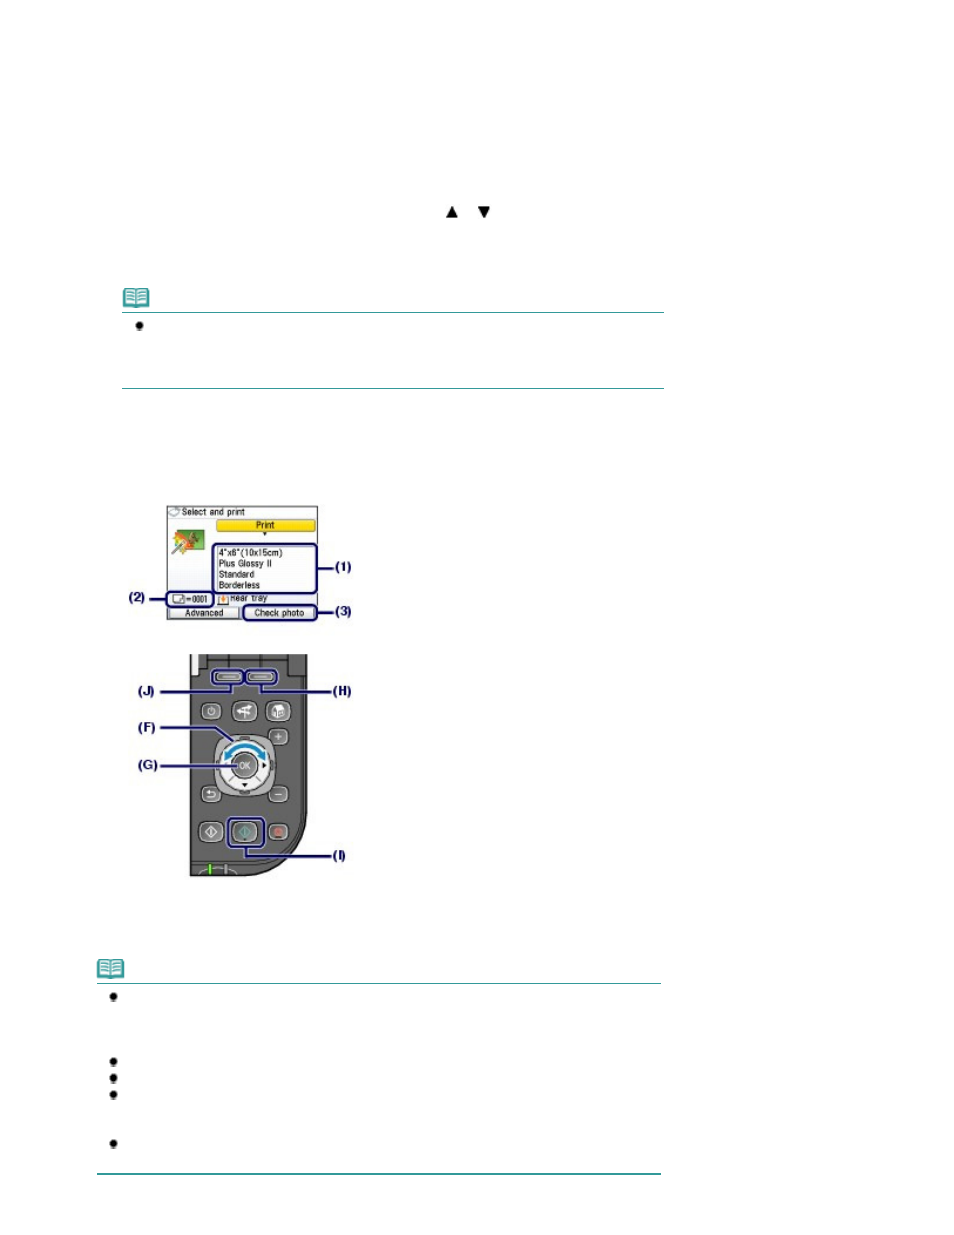
(1)
Confirm the page size, media type, print quality, etc.
Here we confirm that 4"x6" (10x15cm) is selected for Page size and the type of loaded photo paper for
Media type.
To change the settings, use the
Easy-Scroll Wheel (the
or
button) (F) to select the item to change,
and press the
OK
button (G).
See
Selecting Setting Items
and
Changing the Settings
.
Note
When Plain paper is selected for Media type and A4 or 8.5"x11" (LTR) for Page size,
Cassette will appear for Paper source.
When other sizes or types of paper are selected, Rear tray will appear.
Confirm that the selected paper is loaded in the correct paper source.
(2)
Confirm the number of sheets to be used for printing the selected photos.
(3)
Press the right Function
button (H) to select Check photo, and confirm the
selected photos and number of copies for each photo.
Press the
OK
button (G) to return to the print confirmation screen.
(4)
Press the Color
button (I).
The machine starts printing photos.
Note
If you press the left Function button (J) to select Advanced, Date setting, File no.setting and
Auto photo fix will appear.
You can correct photos automatically or manually if you select the Auto photo fix.
See
Using Various Functions
.
Press the
Stop
button to cancel printing.
Printing does not start if you press the Black button.
You can display the Memory card menu screen and select other useful printing functions, if
you press the Back button after printing is completed. If you press the
HOME
button or
remove the memory card or USB flash drive, the
HOME
screen will appear.
To remove the memory card, see
Removing the Memory Card
.
To remove the USB flash drive, see
Removing the USB Flash Drive
.
Page 17 of 949 pages
Printing Photos Saved on the Memory Card / USB Flash Drive