KMC Controls TSP-8001 User Manual
Installing a simplyvav secondary actuator 1
These are brief instructions for installing a SimplyVAV
secondary damper actuator for dual-duct
installations. To view a short video of this
procedure or to download a PDF of The
SimplyVAV Installation and Applications
Guide, browse to the simplyVAV web site.
3
Connect the airflow sensors
Connect the airflow sensor on the VAV box to the
airflow ports on the controller. Use 0.25 in. FR
tubing.
4
Connect to primary controller
Connect the actuator to the SimplyVAV primary
controller. Wiring diagrams are part of the
SimplyVAV Installation and Applications Guide
and submittal sheets that can be found on the
Resources page of the SimplyVAV web site.
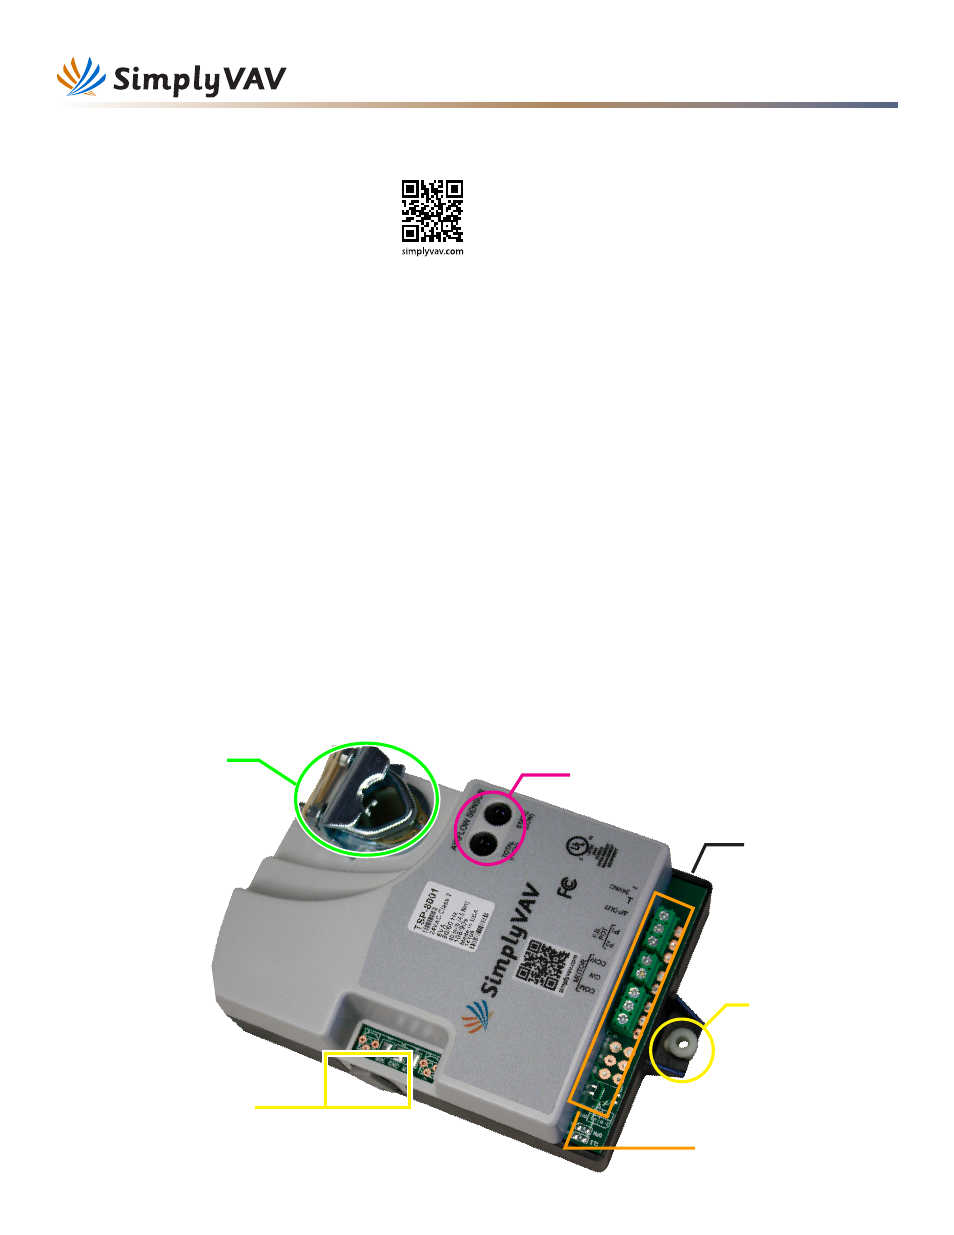
Drive hub
and V-bolt
Airflow sensor ports
Gear clutch
button
Mounting tab and
bushing
Black power
terminals
Green terminals
for connections to
primary controller.
Installing a SimplyVAV secondary actuator
1
Align the damper and drive hub
Manually rotate the damper on the VAV box to the
fully open position.
Press the gear clutch button and rotate the drive
hub in the same direction that opened the damper.
Turn the hub until it reaches a stop.
2
Mount the actuator to the VAV box.
Place the actuator over the damper shaft.
Finger tighten the nuts on the V-bolt to position the
shaft in the drive hub.
Center the mounting bushing in the mounting tab
and fasten it with a #8 sheet metal screw.
Evenly tighten the V-bolt nuts on the drive hub to
30-35 in-lbs.
915-019-05A
© 2014 KMC Controls, Inc.