KMC Controls HLO-1020 User Manual
Installation guide, Mounting, Maintenance
HLO-1020
1
Installation Guide
Mounting
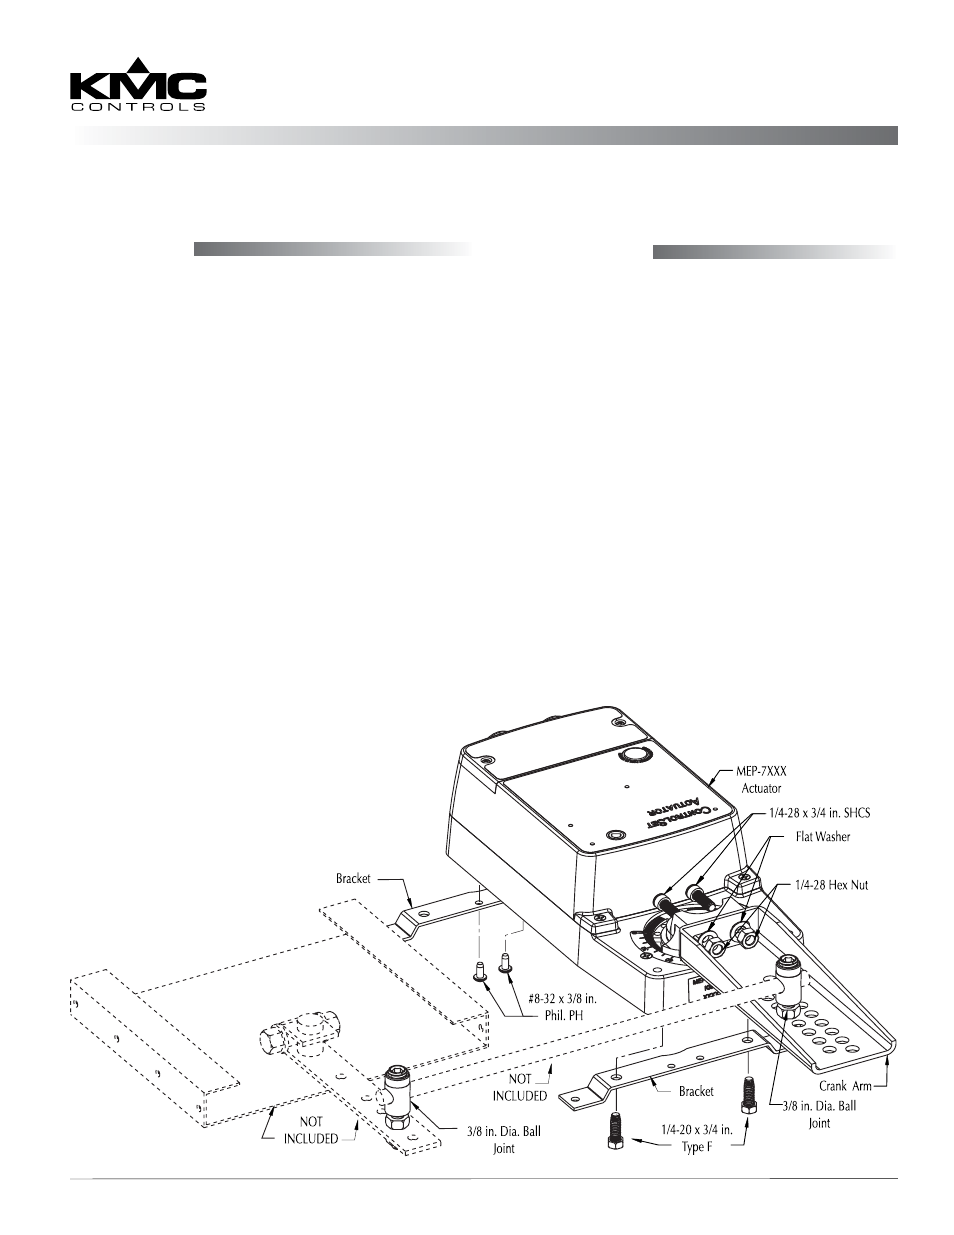
1. From the MEP-7xxx actuator, remove and discard
the V-bolt.
2. Assemble and install the kit and actuator as
shown in the diagram below.
NOTE: In general, position both the ball joints
as close to the end of the crank arms as is
feasible for the application. Positioning a
ball joint in the slot closer to the shaft will
change the torque, rotation speed, and/or
angle of rotation—which may be useful for
some applications.
NOTE: Check for potential issues such as binding
of the linkage or damage caused by the
actuator still rotating when the damper (or
other application) is already closed.
NOTE: For additional information about installing
eb
site (
Installation Guide
Crank Arm Kit for MEP-7000 Series Actuators
HLO-1020
Mounting 1
Maintenance 1
More Information 2
Important Notices 2
Kit Contents:
•
1 crank arm
•
2 ball joints for 3/8"-diameter rod (rod not included)
•
2 mounting brackets
•
Mounting screws
Maintenance
Under normal conditions, no routine maintenance is
required. In harsh environments, however, periodic
lubrication of the ball joints may be necessary.
Each component is designed for dependable, long-
term reliability and performance. Careful installation
will also help ensure long-term reliability and perfor-
mance.