5 using the lift, 5 using, The lift – Heidolph LABOROTA 4000 up to 4003 User Manual
Page 87
Setup and initial use
1.02
Laborota 4000/4001 efficient, 4010/4011 digital, 4002/4003 control
85
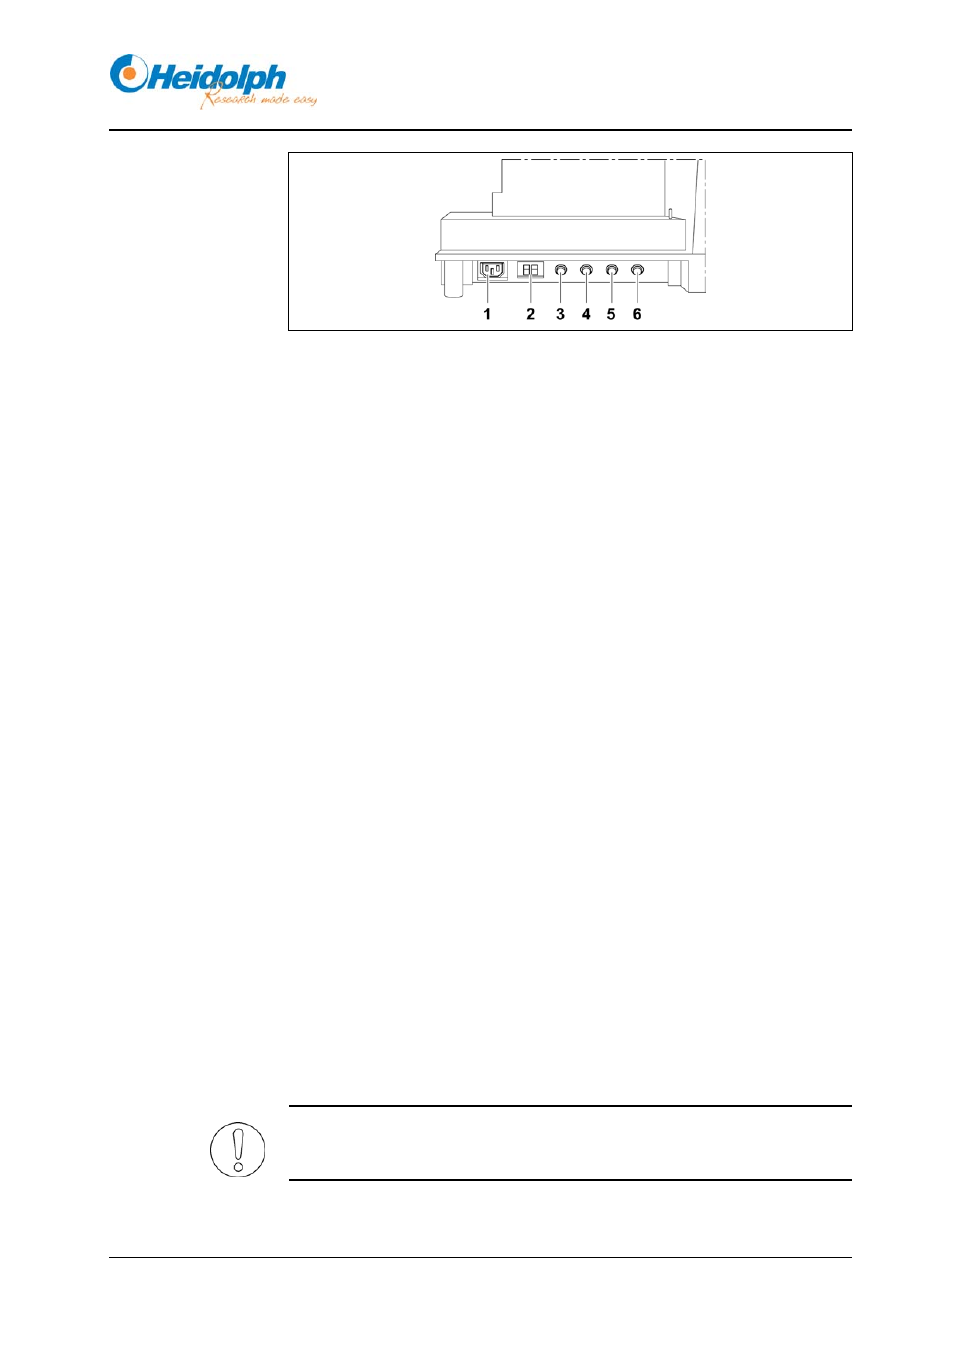
Fig. 4-2: Connections
1 heating bath connector
cable
4 temperature sensor/boiling
temperature sensor
(Laborota 4010 / 4011 / 4002 /
4003)
2 power connection
5 heating bath control cable
(Laborota 4002 / 4003)
3 remote
control
(Laborota
4001 / 4011 / 4003)
6 VAC senso T / Rotavac vario
control (Laborota 4002 / 4003)
1. Insert the heating bath connector cable to the heating bath and the
appropriate socket of the instrument base.
Laborota 4002 / 4003 control:
2. Connect the bayonet plug of the heating bath control cable (5-pin) to the
heating bath and instrument base:
– Grasp the plug by the knurled edge and turn it counter-clockwise to
the stop.
– Press the plug into the socket in such a manner that the locking pin fits
into the groove.
– Turn the knurled ring clockwise until the plug clicks into place.
The bayonet plug is now locked onto the connector.
3. Plug the power cable into the power input socket on the rear of the
instrument.
4. Plug the power cable into an AC outlet.
4.4.5 Using the lift
The height of the drive can be adjusted in order to control the immersion depth
of the evaporating flask.
The flask may not contact the bottom or side of the heating bath while
immersed.