Inspecting and cleaning the electronics, N o t e – ETC Source Four LED v1.6.0 User Manual User Manual
Page 82
76
Source Four LED Profile v1.6.0 User Manual
Inspecting and Cleaning the Electronics
A can of compressed air or oil-free air from an air compressor set at a low setting can
be used to blow through the vent holes and remove dust or other debris from the
interior of the fixture. Dust buildup can cause overheating and premature shutdown.
Remove the secondary lenses (if used) and clean out any dust and debris. All
components, including the secondary lenses, can be cleaned using compressed,
oil-free air as described above or a clean micro-fiber cloth. Isopropyl alcohol may be
used.
Inspect all mounting hardware for wear and, if necessary, clean using compressed,
oil-free air or a soft, lint-free cloth.
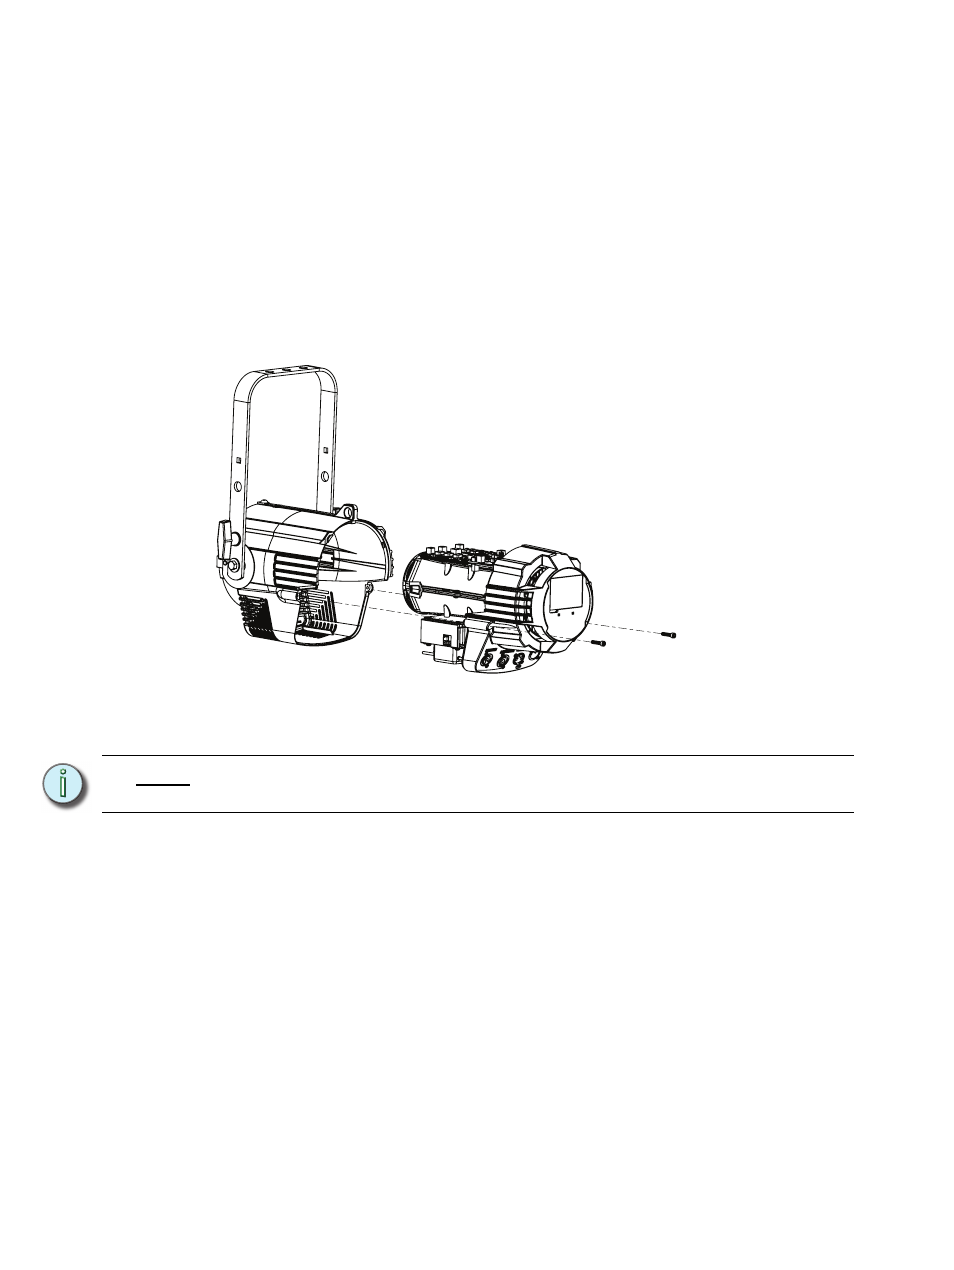
Step 1:
Use a 5/32" hex driver to remove the two screws that secure the back of the
electronics to the housing.
Figure-3.47 Electronics pulled out of housing.
Step 2:
Slide the electronics and lens assembly out of the housing.
Step 3:
While the electronic component body is separated from the housing, visually
inspect the interior of the body and ensure there is no dust build up on the
components. If there is, use canned compressed air or oil-free air from an air
compressor set at a low setting to remove dust or other debris from the interior
of the fixture.
Step 4:
To reassemble, align the mating groves in the shutter barrel with the clips on the
electronics assembly and join the two.
Step 5:
Install and tighten the hex head screws.
N o t e :
Do not remove the field lens from the electronics or attempt to disassemble the field
lens. The lens contains no serviceable parts.