Det-Tronics EagleVision - PC User Manual
Page 28
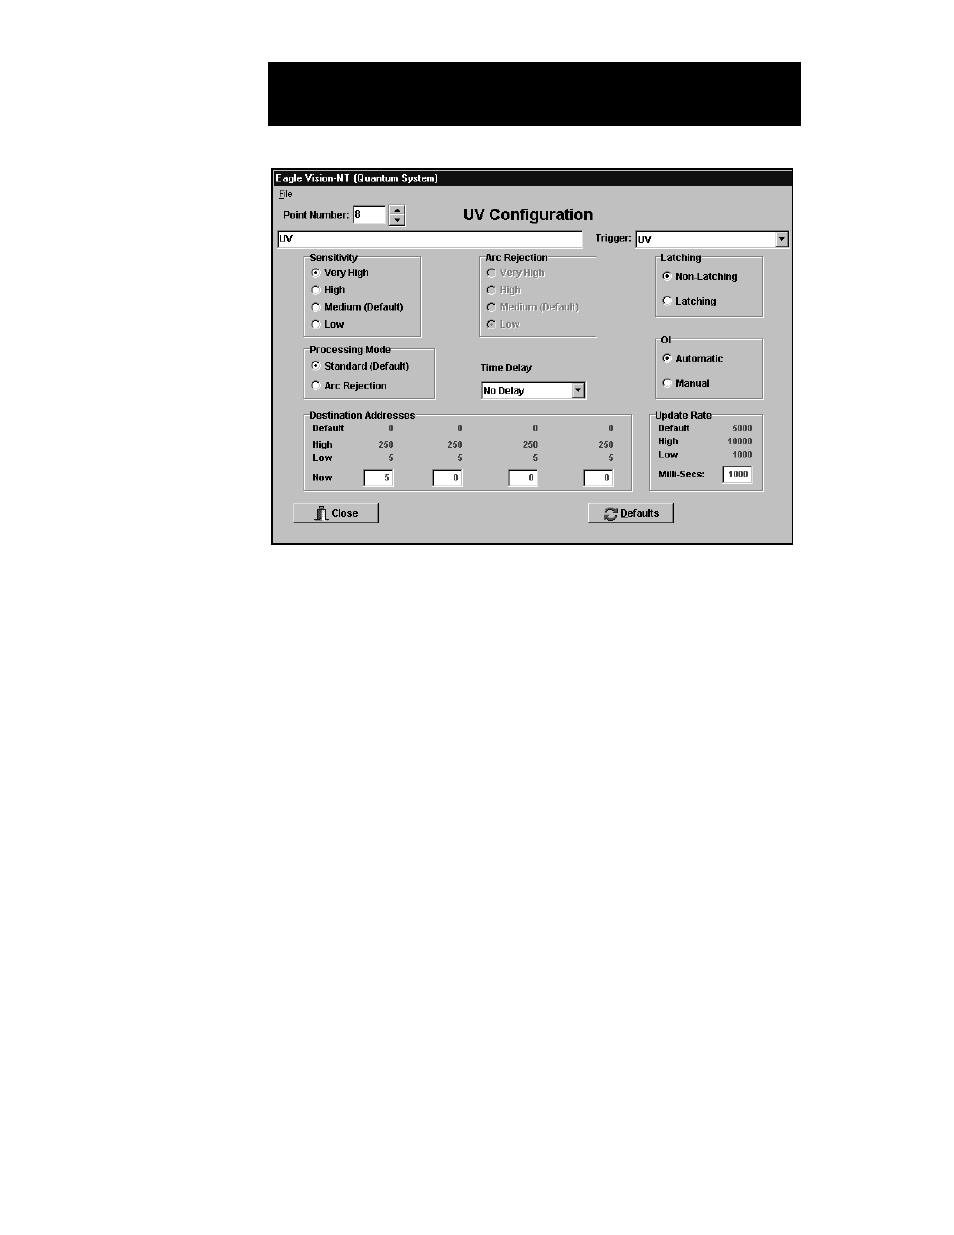
4. Type a tag name for the point in the space provided.
5. Assign a trigger for the point.
6. Select sensitivity level, signal processing mode, latching/non-latch-
ing, time delay, automatic oi, and arc rejection level (if arc rejection
is selected). (Refer to the hardware instruction manual for a com-
plete description of the detector’s features and options.)
7. Click on the Defaults button to set the update rate default value. If a
different update rate value is desired, enter the value in the box
labeled “Milli-Secs” under Update Rate.
8. Enter the Destination Address(s). (Refer to step 7 under “DCU
Configuration” for instructions regarding selection of destination
addresses.)
9. Click on Accept. Click on Close to exit and return to the Point
Configuration screen, or use the scroll arrows to select the next point
for configuration.
UV/IR D
ETECTOR
C
ONFIGURATION
Refer to the “Specifications” section of the Eagle Quantum hardware
instruction manual (form number 95-8470) for suggested settings for
detecting various fires at specified distances using the Eagle Quantum
UV/IR detector. These settings are recommended as a “starting point,”
with the final settings determined and verified through field tests.
5.12
E
AGLE
Q
UANTUM
S
YSTEM
C
ONFIGURATION
FIGURE V-8
UV Configuration Screen